


So, imagine you’re a company with a hard-earned reputation for being super responsive, looking out for your riders’ best interests, and being open and honest with your customers. Next, imagine one of your customers with roughly 15,000 miles on his motorcycle calls up and tells you that his right engine cover literally cracked open and is spewing oil. What do you do? Do you sit tight, cross your fingers, keep your mouth shut, and hope it never happens to anyone else? Or, do you rapidly determine what happened, let your riders know about it, and tell them how to check their bikes so they won’t have the same problem?
You can guess where this story is going. This actually happened. The first thing we did when we got that phone call was to look at an engine drawing. Based on what the customer told us and our drawing review, it looked like the crankshaft nut loosened, ultimately came off the crankshaft, and then it (and possibly the drive gear) jammed into the right engine cover. The next day, our customer disassembled his bike and found that was precisely what had occurred.
We quickly contacted Zongshen, as this was the first time this had occurred in North America. Worldwide, Zongshen told us they had seen one other instance. That sounds like this failure might be an unusual occurrence, but you know and we know that here in the US, we are racking up more miles on our bikes than anyone else.
Steve, Gerry, and I talked about this. My RX3 (with about 12,000 miles) may be the second highest mileage RX3 in the US. Gerry said he wanted to pull the right engine cover on my bike and check the crankshaft nut. I rode my RX3 in this morning and we did exactly that.
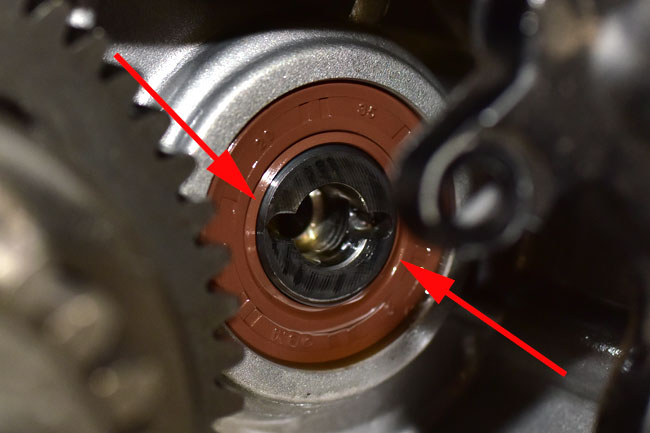
Here’s what it looks like inside the RX3 engine when the right engine cover is removed…the red arrow is pointing to the crankshaft nut (Gerry had already bent the nut’s locking tab back when I shot this photo).
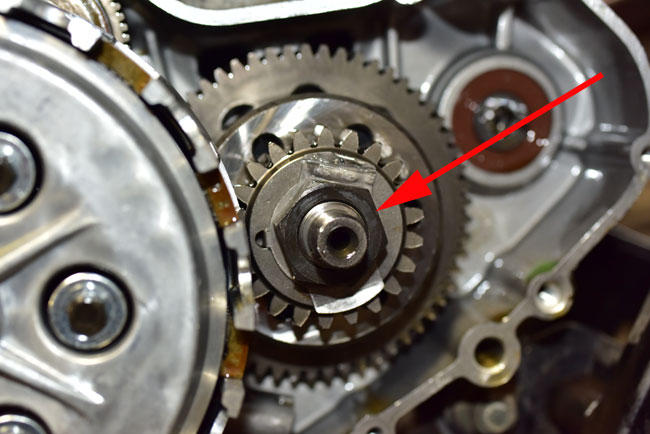
The good news is that the nut was in place. The bad news is that while it was more than finger tight, it came off fairly easily and it had not been Loctited in place from the Zongshen factory. Chances are if I continued to rack up the miles, it would ultimately loosen and suffer the same kind of failure as described above.
Here’s the bottom line: We recommend that you pull the right side engine cover as part of your 10,000-mile service, remove the crankshaft nut, replace the locking tab, reinstall the nut with red Loctite, and torque it to 100 ft-lbs. The tutorial below shows how to do this.
The first thing you need to do is drain the oil and the coolant. You can see how to do this in our other maintenance tutorials.
Remove the brake lever. To do this, pull the cotter pin and the brake actuation pin, pop the cover off the swingarm, and remove the locknut on the end of the brake lever pivot bolt. Unscrew the brake lever pivot bolt and remove the brake pedal.

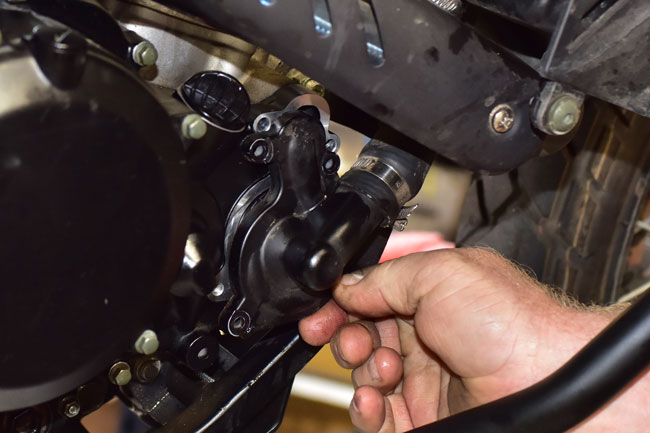
Remove the water pump.
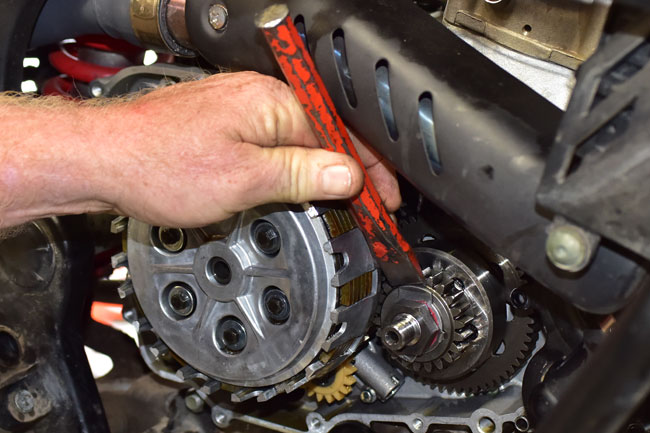
Remove all of the bolts securing the right engine cover. The two shown below will make you invent new cuss words when you are trying to remove them. They are the only two Allen bolts on the right engine cover (Zongshen probably did this because they are difficult to get to), but it doesn’t really help. They are way overtorqued from the factory, and we end up whacking on these two with a chisel to get them started. When we replace them, we use shorter hex head bolts, which are a lot easier to get on and off.

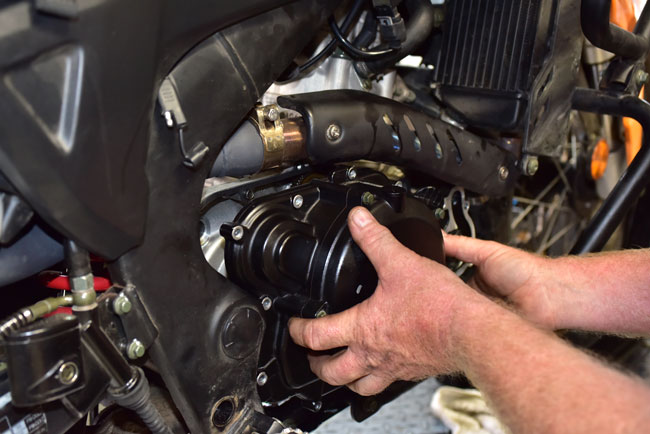
Remove the right engine cover.
With a screwdriver, bend the crankshaft locking tab back, and then remove the crankshaft nut.
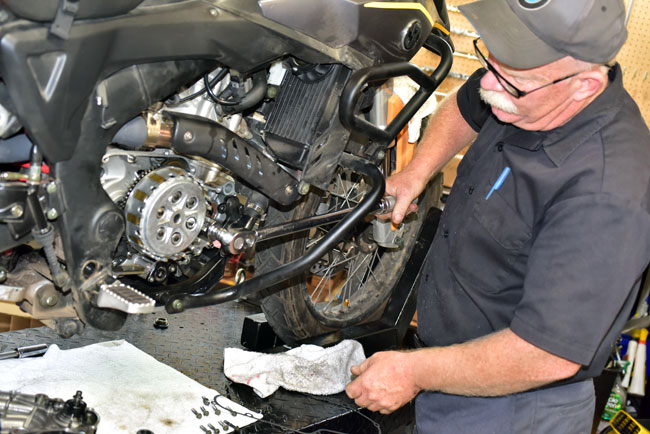
Install a new locking tab, apply red Loctite to the crankshaft nut, and torque it to 100 ft-lbs. You’ll need to keep the crankshaft from turning when you do this. The easiest way to do that is to use a drive on the crankshaft’s Allen socket on the left side of the engine.

After torqueing the crankshaft nut to 100 ft-lbs, bend the locking tab over one of the flats to lock the nut in place. We start it with a chisel, and then use a channel lock pliers to bend it the rest of the way. We then gently tap it with the chisel to snug it up against the nut.
When you do this, take care not to let the channel lock pliers touch the end of the crankshaft. That’s a bearing surface that seals against a seal in the engine cover. If you scratch or gouge the crankshaft end, it will create an internal oil leak.
Assembly is the reverse of disassembly, with a few things we’d like to point out.
Use a new gasket.
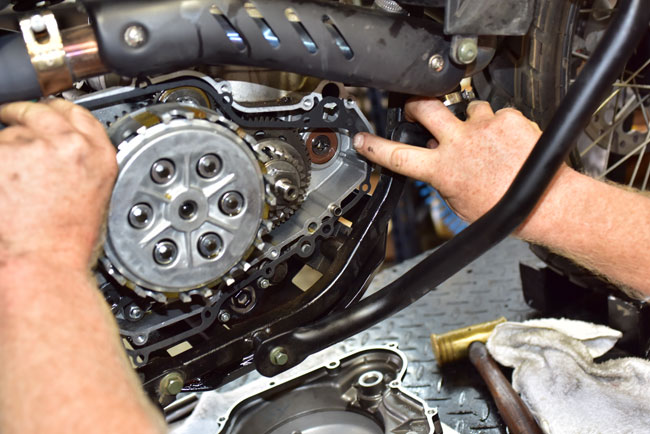
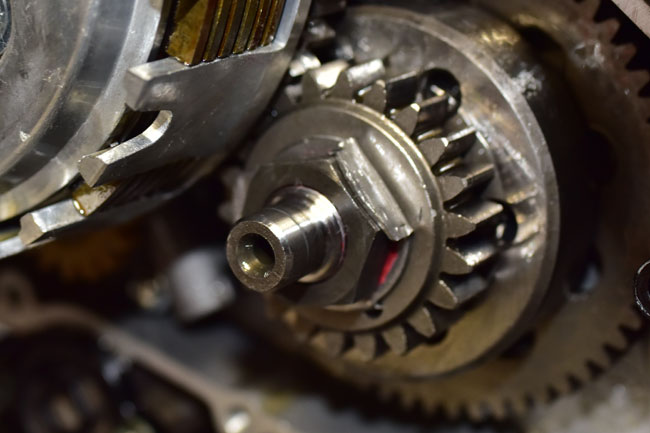
When you are installing the right engine over, the water pump drive has a pin that fits into its driver, as shown in the next two photos. Take care to align the pin with the grooves in the driver. You can turn the pump’s impeller to allow the pin to find its way into the drive.

As I said above, assembly is the reverse of disassembly. Tighten the cover bolts to 5 ft-lbs, reinstall the brake lever assembly, reinstall the water pump cover, replace the coolant, replace the oil, and you’re good to go.
Oh, back to that first question: What do you do…hope it never happens again or let the people who trust you (our riders) immediately know about it so they know what to check? Hey, I work for Steve Seidner at CSC. There was never any doubt about the answer in my mind.
 SG250 San Gabriel Cafe Racer
 TT250 Enduro