


This maintenance tutorial addresses clutch cable installation and adjustment.
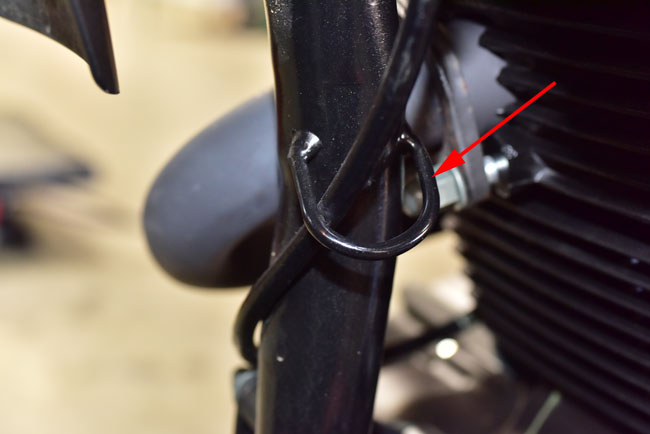
First, route the cable from the handlebar (without attaching it yet) to the engine. Note that there is a loop welded on the left front frame downtube through which you should route the clutch cable.
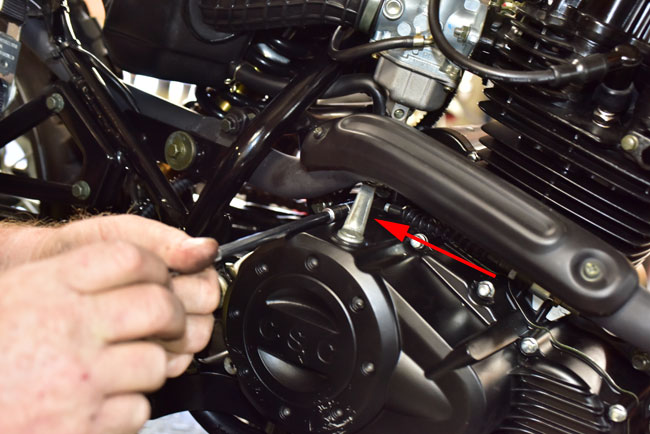
Apply a small amount of grease to the lower clutch cable attachment point and attach the lower end of the clutch cable to the engine clutch arm. This is what it will look like looking down at the attach point between the engine and the exhaust pipe.

Route the clutch cable through the adjustment mount on the engine, and adjust the adjustor nuts to give the cable as much slack as possible. The barrel should reach as far back to the rear of the motorcycle as it can.
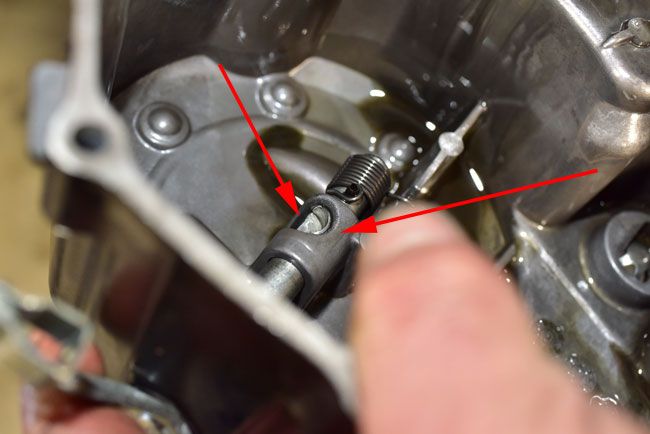
I had Gerry take the right engine case off of the engine so you could what’s going on inside the engine when we do this. These photos are for illustrative purposes only. You do not need to open up the engine to make this adjustment.
When the engine clutch arm is actuated by pulling in the handlebar clutch lever, it rotates the shaft to which the engine clutch arm is attached. That shaft has a flat spot on it inside the engine case (you can see this in the photo below; the red arrow on the left points to it). When the shaft rotates, that flat spot acts to move a rod that disengages the clutch. Again, you do not need to open up the engine; this is just to explain to you how the clutch is actuated internally and to give me a chance to show off my photography skills.
Okay, back to the main attraction. Pull back the handlebar clutch lever hood.
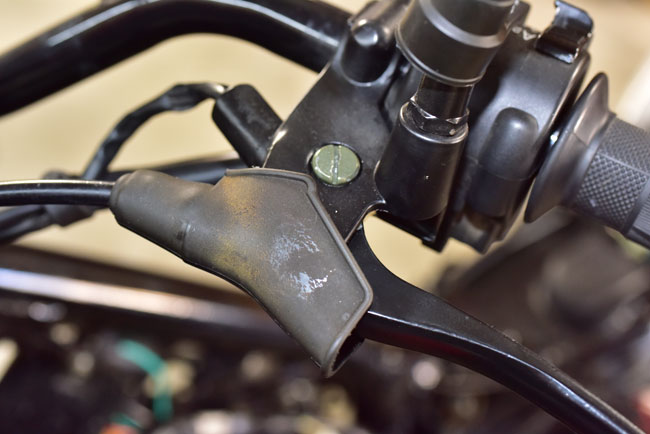
Screw the clutch lever adjustors into the clutch lever as far as possible. After applying a small amount of grease to the clutch cable barrel, route the clutch cable through the adjustors and connect the clutch cable barrel.
After doing the above, position the handlebar clutch lever adjustor so that the adjustor is in the middle of the adjustment range. Note that there were still be considerable slack in the clutch cable at this point.
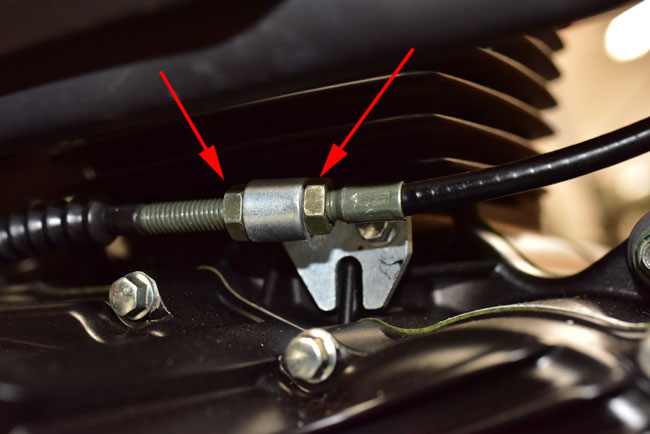
Next, adjust the cable slack with the engine-mounted adjustors. Use the adjustors shown below.
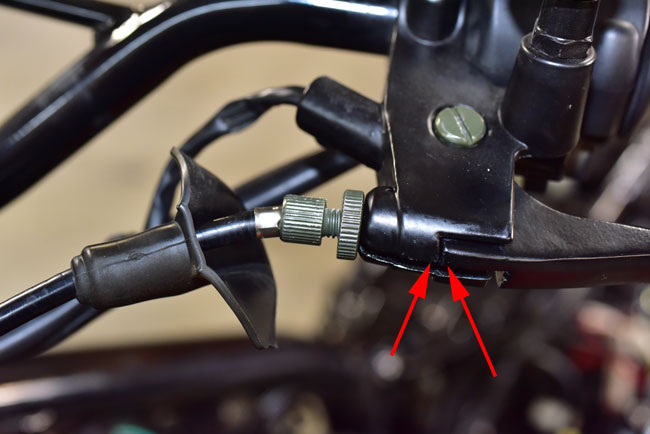
Adjust these so that there is approximately 3mm of slack on the handlebar clutch lever at the point shown below.
Lock down all of the adjustor nuts (on the engine and on the handlebar clutch lever adjustor). Pull the rubber adjustor hood over the adjustors at the handlebar clutch lever.
All future clutch adjustments should be made with the handlebar clutch lever adjustors.
You should not lubricate the clutch cable; it has a Teflon sheath and is self-lubricating.
 TT250 Enduro
 SG250 San Gabriel Cafe Racer