


Our brake maintenance tutorial covers the following topics:
- Adjusting the brake pedal free play.
- Inspecting and replacing the brake pads.
- Replacing the brake fluid.
- Bleeding the brakes.
- Inspecting and replacing the brake disks.
The RX3 has hydraulic disk brakes on both the front and the rear wheel.
Adjusting the Rear Brake Pedal
You should adjust the rear brake pedal to have 10 to 20 mm of free play. The adjustment is made with a threaded adjustment shaft and locknut just below the rear brake master cylinder. First, pull back the rubber grommet over the adjustment shaft.
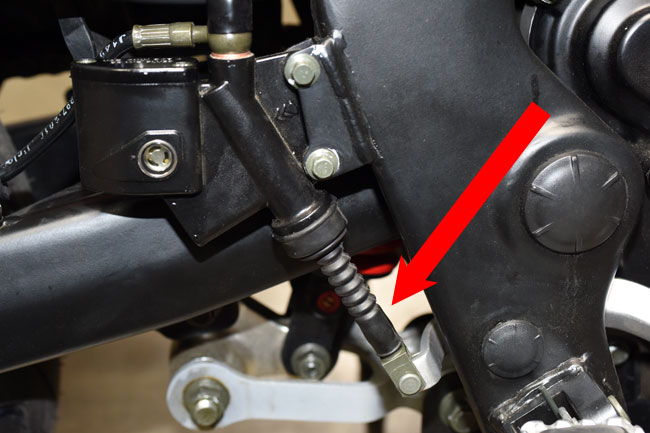

Loosen the locknut, adjust the free play with the threaded adjustment shaft, and then tighten the locknut.
Inspecting and Replacing the Brake Pads
The front and rear disk brake utilize dual piston calipers. You should replace the brake pads when either one has less than 1.5mm of pad thickness left, or if you the brake pads are worn such that the groove in the pad is no longer visible. We stock the brake pads, so when you need a set, give us a call at 909 445 0900.
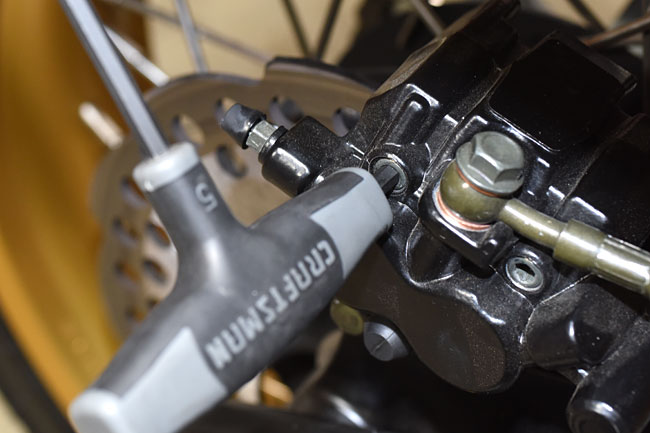
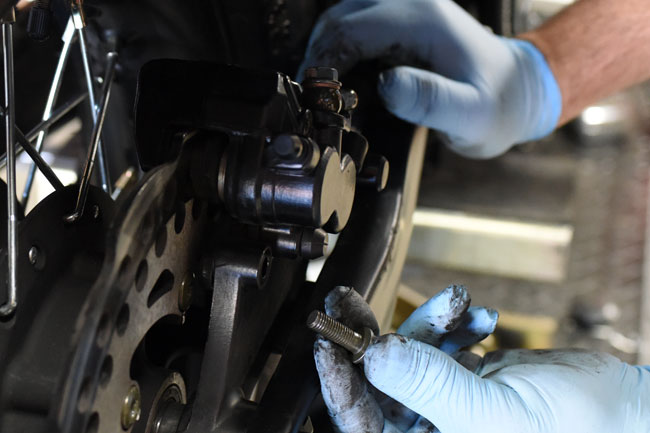
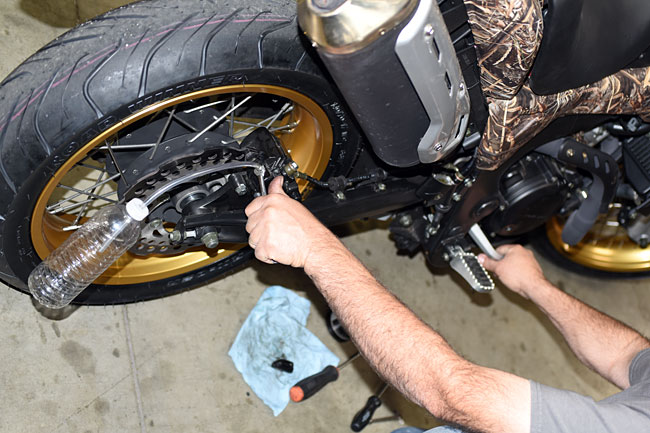
To remove the rear brake pads, loosen the rear brake caliper Allen bolts as shown in the photo below.
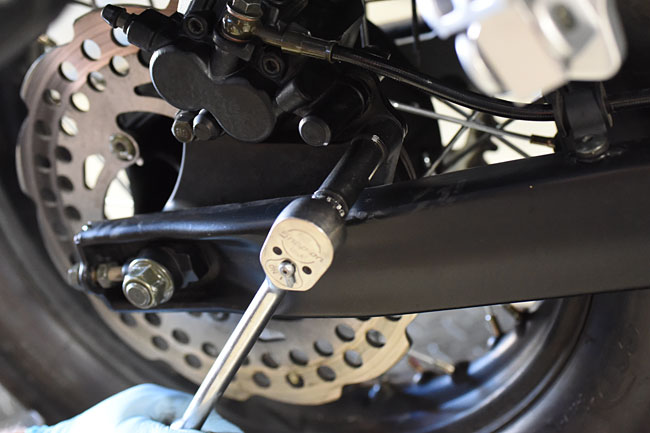
Remove the bolts securing the caliper to the swingarm.
One the rear caliper bolts are removed, slide the caliper rearward, lift if off of the disk rotor, and then remove the Allen bolts holding the brake pads in place.

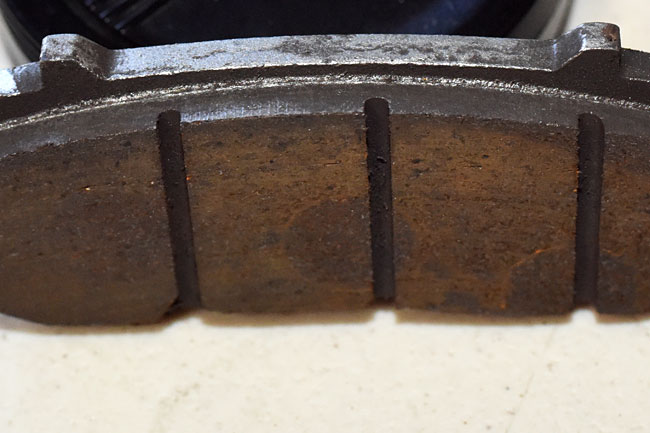
Once the caliper Allen bolts are removed, the pads will slide out. Note that the pads are not identical; they must be installed in the correct orientation. The pad with the large arm (shown at the top of the photo below) is opposite the pistons; the pad without the large arm is situated against the pistons.
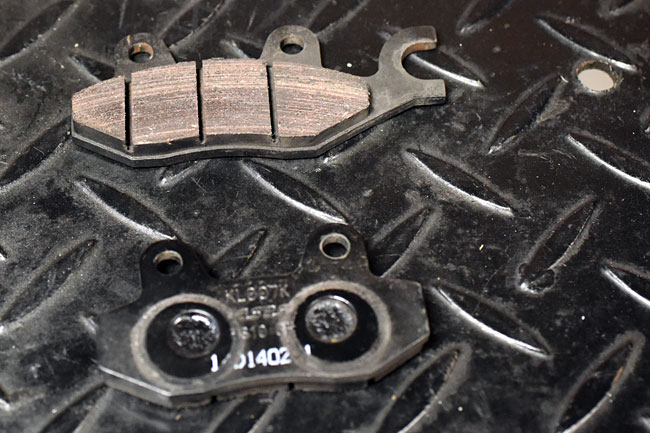
Inspect the brake pads to determine if they are worn beyond their service limit (less than 1.5mm thick). If the pads are worn such that the grooves are gone (visible as vertical slots in the photo above), the pads should be replaced.
Reinstall the Allen bolts in the caliper, position the caliper in its appropriate location, and install the caliper bolts to mount the caliper to the swingarm. Tighten all fasteners.
Pump the rear brake pedal several times. Operate the motorcycle to assure satisfactory rear brake performance.
The process for replacing the front brake pads is similar to that described above for the rear brake pads. Loosen the front brake caliper Allen bolts, and then remove the front brake caliper mounting bolts. Remove the caliper and then remove the Allen bolts from the caliper. Inspect the front brake pads and replace if necessary. Reinstall the Allen bolts, the front caliper, and the caliper bolts. Tighten all fasteners. Pump the front brake lever several times. Operate the motorcycle to assure satisfactory front brake performance.
Replacing the Brake Fluid
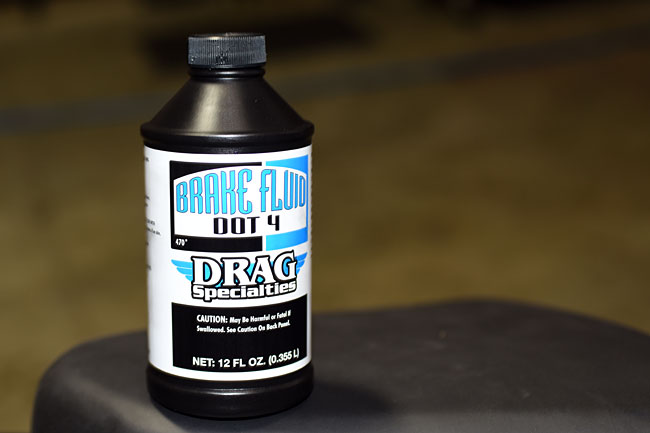
You should replace the brake fluid in the front and rear master cylinders every 2 years. Use only DOT 4 brake fluid. We recommend Drag Specialties brake fluid, and if you call us at 909 445 0900, we will ship a container to you.
The procedure shown here is for the rear master cylinder; the front master cylinder is performed in a similar manner.
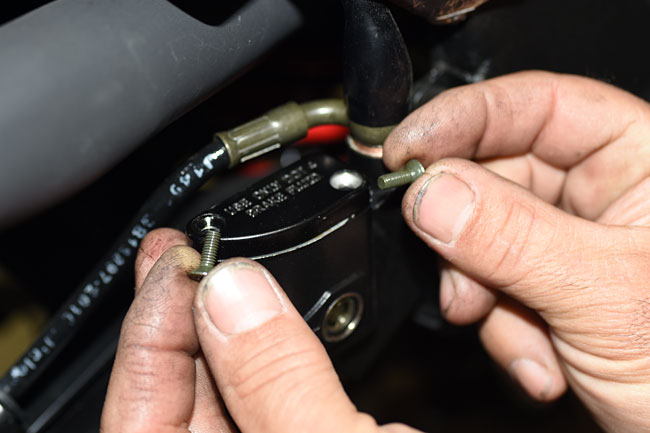
Open the master cylinder by unscrewing the two screws securing the master cylinder cover. Remove the master cylinder cover and place it in an area where it will not become contaminated.
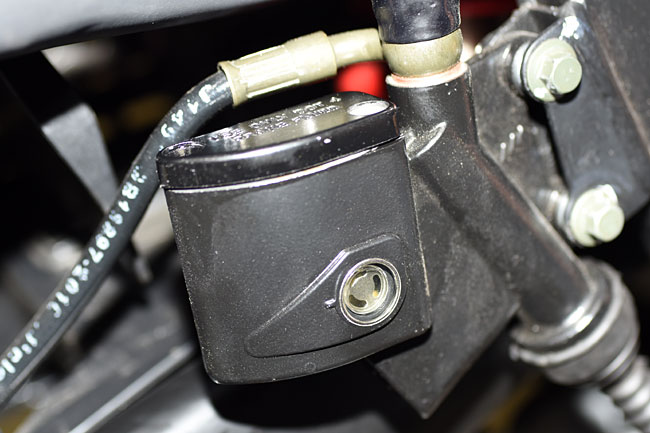
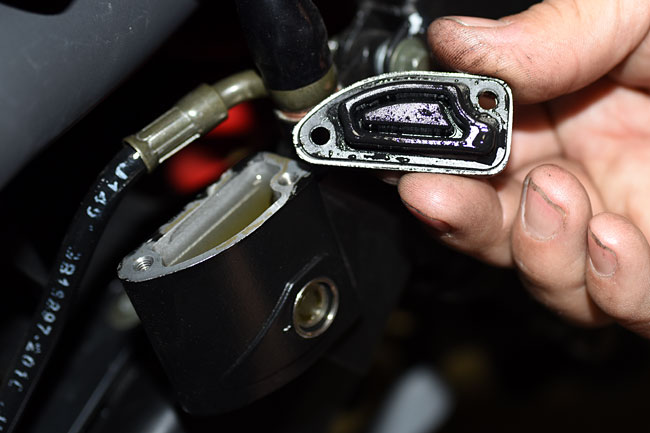
Using a turkey baster or other suction device, remove as much of the brake fluid in the master cylinder as possible. Exercise caution to prevent any brake fluid spillage. If any spillage occurs, wipe up the spilled brake fluid immediately (it will damage painted or plastic surfaces).
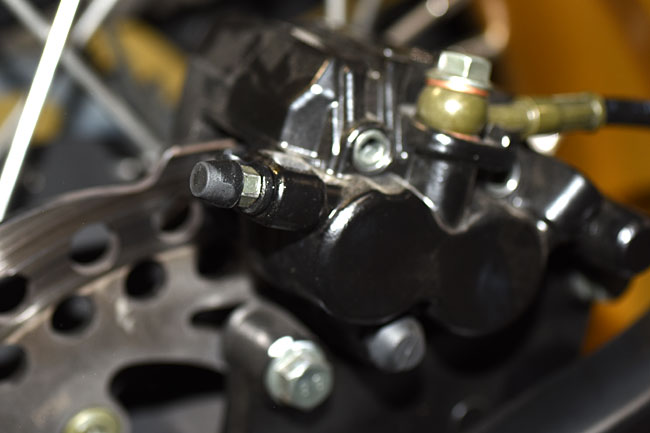
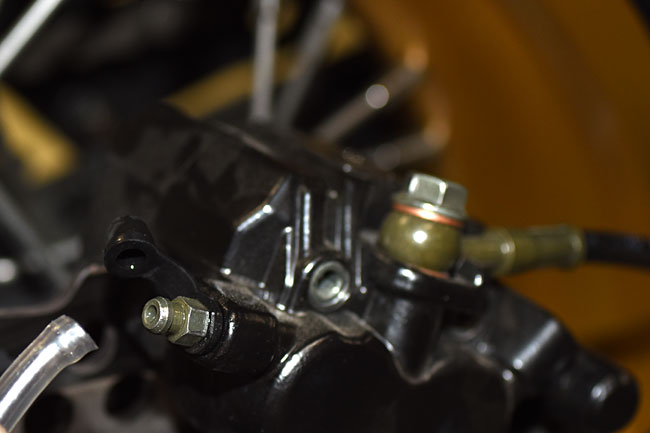
Remove the caliper bleed cap and attach a small diameter tube to the caliper bleed fitting. Route the tube to a receptacle.
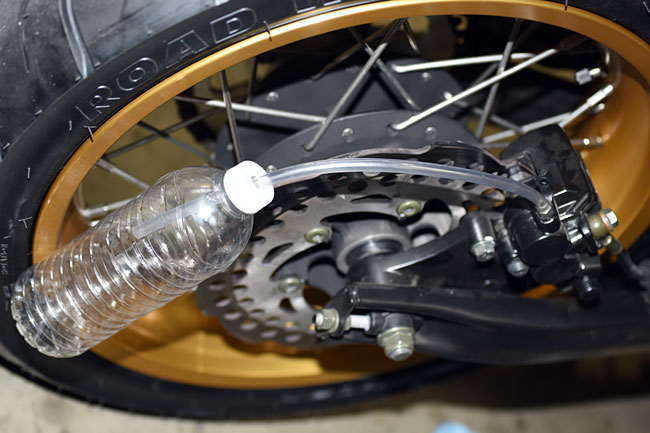
Add fresh brake fluid to the master cylinder.
Open the caliper bleed fitting by unscrewing it slightly (turn it counterclockwise to do so) and depress the brake lever to pump brake fluid out through the caliper bleed fitting. Prior to allowing the brake lever to return, close the caliper bleed fitting by turning it clockwise.
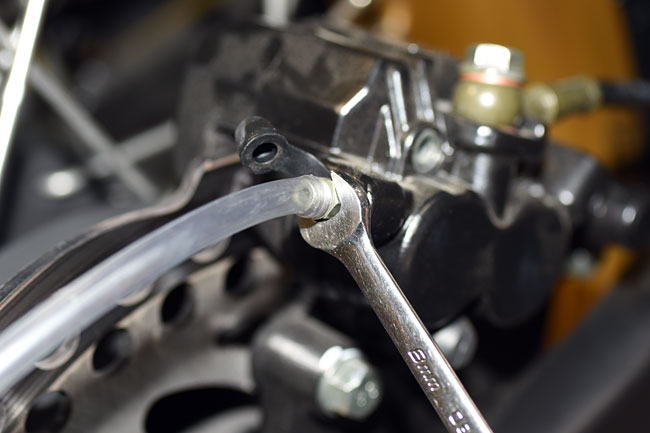
Repeat the process until fresh brake fluid exits the caliper.
Close the caliper bleed fitting and replace the caliper bleed fitting cap.
Add brake fluid to the master cylinder such that the upper level is within 1/8-inch of the top (do not overfill the master cylinder).
Replace the master cylinder cover and the screws securing it to the master cylinder. Tighten the screws.
Pump the rear brake pedal several times. Operate the motorcycle to assure satisfactory rear brake performance.
Bleeding the Brakes
If air gets into the brake lines, braking performance will be diminished. You should bleed the brakes any time the brakes feel spongy or soft, or if the brake fluid drops below the level of the master cylinder view port. Before you bleed the brakes, you should isolate and correct any leaks. Again, use only DOT 4 brake fluid.
The procedure is similar to the procedure for replacing the brake fluid. Open the master cylinder by unscrewing the two screws securing the master cylinder cover. Remove the master cylinder cover and place it in an area where it will not become contaminated. Remove the caliper bleed cap and attach a small diameter tube to the caliper bleed fitting. Route the tube to a receptacle. Open the caliper bleed fitting by unscrewing it slightly (turn it counterclockwise to do so) and depress the brake lever to pump brake fluid out through the caliper bleed fitting. Prior to allowing the brake lever to return, close the caliper bleed fitting by turning it clockwise. Add brake fluid to the master cylinder as necessary. Repeat the process until the brake fluid exiting the caliper is free of air bubbles. Close the caliper bleed fitting and replace the fitting cap. Add brake fluid to the master cylinder such that the upper level is within 1/8-inch of the top (do not overfill the master cylinder). Replace the master cylinder cover and the screws securing it to the master cylinder.
After completing the above, pump the rear brake pedal (if you are bleeding the rear brake) or operate the front brake lever (if you are bleeding the front brake) several times. Operate the motorcycle to assure satisfactory brake performance.
Inspecting and Replacing the Brake Disks
You should replace any brake disk that is worn below service wear limits or if the disk is warped. You can measure disk thickness and straightness without removing the wheel from the motorcycle. You will, of course, need to remove the wheel if you replace the brake disk.
Use a caliper (i.e., a measuring device; not the brake caliper) to measure disk thickness. If the disk is less than 2mm thick, replace the disk.
Use a dial indicator with the wheel off the ground to measure disk runout. Spin the wheel and measure runout. If the runout exceeds 0.3mm, replace the disk. You only need to do this if the disk appears to be visibly warped (which is not likely) or if the brakes pulsate when applied. It’s not likely you’ll ever experience this; in 50 years of riding motorcycles, I never have.
You will have to remove the wheel in order to replace the disk. Refer to our maintenance tutorial on fixing a flat tire for instructions on how to remove the wheels.
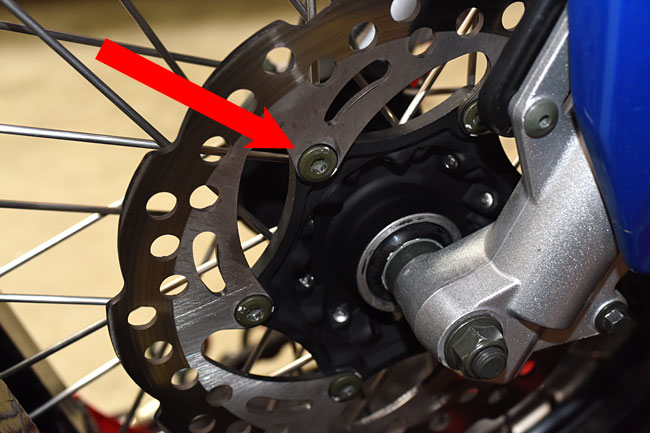
Each disk is secured with 6 Allen bolts. Use blue Loctite when reinstalling the bolts that secure the brake disk.
And that’s about it, folks. Time to get out and go for a ride!
See you on the road!
 RX1E Electric Motorcycle
 TT250 Enduro
 SG250 San Gabriel Cafe Racer