


This maintenance tutorial addresses four areas:
- Clutch cable lubrication.
- Clutch cable replacement.
- Clutch adjustment.
- Clutch replacement.
I’ve been riding for more than 50 years. I’ve only ever needed to replace a motorcycle clutch once, and I’ve never needed to replace a clutch cable. Having said that, I always carry a spare clutch cable on my forays into the boonies (it’s just cheap insurance). I’ve lubed plenty of clutch cables, and I’ve adjusted the clutch on virtually every motorcycle I’ve ever owned. All of this is good stuff to know.
Clutch Cable Lubrication
Clutch cables are easy to lube. All you need to do is to disconnect the cable at both ends (the clutch lever on the left handlebar, and the clutch input lever on the left side of the engine), and then get lubricant into the clutch cable sheath so that it lubricates the wire portion of the cable.
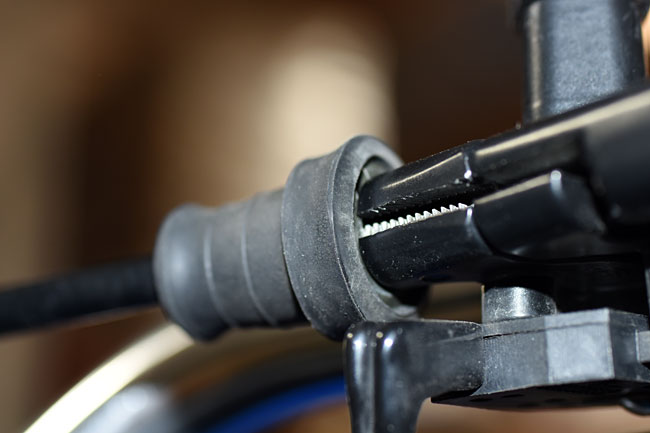
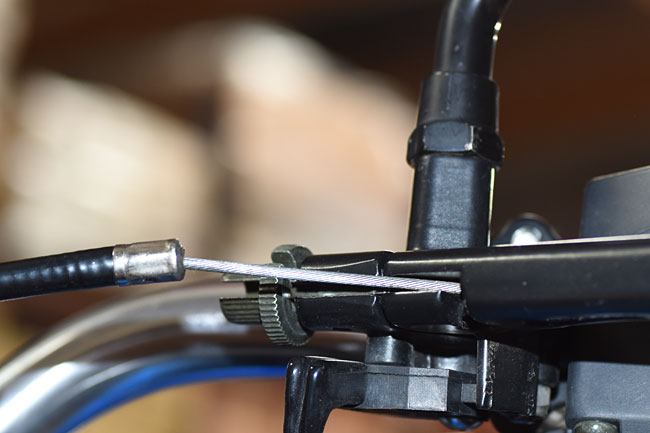
To disconnect the cable at the handlebar clutch lever, pull back the rubber grommet to expose the clutch lever knurled adjustment knob and knurled lock nut.
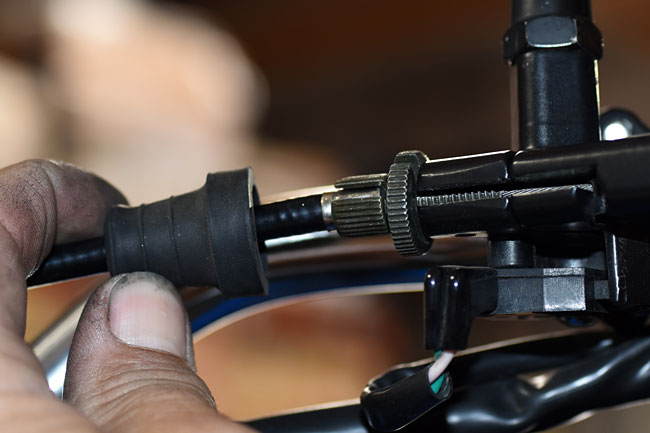
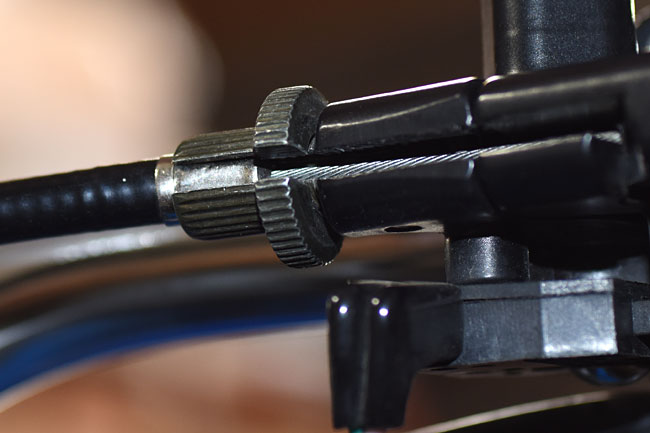
Loosen the knurled lock nut, and then fully screw in the knurled adjustment knob. Align the slots in the knurled adjustment knob and the knurled lock nut, as you see in the photo below.
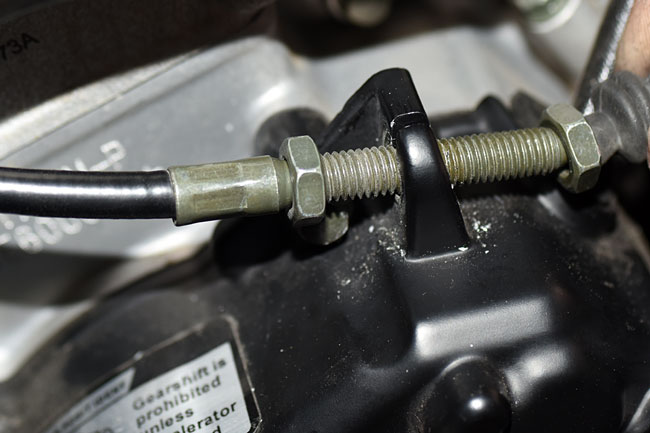
Find the other end of the clutch cable where it attaches to the clutch lever on the engine case. It’s on the left side of the engine behind the cylinder and above the shift lever.

Loosen the lock nuts on the threaded adjustment mechanism and move it forward to gain more slack in the cable.
Once you have enough slack in the clutch cable, you can remove the cable sheath from the knurled adjustment knob at the handlebar end of the cable, and slide the clutch cable out. This will allow pulling the cable forward and sliding the cable head out of the clutch lever.

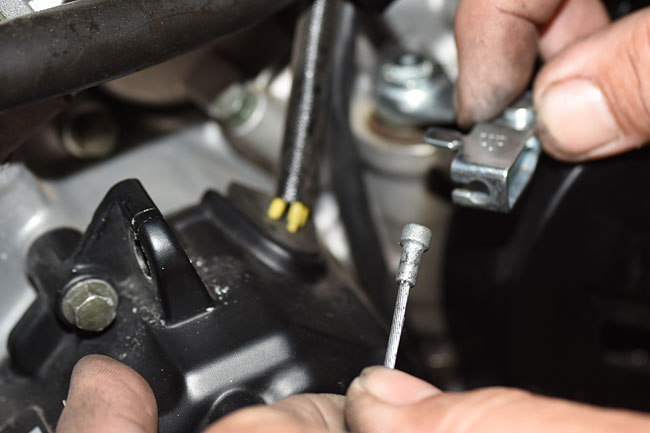
Similarly disconnect the clutch cable at the engine end, as shown in the photos below.


At this point, you have the cable disconnected at both ends, and you can manually slide the wire cable up and down in the cable sheath. Inspect the wire cable at both ends. If any of the cable’s wire strands are frayed or broken, it’s time for a new cable (we’ll cover that in the next section).
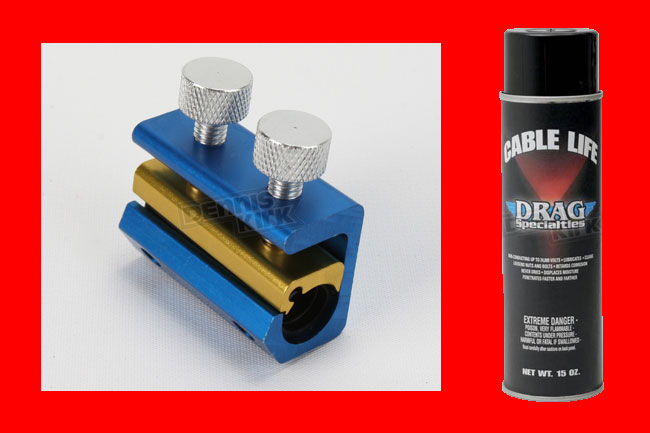
Assuming the cable is good and does not need to be replaced, point the clutch cable up at the handlebar end, and work the cable up and down in its sheath as you lubricate it. We recommend Drag Specialties clutch cable lube. You need a can of this (give us a call at 909 445 0900, and we’ll shoot a one out to you). Getting the lube down into the cable sheath can take a little while doing it the way described above. If you want to be a bit more efficient (and a lot less messy), use a mechanical attachment that directs the spray lube into the cable sheath. The idea behind this tool is that it forms a seal around the end of the sheath and forces the lube into it. We like the Dennis Kirk cable lubricator, and we also stock those. Give us a call and we’ll send that to you, too.
You’ll know you’ve lubed the cable adequately when you see the lubricant emerge from the cable sheath at the other end of the cable. When you’re finished lubricating the clutch cable, reattach it at both ends and adjust the clutch so that you have 10mm to 20mm of free play at the clutch lever tip. We’ll cover the clutch adjustment process in more detail a little further down in this tutorial.
Clutch Cable Replacement
This is a fairly straightforward operation. If the clutch cable is frayed, if it feels snatchy or grabby even after you’ve lubricated it, or if it snaps, you need a new clutch cable. As I mentioned above, I always carry a spare cable. We stock the clutch cables, and my advice to everyone is buy a spare, tuck it away in your motorcycle’s luggage, and hope you’ll never need it. It’s cheap insurance.
If you need to replace the clutch cable, disconnect it at both ends as described above. Take a good look at how the cable is routed through the motorcycle before you remove it. A trick I’ve seen other folks use is to tape the upper end of the new cable to the lower end of the old cable, and use the old cable to pull the new one into place when you remove the old cable. Before doing that, though, I recommend that you lube the new cable first. If it’s been in your saddlebag for a couple of years or more, it’s probably picked up some dust.
After you have the new cable in place, connect both ends and adjust the clutch. We’ll explain how to do that in the next section.
Clutch Adjustment
There are two areas in which adjustments can be made to the clutch. These are the lower end of the clutch cable (where it attaches to the lever on the engine case), and the upper end of the clutch cable (where it attaches to the lever).
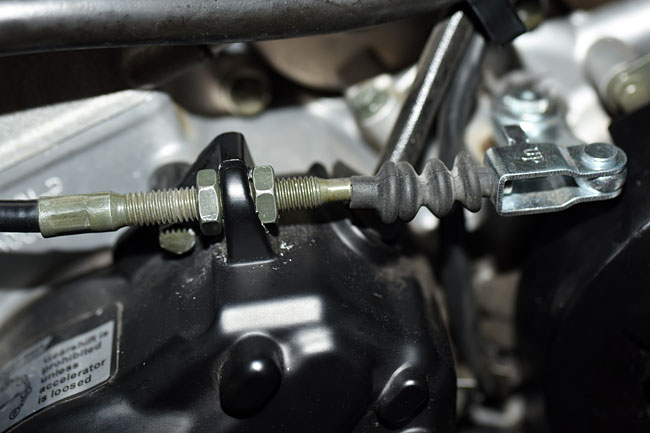
We recommend setting up the lower end of the clutch cable adjusting mechanism so that it is about in the middle of its adjustment range, as shown in the photo below, such that all of the slack is removed from the clutch cable sheath. That’s the primary function of the lower end of the clutch cable adjusting mechanism.
Once you’ve done that, adjust the knurled adjustment know at the handlebar clutch lever such that there is about 10mm to 20mm of free play at the end of the clutch lever. When you’ve done that, lock the knurled adjustment knob in place with the knurled lock nut. Pull the rubber grommet back over the adjustment mechanism, and you’re done.
Clutch Replacement
If you change your oil regularly and you use the right kind of oil, and if you don’t abuse your bike, your clutch will last a long time. If you abuse your clutch by using it as a hill holder or by popping wheelies, it won’t last a long time. If the clutch is grabby or if it slips, and you can’t fix it by changing the oil or by adjusting the clutch, you need a new clutch.
Installing a new clutch sounds ominous, but it’s really not that big a deal. Let’s take a look.
The first step is to drain the engine oil. You can see how to do this in our oil change maintenance tutorial.
Remove the clutch cover by unbolting the five bolts securing it to the engine.
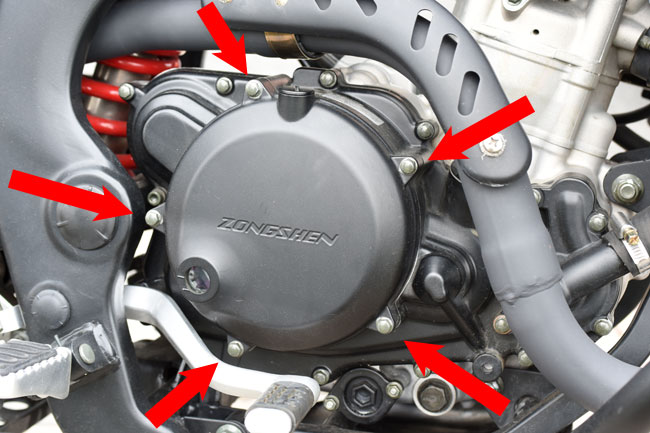
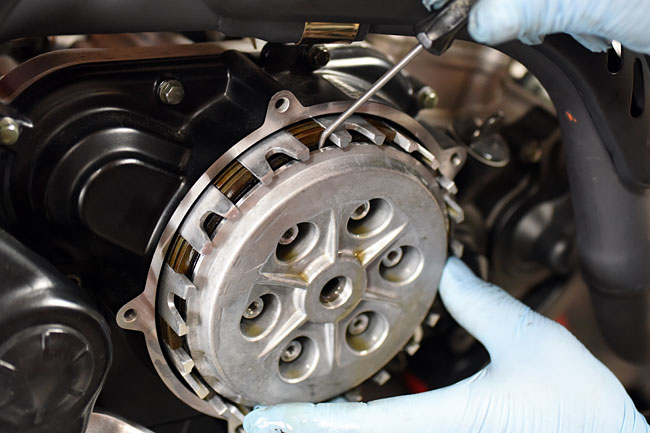
When you’ve removed the clutch cover, the clutch will look like this.
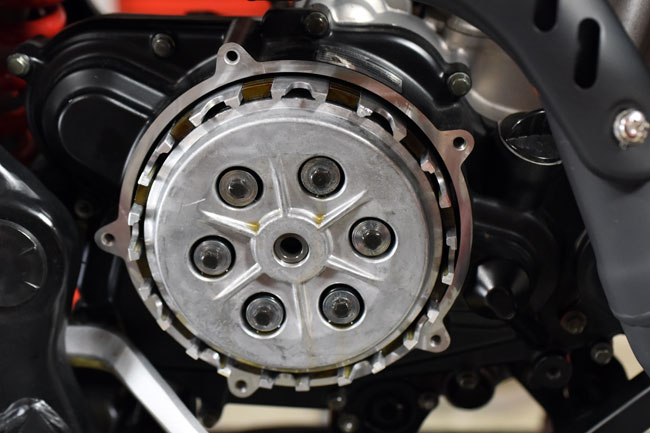
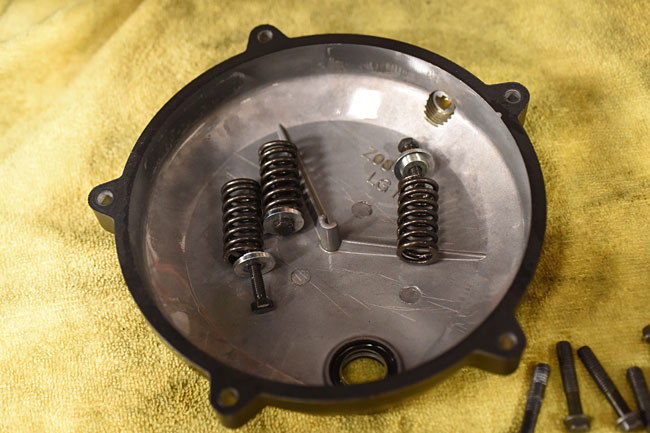
Set the clutch cover aside, inside face up. You can use it as container for the parts we are going to remove next.
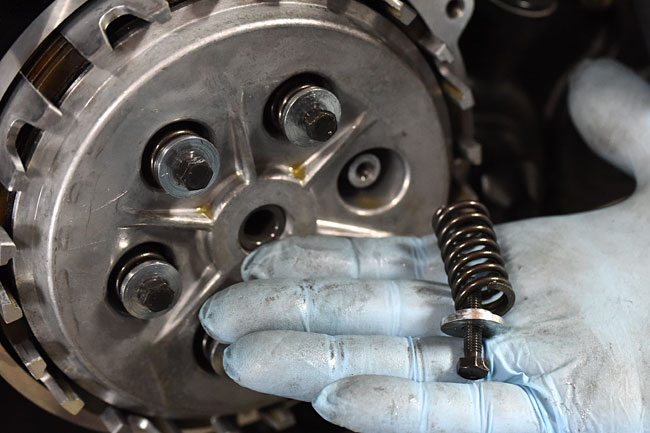
Remove the six clutch pressure plate bolts. Each bolt has a large machined keeper and a spring. Place these in the clutch cover.
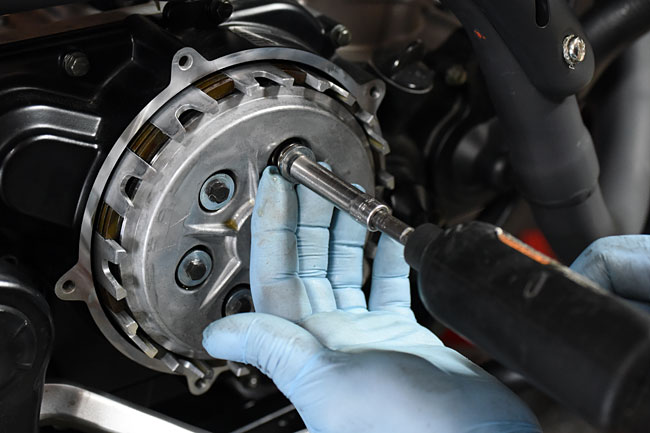
Remove the clutch pressure plate. You may need to use a small pick to get behind it to coax it out.
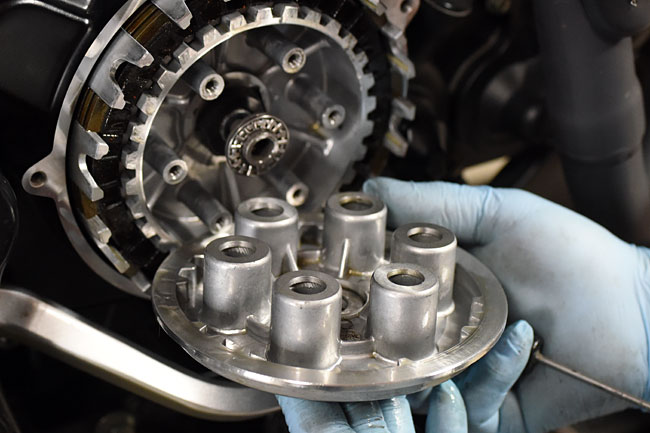
There’s a pusher behind the pressure plate that consists of a shaft, a roller bearing, and washer. You can see it in the photo above, and here are additional photos that show these components.
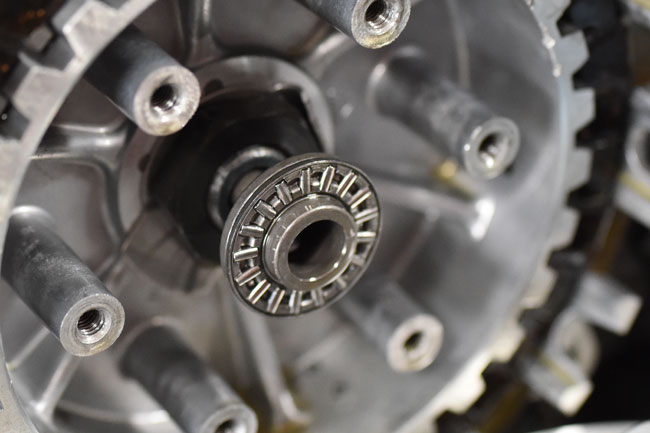
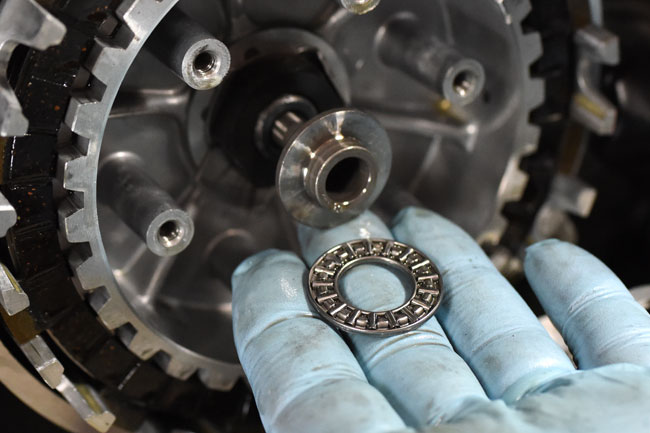

Inspect the roller bearing and washer. If either part is damaged, replace it.
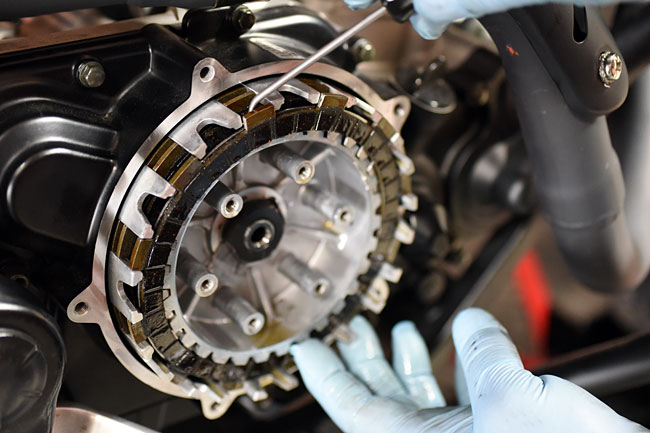
At this point, you can remove the clutch plates. There are six friction plates and five steel plates. It’s best to use a small pick (as shown below) to do this.
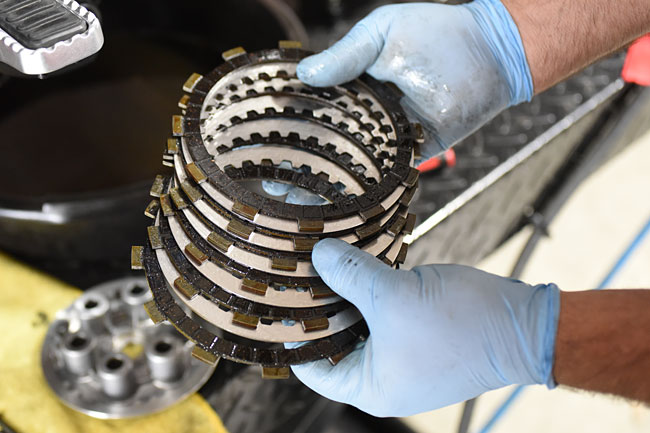
If the clutch was slipping due to the use of an unapproved oil (for example, an automotive oil with friction inhibitors), you may be able to wash the plates to remove any remnants of the unapproved oil that induced the slippage. If I was doing this, though, I’d just replace the clutch plates. The parts are not that expensive and I would not want to invest the labor only to find out that washing the plates didn’t work.
Replace the plates (we stock these parts), and then reinstall the pressure plate, the clutch springs, the keepers, the bolts, and the clutch cover. Fill the engine to the correct level with an approved motorcycle oil. Adjust the clutch as outlined above, and you are good to go.
 SG250 San Gabriel Cafe Racer
 TT250 Enduro
 RX1E Electric Motorcycle