Haha…hahahaha….this is a good one, folks! I watched Tony adjust the valves on my California Scooter today, and I gotta tell you, this is the easiest valve adjustment procedure I’ve ever seen.
I speak with some experience on this subject, having adjusted the valves on my Triumph Tiger and on my KLR-650 (adjusting the valves on those bikes was a nightmare). On the California Scooter…well, folks, adjusting your valves just doesn’t get any easier than this. Steve told me that he designed this bike so anyone could work on it, and his selection of the Scooter’s 150cc overhead valve engine sure makes that a reality. One of my good friends who recently purchased a California Scooter asked me about the valve adjustment process, so I thought I’d include a “how to” right here.
So, with no further ado, here we go.
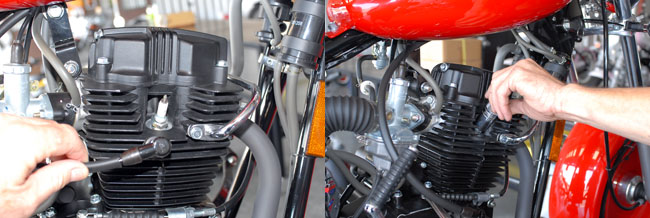
The first thing you want to do is make sure your bike is cold. Not “cold” as in freezing, but “cold” as in not having run for a few hours. You don’t want the engine to be warm from a recent ride. Let it cool down completely. Once you’ve done that, take off the spark plug wire and remove the spark plug (see the first photos below). There’s only one sparkplug (hey, it’s a thumper!), so this will only take a few seconds. If your bike is real dirty, it’s a good idea to blow a little compressed air around the spark plug before you remove it so no dirt will fall down into the cylinder, but even if it does, don’t have a cow. It will just blow out when you start the engine.
The next steps involve bringing the engine to top dead center. This sounds a lot more complicated than it really is. Take a look at the two photos below. All you gotta do is remove the viewing port on top of the left crankcase cover with a screwdriver (look at the photo on the left and you’ll see the cover I’m talking about). Put the bike in gear and roll it forward or backward to line up the index mark on the flywheel with the mark on the engine case (look at the photo on the right).
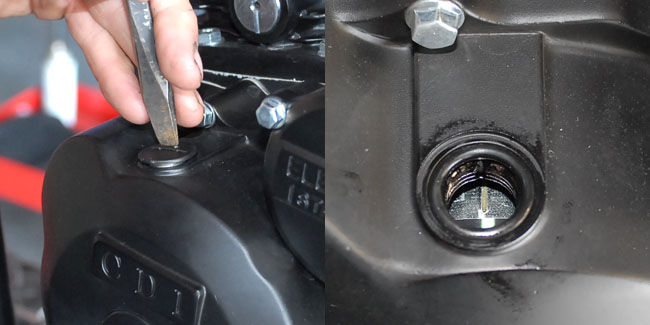
The above step is a tiny bit tricky because there are two index marks on the flywheel. The one we want has a T by it (you can sort of see the edge of it in the above photo), but it’s a little hard to pick up. The easy way to make sure the piston is at the top of its stroke is to lightly feel inside the cylinder with a probe (like a screwdriver or a pen). If the piston is at the top, you’ll know it.
The reason we want the piston at the top of its stroke with the index mark as indicated above is the valves will be fully closed. When they are fully closed, there will be a little gap between the rocker arm and the top of the valve stem. It’s that gap we’re adjusting. It all sounds a little complicated, but the photos coming up will make it easy to understand.
Before we can get to the stuff we’re going to adjust, though, we have to remove the valve cover. Wow, is this ever easy on the California Scooter. On my Triumph and my KLR, I had to remove the seats, remove the gas lines, and remove the gas tank before I could even see the valve cover. That’s a built-in annuity for the Triumph and Kawasaki dealers, but there’s none of that nonsense here. You don’t have to remove anything on a California Scooter to get to the valve cover. It’s right out there in the open!
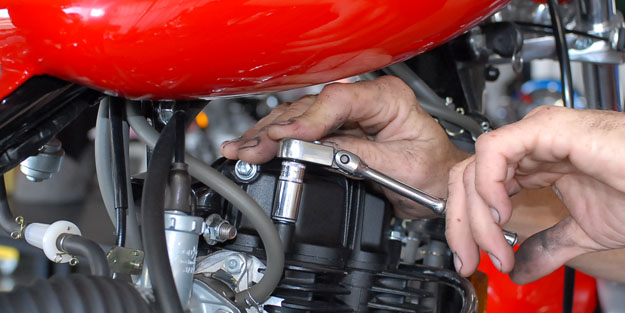
There are three bolts holding the valve cover on the cylinder head. You just take those off and the valve cover lifts off. The photo below shows Tony removing the first bolt; he has two more to go. There’s another bolt on the very top of the valve cover (it’s the horizontal one to the left of the ratchet in the photo below, just below Tony’s fingers). Don’t mess with that one; it stays with the valve cover and you don’t need to unscrew it.
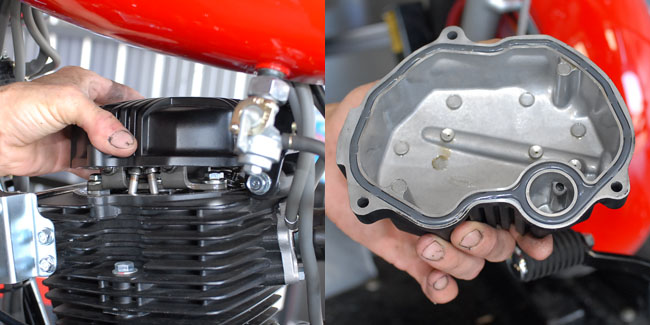
The photo on the left shows Tony removing the valve cover; the photo on the right shows what the valve cover looks like from the inside. Leave the gray rubber seal running around the inside edge of the valve cover in place. You can reuse it when you put everything back together.
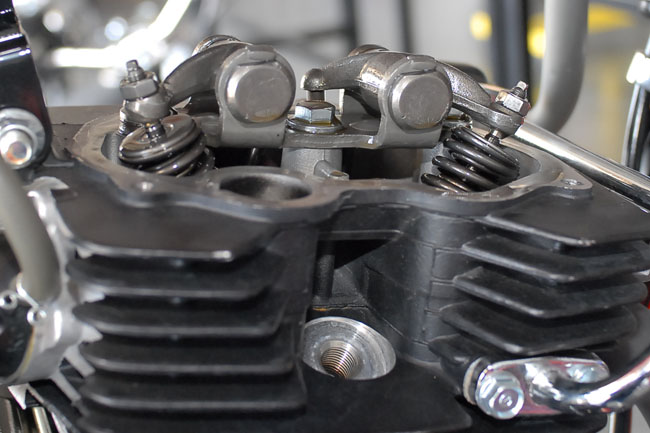
This is what it looks like underneath the valve cover from the right side of the bike. The coil springs you see are the valve springs. They’re what make the valves close. The little metal arches reaching over are what push the valves open (they’re called rocker arms). The one on the right side is the exhaust valve, and the one on the left side is the intake valve. And see those little nuts and threaded pieces on top of the rocker arms at both ends? Those are what we’re going to use to adjust our valves.
Here’s a closer shot of what I just described above. See that little gap in the photo below (the one labeled “gap’)? Well, that’s what this is all about. We are going to adjust that gap so that it is between 0.06mm and 0.08mm. Here’s what’s going on with that gap…when the valve is fully closed, there’s a gap between the rocker and the valve (that’s the gap you see in the photo below). As the engine warms up, that gap decreases, but we are adjusting it to a gap when the engine is cold so that when it warms up, there is still a little gap left.
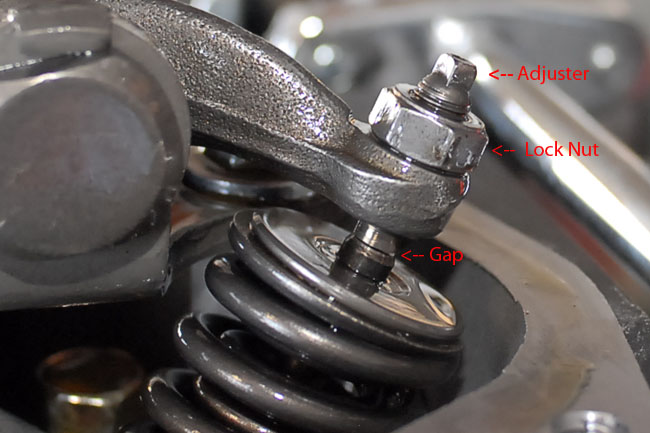
If we didn’t have that gap, the valve wouldn’t fully close, and that would be bad. If that occurs, hot gases go around the valve each time the cylinder fires, and that can result in lost power, poor fuel economy, and a burnt valve. That’s bad stuff.
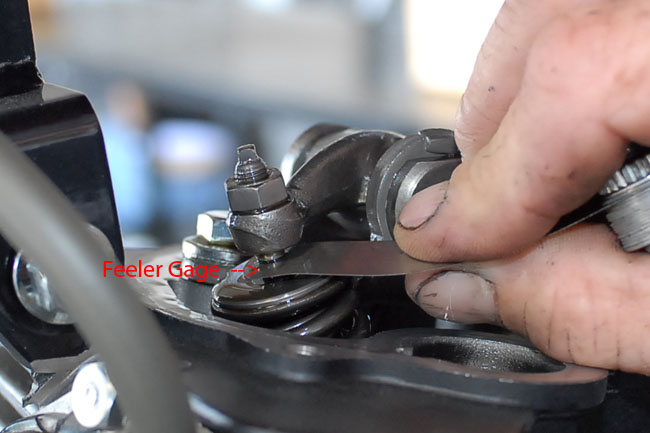
The way we adjust the valve gap is with the adjuster. We’ll loosen the lock nut, use a feeler gage, and turn the adjuster so that the gap is within that 0.06mm to 0.08mm range.
Here’s the adjustment being made with the feeler gage on the intake valve…
And here’s Tony doing the same thing on the exhaust valve…
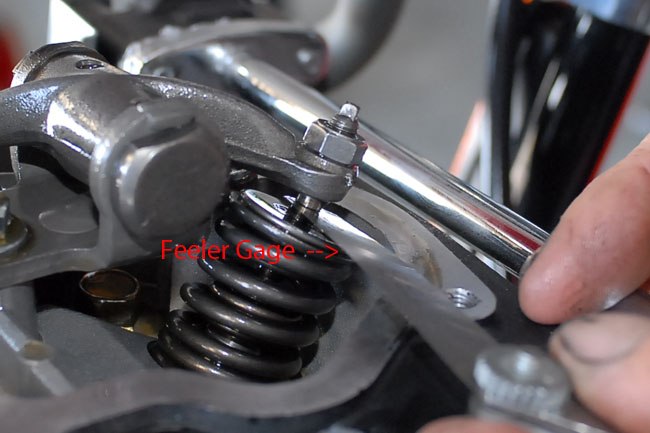
There isn’t much trickery in this…perhaps the only thing is getting a feel for how the feeler gage should fit in the gap. It should just go in snugly, and have a little drag on it when you pull it out. If the feeler gage goes in and out too easily, the gap is probably a bit on the high side. The other technique is tightening the lock nut so that the gap is where it needs to be. I always check the gap again after I’ve tightened everything. Once the valves are adjusted and the rocker arm lock nuts are tight, all you need to do is reinstall the valve cover, the sparkplug, and the sparkplug wire, and you’re on your way!
Making the adjustment with a threaded adjuster as shown above is really cool, and really simple. Other bikes don’t make life easy for you like this one does. When I did the valves on my KLR and my Triumph, for example, I found out that they both use a complicated system with shims. Just to get at the valve cover, as mentioned earlier, I had to remove the seat, the fuel lines, and the fuel tank (try lifting a fuel tank off a bike with 6 gallons of fuel in it). And once you’ve done the exploratory surgery and removed the valve cover on those bikes, you’ve gotta measure the gap for each valve, calculate how far off it is, take the size of the existing shim, and make calculations about the shims that you need to bring the gap back into spec. Then you’ve gotta buy the shims (they’re not cheap, either). The KLR has four valves per cylinder, and so does the Triumph. That’s four valves to adjust on the single-cylinder KLR, and 12 valves to adjust on the Triumph three-cylinder engine (the Triumph and Kawasaki dealers charge hundreds of dollars for this). It’s even worse on a four-cylinder engine. I used to have a six-cylinder Honda CBX with 24 valves, and to adjust those valves, you had to drop the engine out of the frame! And if I ever had to do this on a Ducati with their desmodromic valve concept, well, I wouldn’t even attempt it. I wouldn’t pay a mechanic a thousand bucks to do it either…I just wouldn’t buy a Ducati. Good lord, what were those engineers thinking!
So, that’s it, folks. If it seems simple on a California Scooter, well, that’s because it is! It’s literally a 10-minute job, and if you want to do it yourself, you can.



 TT250 Enduro
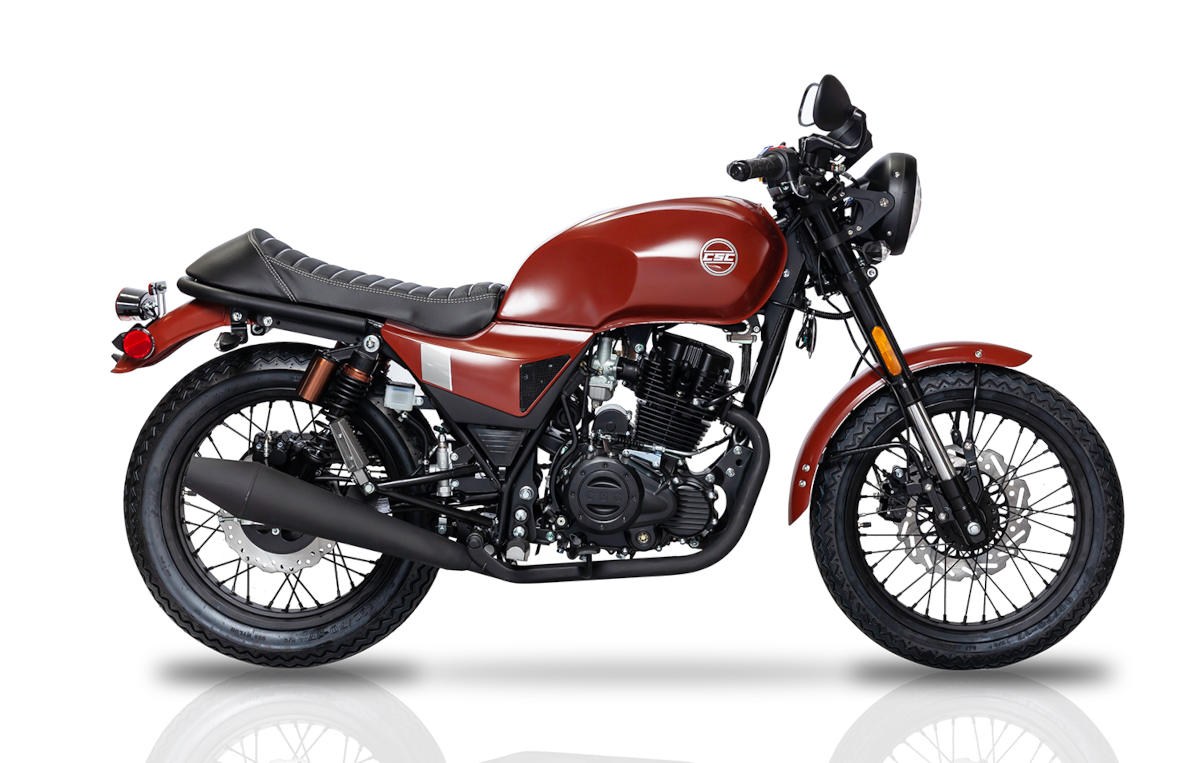 SG250 San Gabriel Cafe Racer
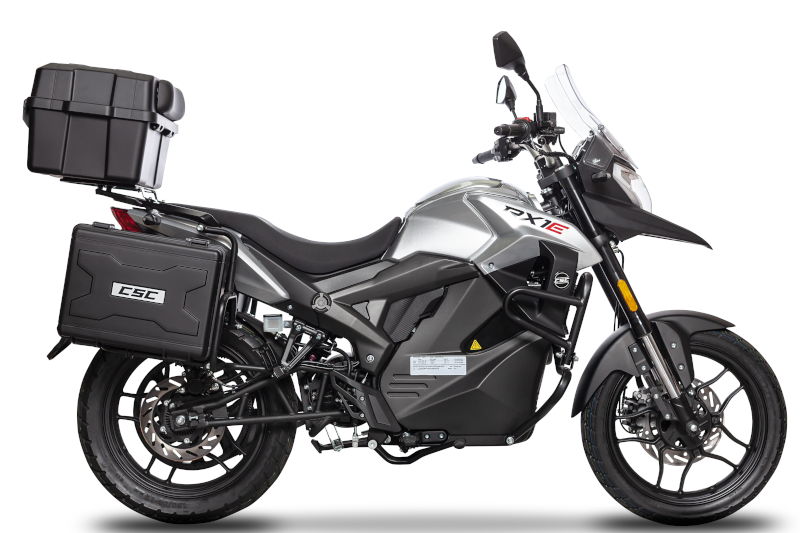 RX1E Electric Motorcycle
3 Responses to Adjusting Your Valves…