There are three more maintenance tips I’d like to share with you about the RX3.
Air Filter Oiling
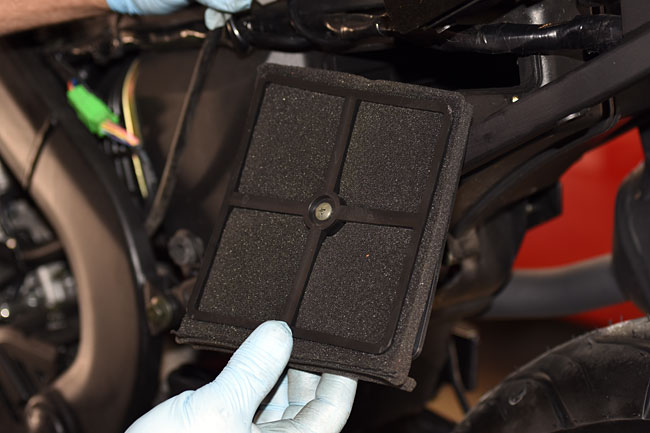
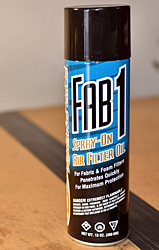 The first maintenance tip involves the air filter. When we set up a bike here in California, we oil the air filter.
Okay, here comes the commercial: We sell the oil to do this (we use Fab 1 oil; see the photo to the right). You can give us a call at 909 445 0900 and my good buddy Ryan will take care of you.
The RX3 air filter is designed to be oiled to do a better job in filtering dust, and the oil actually changes the amount of air that flows through the bike. Here’s the deal…we’ve found that if the air filter is oiled, the bike actually runs better. It will idle more smoothly and be less prone to stalling.
Crankcase Vent Line
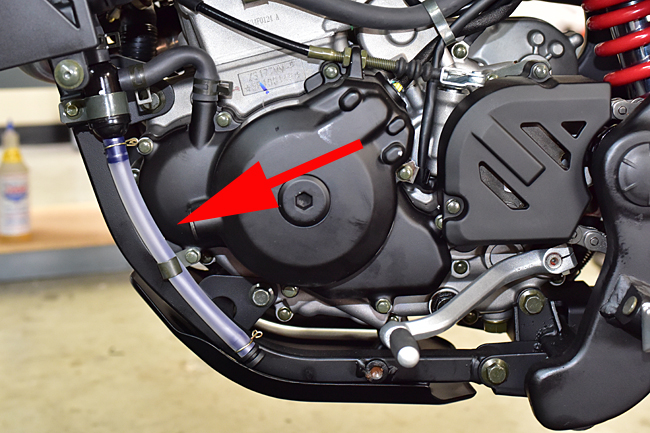
You’ve noticed that there’s a vent line that runs from down the left side of the engine.
This line accumulates both oil and water (in fact, the sometimes milky appearance of the oil in this line is due to the presence of water).
- The oil comes from the crankcase. It’s an overflow and vent line. You’ll see more of this when the engine is new. If you overfill the oil, this is where the excess will go once the engine starts operating. But even if you don’t overfill the engine, when the crankcase vents, the gases flow out of the crank through this line. The black plastic piece at the top of the line is a separator valve; it sends the oil south into the clear plastic line below, and it sends crankcase fumes to the air box (to be ingested through the engine).
- The water comes from condensation as the hot oil/air from the crankcase is vented. It’s not coolant, despite what the keyboard commandos on some of the forums have stated (ah, if only ignorance was money…these guys would be wealthy).
As I said above, this line will fill more often when the bike is new. When it fills, just open the plug on the bottom and drain the line. It’s normal performance (nothing to worry about).
Valve Adjustments
The recommended RX3 valve gap inspections are at 500 miles and every 2500 miles thereafter. We’ll probably increase the interval after we gain more experience with these motorcycles, but for now, that’s what we and the engine manufacturer recommend. The first valve adjustment (which should be at 500 miles) is important; the valve gap will most likely experience its greatest change when the engine is new. And the gap will always decrease as the engine wears; it does not increase with normal engine wear.
You should check your valves and adjust them if necessary at the specified intervals. The factory specifies 0.04mm to 0.06mm. I always hug the upper end of that specification (i.e., 0.06mm).
.jpg)
I know it seems a little intimidating the first time you check your valves, but trust me on this: It’s not that bad and after you’ve done it, you’ll feel pretty good about doing it. And, your bike will run better. It will take an hour or so of your time the first time you do it, and then it will go a lot faster for each subsequent adjustment. Here’s a link to our valve adjustment tutorial.
When I was in China last week I mentioned to the engineers that my bike very occasionally stalled when I rolled to a stop and cut the throttle. The Zongshen EFI engineer told me that the first thing he would check is the valve gap, and in particular, the exhaust valve gap. If it’s too tight, he said, it could result in occasional stalling when closing the throttle. I thought about that a second, and then I realized that after adjusting my valves, I had not experienced a single stall. If the valves are out of adjustment, it can also result in hard starting. There are lots of reasons for keeping your valves properly adjusted.
That’s it for now, folks. Watch for more info on our upcoming epic western US ride with the folks from Zongshen (and hopefully, you) and a near-term blog on installing the aluminum Tourfella bags.



 SG250 San Gabriel Cafe Racer
 RX1E Electric Motorcycle
 TT250 Enduro