


This tutorial addresses the cooling system on your RX3 motorcycle. The RX3 is water cooled (actually, it’s an ethylene glycol and water mix), and you can see your bike’s operating temperature on the right side of the instrument cluster.
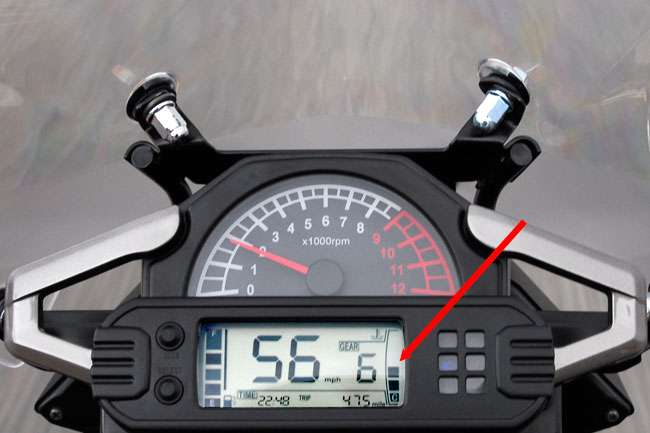
Anything below the max bar is okay. In the photo above, we were riding through Joshua Tree National Park on a very cold day, and the temperature indicator never got above two bars. On warm days, when stopped in traffic, or when climbing hills, the temperature indicator will go up to three or four bars. It’s normal.
Let’s start our cooling system discussion by considering safety issues:
- Only work on the cooling system when the engine is cold.
- When opening the radiator cap, always cover the radiator cap with a cloth and open it slowly to prevent being scalded by escaping hot fluid.
- Always immediately wipe up any spilled cooling fluid.
- Only use a quality 50/50 ethylene glycol/distilled water cooling fluid with corrosion inhibitors intended for use in aluminum engines.
The RX3 cooling system consists of the following components:
- Two radiators located under the fuel tank.
- Two fans (one for each radiator).
- Hoses connecting the radiators and the engine.
- A water pump.
- Cooling fluid. The system coolant capacity is 1.0 liter.
- A temperature sensor (located on the bottom of the left radiator).
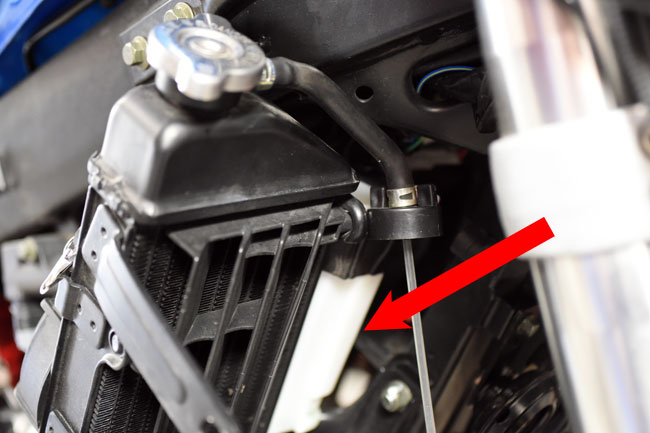
- An overflow container located to the left of the right radiator.
- A thermostat located on the top right of the cylinder (it’s where the cooling system hose attaches to the engine).
Don’t buy just any “antifreeze” cooling fluid from an automotive store. Your RX3 motorcycle has a high performance aluminum engine and it needs a cooling fluid designed to work in this kind of engine. If you use regular automotive cooling fluid, it will induce engine damage. We stock cooling fluid for the RX3 motorcycle, and if you would like to order it from us, please give us a call at 909 445 0900.
Okay, that’s enough for the commercial. Let’s get back to the maintenance activity.
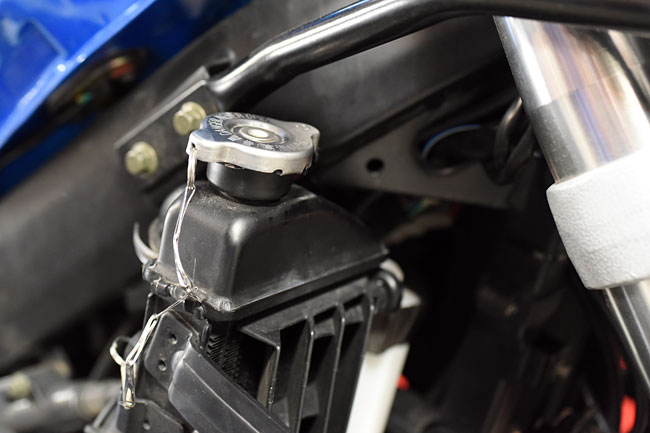
Access to the coolant system is provided via the radiator cap on top of the right side radiator. As mentioned above, when opening the radiator cap, always place a rag over it and open it slowly.
There are three categories of cooling system maintenance:
- Checking and adjusting the cooling fluid levels.
- Flushing and replacing the cooling fluid.
- Troubleshooting associated with engine overheating or leakage.
This tutorial considers each of these. We’ll go into detail on the first two categories. For troubleshooting, we’re going to refer you to the Service Manual provided free with each new CSC RX3 motorcycle.
Checking and Adjusting Cooling Fluid Levels
In our photos in this section of the cooling system maintenance tutorial, we show the bike with all of the right side body panels removed. We did that just to make the photography easier. You can get to the radiator cap and the overflow container (just for checking cooling fluid levels) without removing all of the right side body panels, but it will be tight. Turn the forks to the left to gain more access to the right side radiator and overflow container. It’s easier to get to the overflow c0ntainer from underneath the bike.
You should check the coolant level in two places: The overflow container, and the radiator.
The first check is to view the coolant level in the overflow container. The overflow container should show a fluid level between the top and bottom of the container. The fluid level is visible from the outside of this container (you do not need to open the container to see the fluid level). It is normal for this level to vary as the motorcycle is operated and when the motorcycle is turned off as the engine cools. If you need to add fluid to the overflow container, unscrew the overflow container’s twist top. Use a funnel to avoid spilling fluid on the motorcycle if you need to add cooling fluid. If any cooling fluid spills, wipe it up immediately.

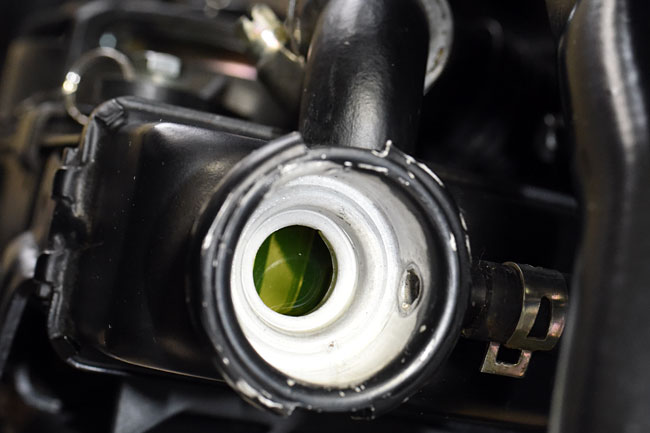
The second place to check the cooling fluid level is the radiator cap. As mentioned above, use caution whenever opening the radiator cap, and only open it when the engine is cold. The fluid level should be about even with the bottom lip in the radiator when the radiator cap is opened, as shown below.

Flushing And Replacing The Cooling Fluid
We recommend flushing and replacing the cooling fluid every two years.
Start by opening the radiator cap. Again, make sure the engine is cold, and you should still put a cloth over the radiator cap and open it slowly.
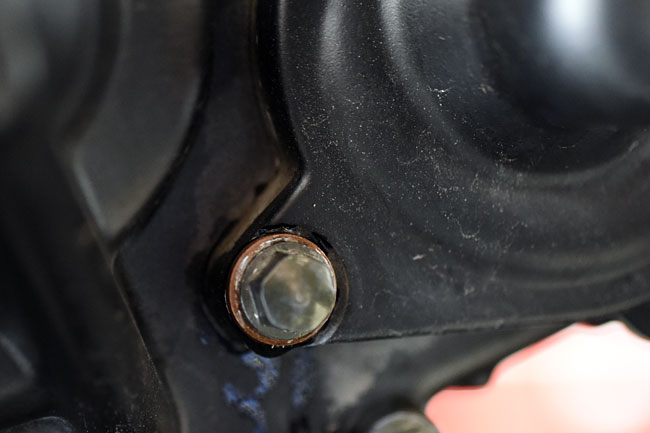
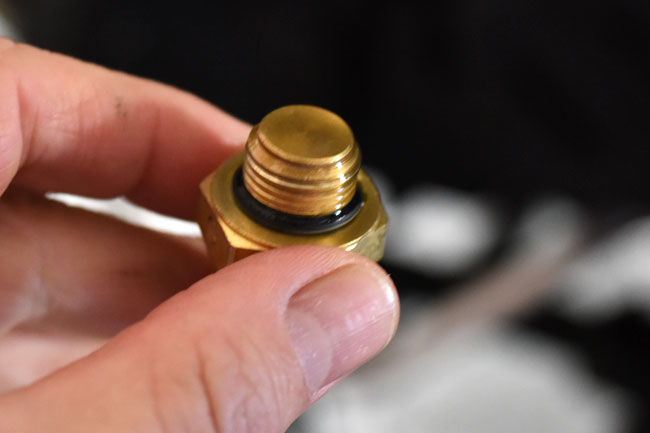
Place a drain pan beneath the motorcycle and then open the cooling system drain plug. It’s located on the right side of the engine just beneath the water pump. It looks like one of the bolts securing the water pump to the engine, but you can distinguish the drain plug by its location and the fact that it has a copper gasket beneath the bolt head.
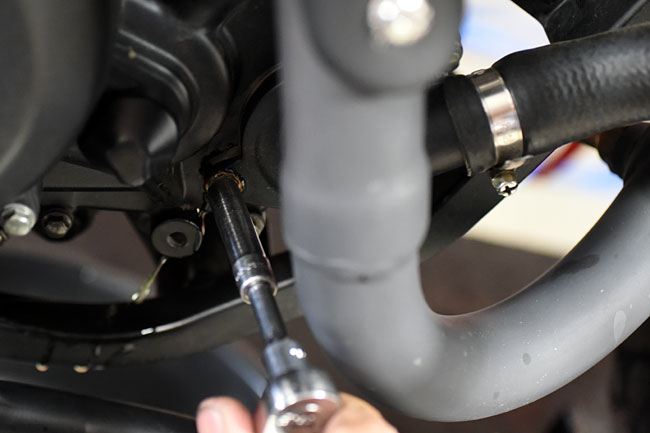
Allow the cooling fluid to completely drain from the right radiator. Move the bike to a completely vertical orientation to allow the radiator to drain completely.
Next, drain the left radiator. Place a drain pan underneath the left radiator. Remove the electrical plug from the temperature sensor, unscrew the temperature sensor, and allow the cooling fluid to drain from the radiator. Immediately wipe any spilled cooling fluid from the motorcycle.
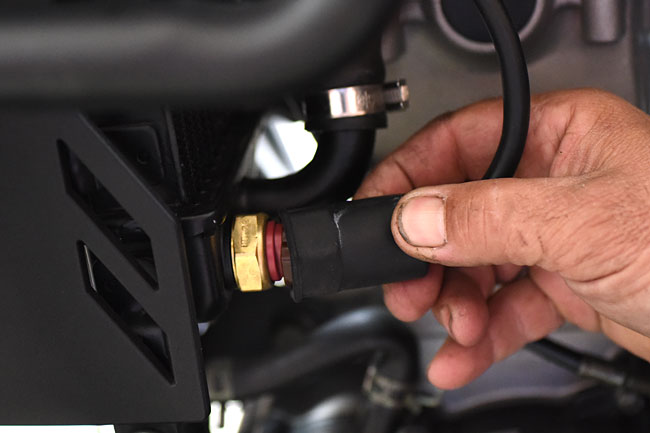
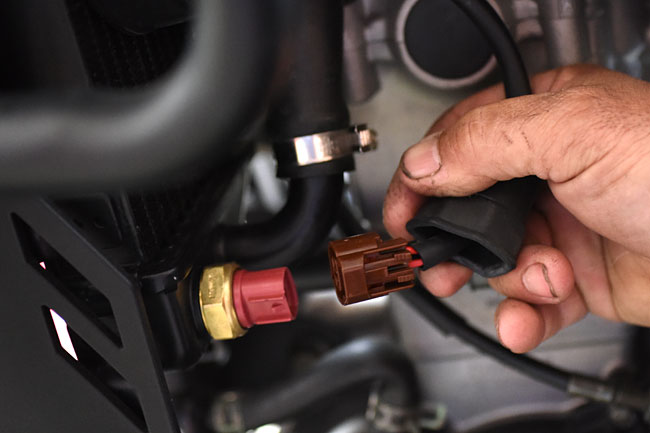
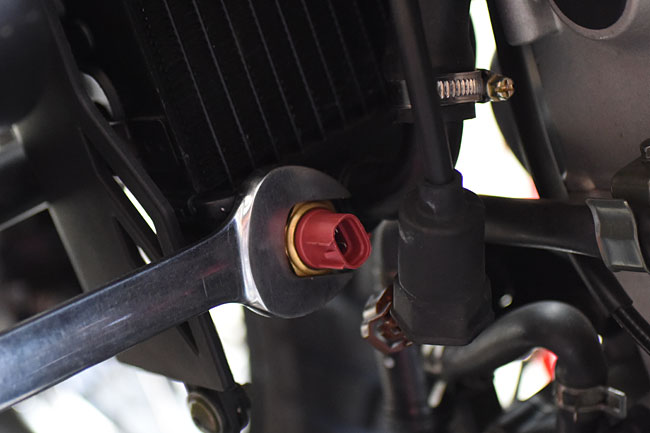
Note that the temperature sensor has a rubber gasket to form a seal between it and the radiator. Take care not to damage this seal when removing and reinstalling the sensor.
At this point, all cooling fluid will have been drained from the motorcycle.
Reinstall the cooling fluid drain plug (just beneath the water pump) and the temperature sensor.
Add one liter of new cooling fluid to the radiator. Use a funnel to prevent spilling cooling fluid on the engine, and again, immediately wipe up any spilled cooling fluid. As you are adding cooling fluid, you will notice that the radiator will not take the entire liter of cooling fluid. That’s because the cooling fluid needs to flow to the other radiator, the hoses, and the engine.
When the right radiator fills to its neck, and with the radiator cap off, start the engine and allow it to run such that cooling fluid is pumped to the engine and the left radiator. You can burp the system by gently squeezing the cooling system hoses to move fluid through them. Shut the engine off and add more cooling fluid to the right radiator. Repeat this process until the cooling system is full. When you are done, the cooling fluid will be even with the lower lip inside the right radiator opening.
Start and allow the motorcycle to run for several minutes to make sure the cooling system is operating normally.
Next, remove the cap from the overflow container. Add cooling fluid to the overflow container such that the container is approximately half full. Remember that this is a reservoir and the cooling system will pull from the overflow container and return cooling fluid to it. Don’t have a cow about getting it exact. Half full (or half empty, depending upon your outlook on life) is good enough.
After completing the above activities, reinstall all body work on the right side of the motorcycle. Start your bike and go for a ride. You’ll feel better. Trust me on this.
Troubleshooting
You will know if the cooling system is not operating properly when the engine overheats (discernable via the instrument cluster temperature indication) or if you see cooling fluid leakage from the motorcycle.
If leakage occurs, you need to identify and correct it at the point where the motorcycle is leaking. There’s no rocket science here; it’s Leak Detection and Fixing 101.
If the motorcycle overheats based on the instrument temperature gage bar indication, we’re going to refer you to the RX3 Service Manual (provided free with each new CSC RX3 motorcycle) for detailed troubleshooting instructions.
 TT250 Enduro
 SG250 San Gabriel Cafe Racer
 RX1E Electric Motorcycle