Fixing flats…

Flat tires.   It’s something we probably all worry about, and it’s something we all have experienced.   The good news is that it doesn’t happen very often.  The bad news is that when it happens, it’s usually out in the middle of nowhere and it’s up to us to fix it.  This maintenance tutorial focuses on fixing a flat on your RX3.   We’ll talk about the tools you’ll need, the approach, and how to do it.

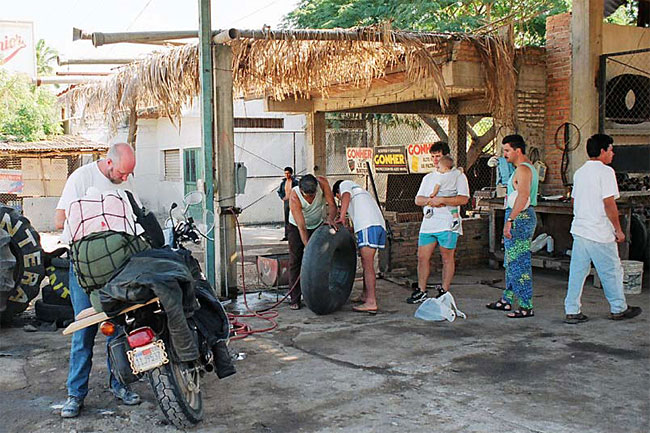
First, a story.   The first time I ever came head-to-head with a flat tire it wasn’t even on my bike; it was on my buddy John’s Virago.  We were on one of our mega-expeditions in Mexico and we were riding through the jungle (no kidding, a real jungle) early on a Sunday morning somewhere way north of Puerto Vallarta.   When I say a real jungle, let me put that in perspective:  We were smack dab in the middle of where Liz Taylor and Richard Burton filmed Night of the Iguana.   Like I said, a real jungle.

John was on his Yamaha riding alongside me on this empty rural road, we were dodging iguanas, and I noticed John’s front tire was nearly flat.   I don’t know why ol’ Juan didn’t notice it.   I motioned for us to stop, we pulled over, and there was no question….that tire looked about as dead as Pancho Villa.   It had just a bit of air, but it was obvious…if we didn’t get it fixed soon, we’d be stranded.   In the middle of the jungle.   Somewhere in Mexico.

John didn’t seem too fazed by all of this.   That guy will probably live to be 900 years old.   Me, I’m a worrier.   I had visions of trying to survive by eating monkey meat (yeah, we could hear them out there in the trees) or lizards.   I remember thinking iguana probably tastes like chicken.   John said maybe he just needed air.   I explained to him how we were in the middle of the jungle on a Sunday morning, we hadn’t seen another car or human being in hours, and things were looking bleak.   John’s only thought was that maybe we’d see something up ahead and we could get the thing fixed there.    We hadn’t seen another structure for the last 60 or 70 miles.   Nothing.   Just trees.   And lizards.

With me feeling deep despair and John being the eternal optimist, we slowly started out again.  We didn’t want to go too fast; there could not have been more than about 8 psi in that front tire.

Son of a gun, we hadn’t gone a quarter of a mile when we rounded a bend on that jungle road in the middle of Mexico.   Whaddaya know, there was a llantera (that’s Spanish for “tire shop”) on the right, tucked away in the trees, and it was open!  On a Sunday morning.   There must have been 12 or 15 people out in front, including a bunch of Mexican kids playing with old tires.   It was a hot spot.   I wondered if Richard Burton had ever been there.

JohnGetsLucky

John asked the guy who looked like he was in charge if he had air.

“Que?” was the response.

“Air,” John said again, a little louder.   When someone doesn’t speak English, we Yankees always think if we say the same thing again louder they’ll comprehend.

No dice.   The language barrier.

John made a hissing sound and pointed at his tire.

“Ah, aire,” the llanterian said.   He pronounced it “aye-day.”

So, back to the main attraction.   Most of the places we ride our adventure touring bikes aren’t going to be blessed with a Sunday morning llantera in the middle of nowhere, so we have to know how to fix our tires when they need fixing.

Here we go, boys and girls.  Let’s fix a flat.

The first bit of advice I always give people is to check for any obvious cause of the flat tire on the outside of the tire.  The reason you want to do that is it will make finding the leak in the tube a lot easier.  If you can find it, great.   You’ll know about where to look on the tube for the hole to be repaired.  If you can’t find it, we still have a few tricks we can use, and I’ll get to those shortly.

At this point, let me digress and point a couple of things out.  When you get a flat tire, you’re going to be stopped for a couple of hours.   Don’t sweat it.  It’s all part of the experience, and as a good friend once told me, when you’re on an adventure ride, the real adventure starts when things go wrong.    Don’t get wound up.   We’ll fix it.

Next point…while some folks swear by those “fix-a-flat” kinds of cans that you can just plug into a flat tire and make your cares go away, I’m not one of them.  I’ve tried them a couple of times and I’ve never had good results.   My advice is this:   When you have a flat, you need to fix it.   There are no shortcuts.

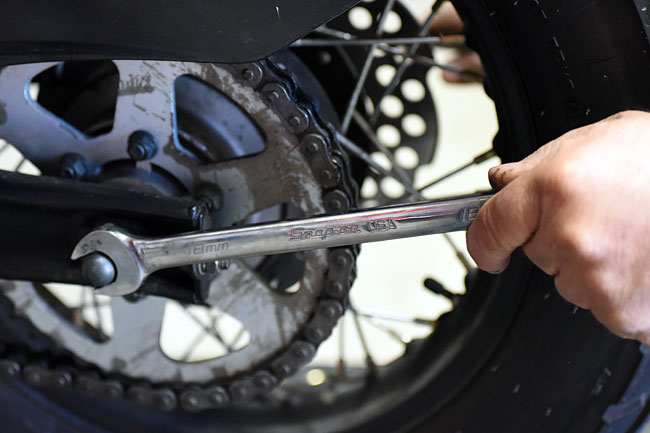
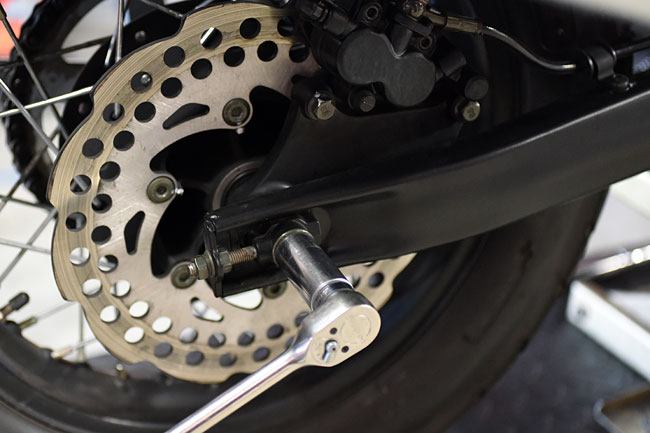
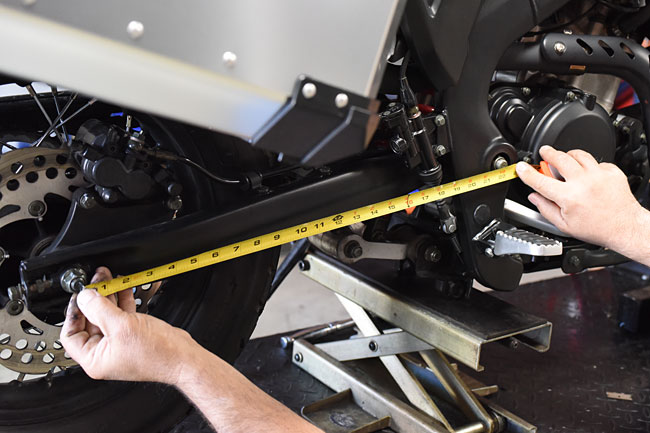
Before you prop up the bike so you can remove the wheel with the flat tire, loosen the axle bolts (just loosen them, do not remove them) .   You want to do this before you get the bike in the air because once the bike is in the air, it won’t be as stable as it was when it was on the sidestand.   Do the heavy torqueing (or maybe I should say un-torqueing) before you get the bike in the air.

Back to lifting the affected wheel…if you have our accessory centerstand, this is a lot easier to do.  If you do not (and most of the bikes I’ve ever had are in this category), you need to find a way to prop up the bike so that you can remove the wheel.

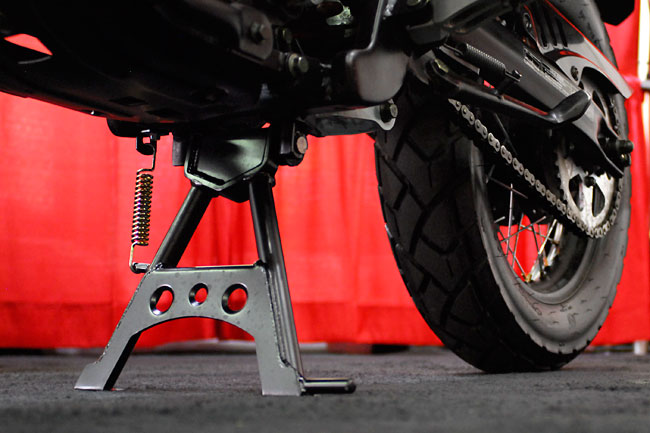
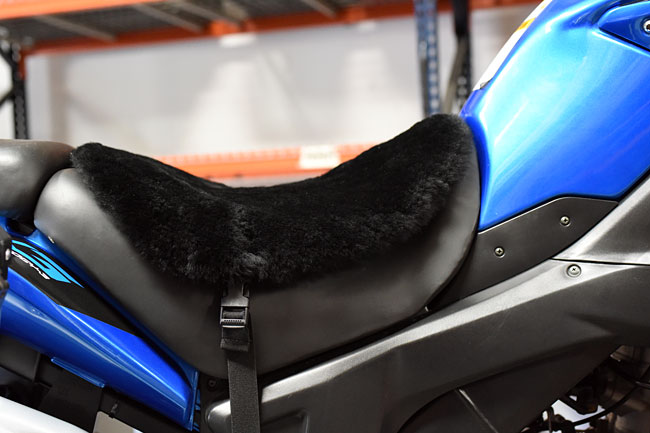
Some folks just lay the bike on its side.   I advise against doing that for a lot of reasons.  Another approach is a prop that works with the sidestand to hold one end of the bike in the air.   Yet another approach is to use our accessory maintenance center stand (see the photo below).

All of these things involve carrying more stuff on the bike.   Necessity is the mother of invention, and if I need to prop up a bike, I’m going to find a way to do it…a fallen tree, a log, a box, or something that will get the bike off the ground.   How you do that is up to you.  The bottom line is that you’ve got to get the bike off its feet, so to speak.

Once you’ve got the affected wheel off the ground, you need to remove it.   Our photos here show doing this with the rear wheel because there’s more to removing the rear wheel than there is to removing the front wheel.  Everything that follows in this maintenance tutorial pertains to the rear wheel only, but other than the nuts and bolts of the rear wheel removal process, what we have here is equally applicable to the front wheel.

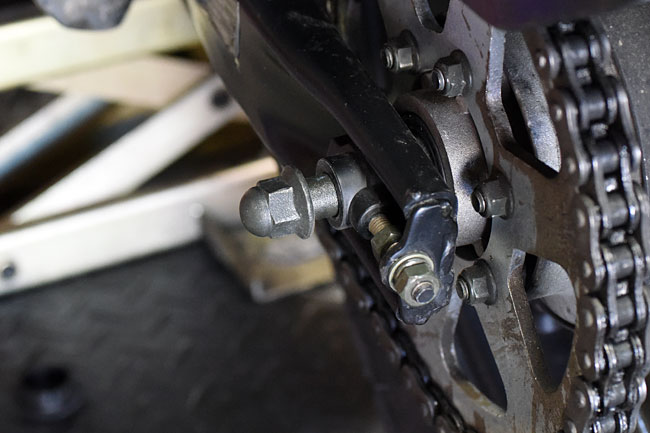
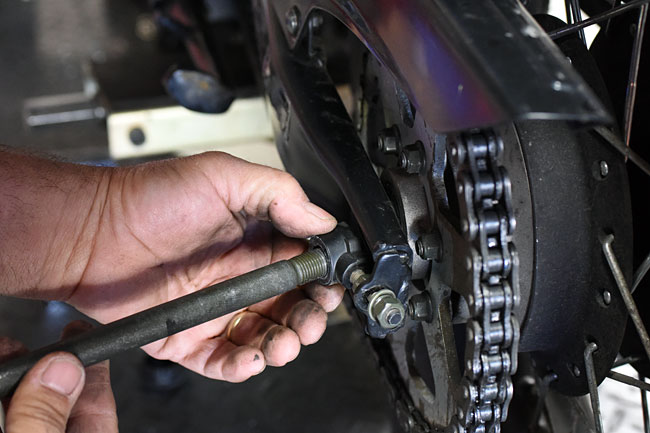
Remove the rear axle nut (it’s a 17mm; the bolt head on the other side is an 18mm) and pull the rear axle out from the left side of the motorcycle.  You may have to tap it from the right side to get it started.

ServMan24Feb_0014-650

ServMan24Feb_0013-650

ServMan24Feb_0032-650

ServMan24Feb_0035-650

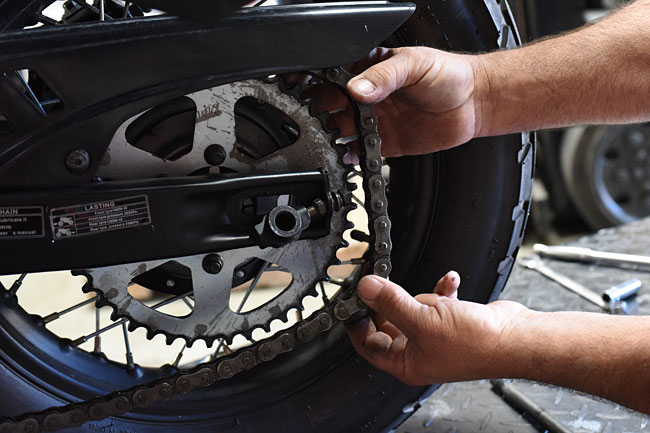
After you have removed the axle, push the rear wheel forward and lift the chain off the sprocket.   Your hands will get dirty (don’t get your shorts in a knot over this; it’s all part of the adventure).   On the RX3, you don’t have to remove the chainguard to get the chain off.   Also, you don’t have to remove the rear brake caliper to get the wheel off the bike.   You’ll want to make sure, though, that after you have removed the wheel, you don’t operate the rear brake (it will make reassembly challenging).

ServMan24Feb_0036-650

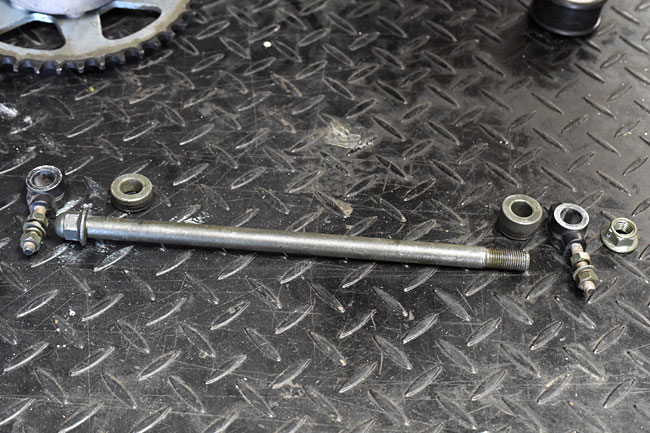
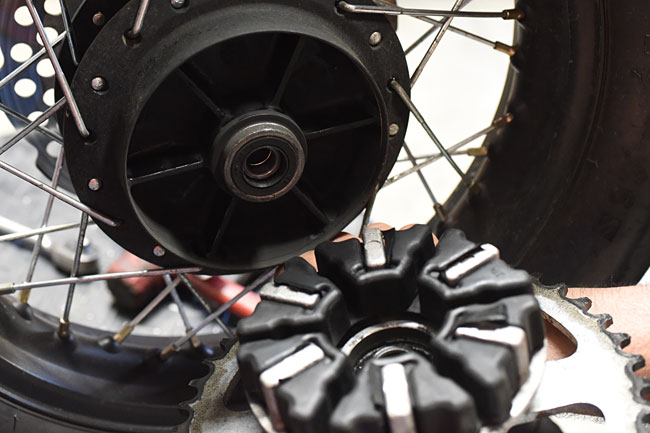
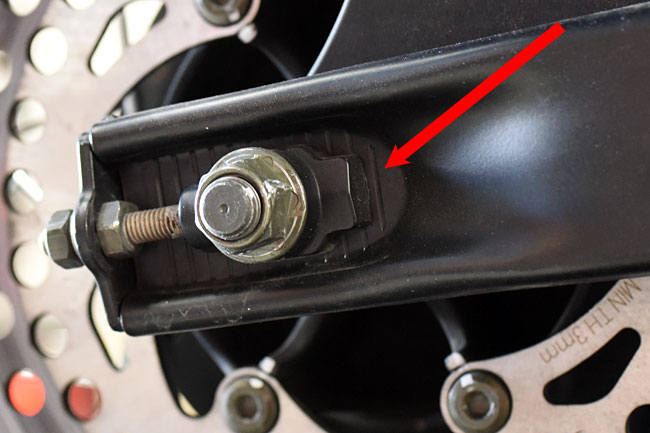
Once the chain is off the sprocket, roll the wheel out from under the motorcycle.   On the rear wheel, there are two bushings (one on either side of the wheel).   The thicker bushing goes on the right side of the motorcycle, and the thinner bushing goes on the left side of the motorcycle.   You’ll want to remember that when you are reinstalling the wheel.  You can see the order of the axle and the bushings in the photo below.

ServMan24Feb_0045-650

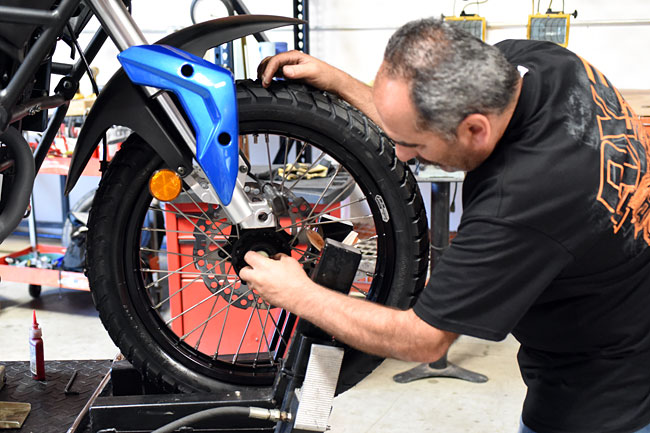
Here’s a shot showing Rich rolling the tire away from the motorcycle.

ServMan24Feb_0038-650

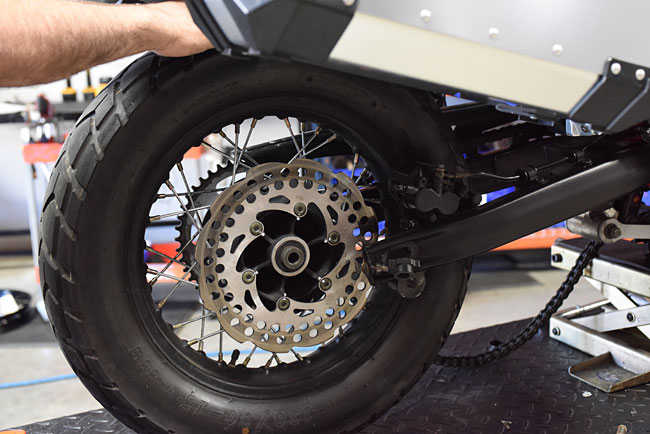
After removing the bushings, remove the sprocket and the cush drive, and set these items aside.

ServMan24Feb_0042-650

Place the wheel on its side, with the brake disk facing down (as shown in the photo below).

ServMan24Feb_0049-650

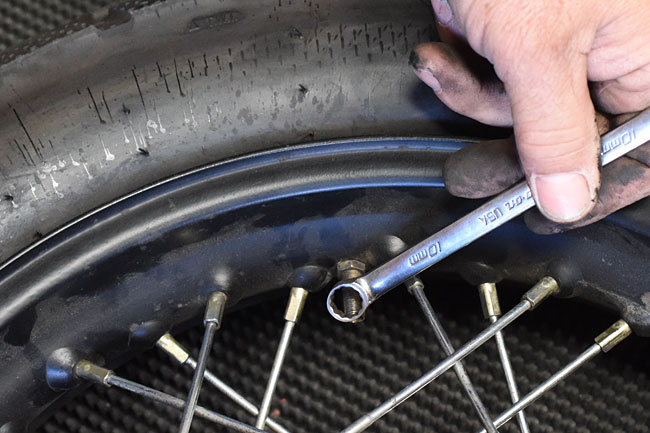
Even though you have a flat tire, there may still be residual air pressure in the tube.   Remove the valve cap and depress the Schrader valve to allow any remaining air to escape.   With a 10mm wrench, loosen the nut around the valve stem, and then unscrew it completely by hand.

ServMan24Feb_0054-650

The next step is to break the bead around the tire.   The good news here is you only need to do this on one side of the tire.   Usually, just stepping on the tire (as shown below) will unseat the tire from the rim.

ServMan24Feb_0050-650

In rare cases where the tire doesn’t want to separate from the rim, you might want to get two people to step on the tire.  Other approaches for breaking the bead can involve using a c-clamp, or using another motorcycles’ sidestand (lean the motorcycle against the sidestand after putting the sidestand on the tire near the bead).   These latter actions are uusally unnecessary, however.   Most of the time, simply stepping the tire will break the bead.

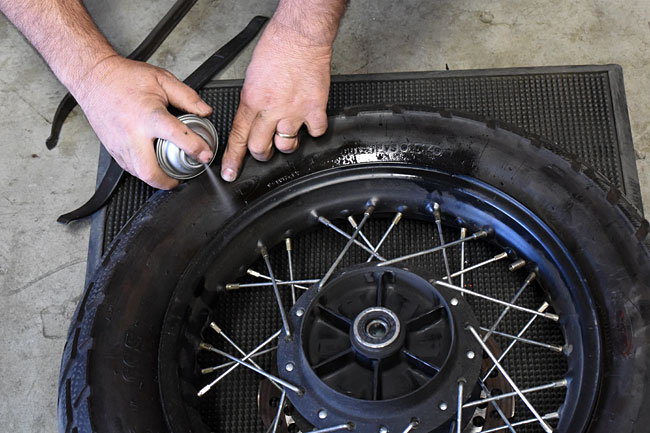
After you’ve broken the bead, spray the area between the bead and the rim with a silicone spray lubricant (I like WD40, and I usually have a can of this in the saddlebag).

ServMan24Feb_0057-650

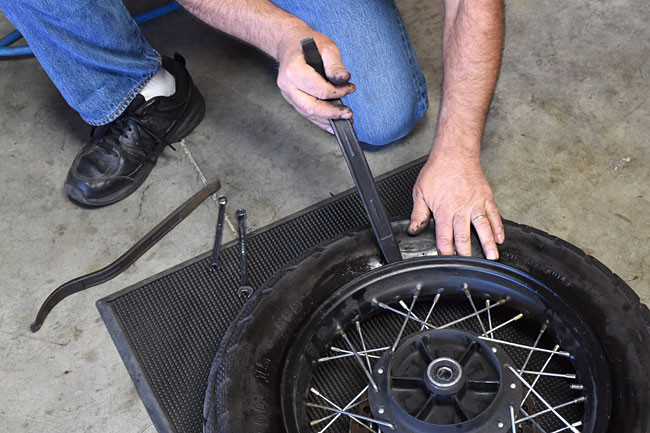
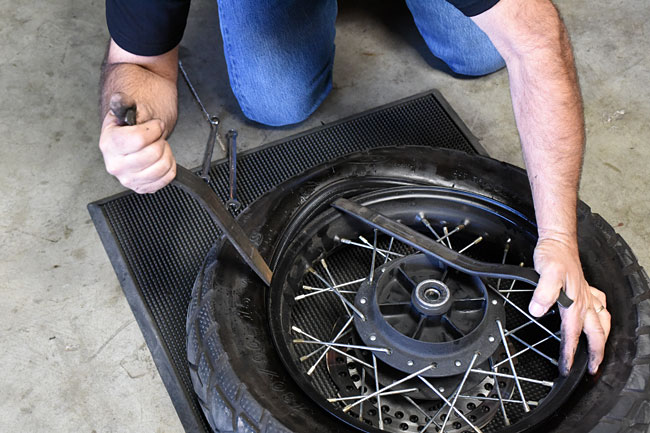
Using one of the tire irons (you’ll need two), insert the tip between the tire and the bead, and pull the bead over the rim.   Using the second tire iron, pick a location about 6 inches away (measured circumferentially on the rim) and do the same thing.     Remove the first tire iron and repeat the process.   You usually only need to do this once and the tire will pop off the rim on the side you’re working.   You do not need to remove the tire from the rim; you only have to get it off the wheel on one side.

ServMan24Feb_0059-650

ServMan24Feb_0063-650

ServMan24Feb_0064-650

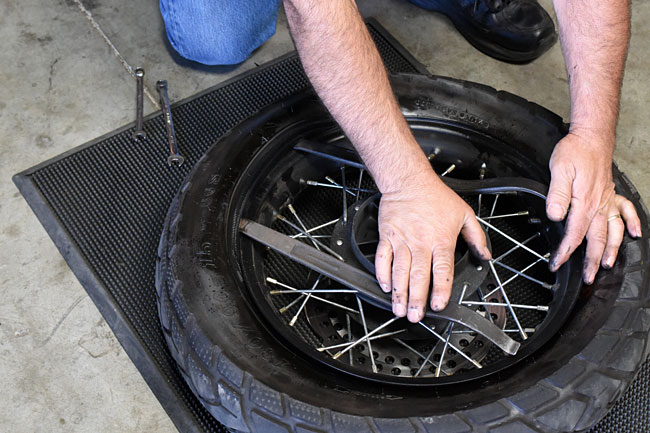
At this point, push the valve stem back into the rim so that it is no longer passes through the rim.   Remembering where the puncture occurred on the tire (if you were able to identify the puncture location), pull the tube out of the tire (you’ll be pulling it out between the tire and the rim on the side where you separated the tire from the rim).

Carefully inspect the tube in the area adjacent to the tire puncture location and inspect for the source of the leak.  If you find it and if it is small (they almost always are), you can most likely patch it.  If the tear is more extensive, you will have to replace the tube.

If you can’t find the leak, partially inflate the tube and listen for hissing.  You may have to put the partially inflated tube near your ear and rotate it until you find the leak.  If you are near water, you can immerse the tube and look for bubbles to locate the leak.  If you hear it but can’t see it, you can rub spit around the general area and look for the leak.

People sometimes ask this question:  Is it okay to patch tubes, or should I replace them?   Here’s my advice:  I don’t like to carry complete tubes because they take up a lot of space (and you’ll need two of them; the front and rear tubes are different sizes).   I carry a patch kit, but I view the patch kit as a temporary fix.  It will get me home or to the next town where I can buy a new tube.  I don’t view a patch as a permanent fix.

Regarding a patch kit, we sell a kit for your RX3 that contains what you need to do everything described in this maintenance tutorial.

Tube-Repair-Kit

You can call us at 909 445 0900 to order the kit above or any of the other items we describe in this tutorial.

A bit of advice on patching a tube:  The kit will say how long you should let the glue dry.   Don’t rush it.   Follow the directions.   And one more bit of guidance:  After you’ve patched the tube and allowed it to dry, partially inflate if before putting it back in the wheel and tire.   You don’t want to find out the patch is no good after you’ve reassembled everything.  Pump it up, spit on the patch and rub it around, and look for bubbles.  If it passes our high-tech spit test, you’re good to go.

Before you reinstall the tube (either one you’ve patched or a new one), reach in with your hand and gingerly feel around the inside of the tire.   You are looking for anything that might damage the tube when you reinstall it.   You want to do this delicately because if there is something sticking into the tire, you don’t want to cut yourself on it.  If you find anything, remove it.

After doing the above, deflate the tube and gently reinsert it into the tire.  Position it so that the valve stem is aligned with the hole in the rim.  Push the valve stem through the hole in the rim and then reinstall the 10mm nut on the valve stem to lock the valve stem in place.   Gently tuck the tube completely in to the tire.

Now we need to reinstall the tire on the rim.   You’ll able to get about 50% or so of the inside tire diameter over the rim with your hands.   The remainder will have to be done with your tire irons.   This is not a time to rush.   Take things slowly and be extra careful not to pinch the tube between the tire and the rim (and don’t damage the tube with the tire irons) when you are reseating the tire.   Liberal use of WD40 will help here.

Reinstall the tire and wheel on the motorcycle before you inflate the tube.   This is the reverse of the process I described above.

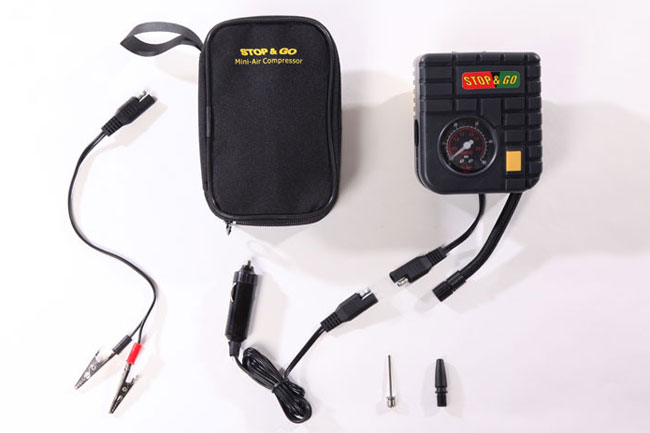
After accomplishing all of the above, it’s time to inflate the tire and get it to seat on the rim.    There are several approaches to this, too.   In a perfect world, you’ll have a source of compressed air nearby (for example, if you can, you might make it to a gas station when you realize you are getting a flat tire).   Most of the time we’re not that lucky.   You can carry a small compressor that runs on the motorcycle’s electrical system.   I’ve used these, they work well, and we sell those, too.   Again, give us a call at 909 445 0900 for a price.

Compressor

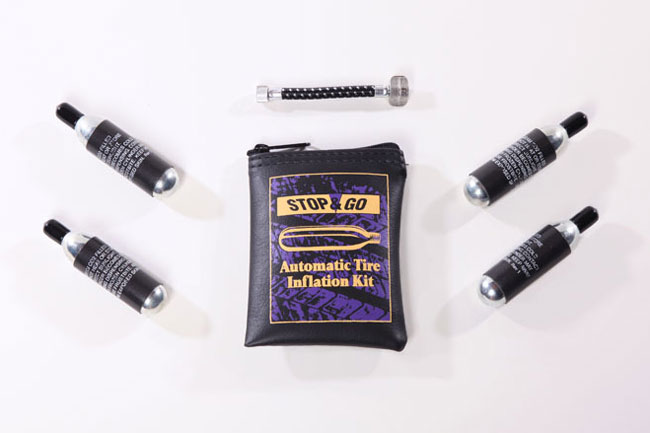
Still another approach is to use CO2 cartridges, and you guessed it, we have those, too.

CO2

There’s yet another approach, and that’s to carry a small bicycle floor pump.   It’s low tech, but it works, and it will get the pressure high enough to seat the tire on the rim.    You’ll get a workout pumping up a motorcycle tire, but then you’d get a workout if you had to walk out of wherever you got a flat tire, too.  The disadvantage is space.   Most inexperienced folks pack too many things on a motorcycle trip.   I like using s small bicycle pump, but I don’t like all the space they take up.

So, you’ve fixed your flat tire, you’re ready to roll, and you have a good war story to share with your friends.   You can even throw in the stuff about Night of the Iguana and being stranded in the jungle if you want (hey, it’s your story)!


Posted in CSC Motorcycles | Comments Off on Fixing flats…

Hard core Peruvian RX3 adventure riding!

Hey, this is interesting! I found a Facebook page that is a Peruvian RX3 owners group. Ever wonder what it might be like to ride the RX3 in Peru?   In the snow?   Way, way up in the mountains?  Well, wonder no more!

Check this out, my friends…especially the second video!

Very cool stuff.   These are definitely hard-care adventure riders!  Thank you, our friends in South America!


Posted in CSC Motorcycles | Comments Off on Hard core Peruvian RX3 adventure riding!

RX3 Chain Adjustment

Our maintenance topic du jour is chain adjustment, which is a bit of a misnomer because adjusting the chain on a motorcycle is actually two jobs:   Adjusting chain tension and aligning the rear wheel.   The challenge here is to both achieve the correct tension in the chain and to align the rear wheel while we are doing so.

You should check the chain adjustment at your motorcycle’s first scheduled maintenance and every maintenance thereafter.   You’ll most likely see the biggest need for adjustment at the first service interval, because chains do most of their stretching in their first several hundred miles of use.

The first step is to check your chain slack.   Zongshen advises 10mm to 25 mm of chain slack, which is indicated by a decal on the left swingarm.

ServMan24Feb_0010-650

The decal is a bit misleading, and I believe 10mm is a bit on the tight side.   On adventure touring bikes with long swingarms such as the RX3, I like to set the chain a bit on the loose side.  I adjust the chain slack to be between 3/4 of an inch and 1 inch (25mm, the high side of the Zongshen recommendation, is just under 1 inch).

You generally measure chain slack by flexing the lower portion of the chain up and down on the bottom run (between the front and rear sprockets) and measuring the amount of “play” from top to bottom.   You get varying opinions as to whether the rider should be on the bike or not.   I do it with no rider on the bike, but with the motorcycle on the sidestand.   This puts the weight of the motorcycle on the wheels and takes up some of the “sink” from the bike compressing the suspension.  I’ll push the chain all the way up, and then pull it all the way down and compare the readings on a ruler or a tape, as you see in the photos below…and as you can see in these photos, this chain is a bit too loose.

ServMan24Feb_0011-650

ServMan24Feb_0012-650

Let’s assume you’ve done this and you find the chain is either too tight or too loose.  When this occurs, we need to loosen (not remove) the rear axle, and loosen the chain adjustors on both aft ends of the swingarm.

Let’s approach the rear axle bolt first.   The rear axle bolt takes a different wrench/socket size at its two ends.   The bolt head is 18mm on the left side of the bike, and the rear axle nut is 17mm on the right side of the bike.

Loosen the rear axle with either wrenches or sockets.  You don’t need it to be real loose.  Finger tight is good enough.   We just want to be able to move the rear axle back and forth in the swingarm after we loosen it.

ServMan24Feb_0014-650

ServMan24Feb_0013-650

Next, loosen the chain adjustors on both sides of the swingarm.   These adjustors have two nuts, one on each side of the adjustment plate, as shown below.  Note that in the photo below, the rear axle adjustor nuts have already been loosened.

ServMan24Feb_0024-650

This is where it gets interesting.   Our challenge at this point is to drive the rear axle either forward or rearward using the rear axle adjustor nuts while simultaneously positioning the rear axle such that we achieve the desired chain tension (as described above) and we maintain rear wheel alignment.

Use the rear axle adjustor nuts to move the wheel either forward or backward.  The inside nut moves the wheel forward, and the outside nut moves the wheel backward.   Note that there are no washers between the inside nut and where it bottoms against the end of the swingarm, and that there is both a flat washer and a lockwasher between the outside nut and the end of the swingarm.   Both axle adjustor nuts are 13mm.

The trick is to get the wheel aligned and the chain properly tensioned.   You need to check both rear axle alignment and chain tension as you make these adjustments.

To attain correct alignment, there are two approaches.   You can actually measure the distance between the center of the swingarm pivot point and the center of the rear axle (as shown in the photo below), or you can observe the location of the adjustor on the swingarm scribe marks.  The photos below show both approaches.   I prefer actually measuring the distance (the first approach) because on many motorcycles the scribe marks are not always accurate.   When we do this, you can pop the plastic swingarm pivot point covers off with a small screwdriver.  On the RX3 used for the chain adjustment in these photos, we found that when the rear axle was perfectly aligned, the rear axle adjustors were perfectly placed with respect to the swingarm scribe lines on both sides of the motorcycle.

ServMan24Feb_0025-650

ServMan24Feb_0026-650

ServMan24Feb_0030-650

The above photos showed us checking rear wheel alignment by measuring the distance between the swingarm pivot point and the rear axle.  The other approach (as mentioned above) is to check the scribe marks on the swingarm, and use these to compare the relative position of the adjustors on both sides of the motorcycle.

ServMan24Feb_0004a-650

Once the axle is aligned and the chain tension is where it needs to be, you can tighten the rear axle nut.   I always check the chain tension again after tightening the rear axle nut just to make sure it hasn’t moved.   After doing that, tighten all four of the axle adjustor nuts, and you are good to go!


Posted in CSC Motorcycles | Comments Off on RX3 Chain Adjustment

We have a winner!

And it’s our good buddy Joel from Colorado!

Wow, I thought this would be an easy one.   I received about a hundred emails in the last couple of hours, but Joel was the first one to nail it by identifying all five items that are upgrades to our stock RX3.   Here’s the photo of our blue RX3 with all the goodies…

ServMan24Feb_0127-650

Ah, that is a glorious photo, with the snow-capped San Gabriel Mountains in the background.   I shot it with my new Nikon, and I am quite pleased with the job this camera is doing.   But I digress…so, back to the main attraction…

Quite a few of the entries in our little t-shirt contest correctly identified 3 or 4 of the 5 non-stock features in that photo, but one was elusive until Joel nailed it.   It’s the 19-inch front wheel!   That really surprised me, because so many people told us that we should offer it as an option.   Well, we are, and what you see above is the first RX3 with that wheel!  We’re offering this as a kit (with aluminum rim and stainless steel spokes), or as a complete wheel.

Okay, so first, here are the five items:

  • The 19-inch front wheel.
  • Bridgestone Trail Wing dual sport tires.
  • The spotlights.
  • The sheepskin seat cover (it’s sweet, folks…I really like it).
  • The Tourfella aluminum luggage (also very sweet).

Back to that 19-inch front wheel…take a look…

ServMan24Feb_0111-650

ServMan24Feb_0113-650

Awesome stuff, to be sure.   The stock RX3 spokes are cad-plated steel.   The 19-inch front wheel kit has stainless spokes.   Muey cool, boys and girls.

You’ve already heard me babble on about the aluminum bags.   I like them.  A lot.   My good Baja buddy John asked me if the larger bags make it harder to get on and off the bike.   It’s weird…even though they are substantially larger than the stock bags, it’s actually easier to get on and off the bike with the optional aluminum bags.   I’ll probably measure and compare where the forward edges are on both the stock and the Tourfella luggage later this week to see why that is.   I have a bad leg from a previous adventure (an encounter with an SUV that didn’t end well) and I’m pretty sensitive to this.   I believe mounting and dismounting an RX3 with the Tourfella bags is easier.

You’ve also heard me babble on about the spotlights.   I didn’t think I wanted them on my bike, but I changed my mind about that today, too.   But maybe not for the reason you might expect.   After we took a lot of shots today for our maintenance tutorials and the service manual, I went for a short ride on the RX3.   Unfortunately, it was 4:30 when I left the plant to get the shot at the top of this blog entry, and our southern California traffic was at its hellish worst.    I split lanes when I rode back to the plant, and wowee!  Because of their brightness and because of the bluish hue the spotlights emit, I believe folks thought I was a motor officer.   Traffic parted like the Red Sea (and I was Moses)!   I need these lights, folks.

Last topic for today…the sheepskin cover!   Again, wowee!  It picks you up maybe a half inch, and it is comfortable.  I didn’t get to try it on an extended ride, but I’ve used these before on my KLR, and trust me, they really work.    Yep, CSC will offer these, and you can bet one is going on my bike!

ServMan24Feb_0105-650

We’ll be announcing prices on the 19-inch front wheel kit and the sheepskin seat cover later this week, so stay tuned!


Posted in CSC Motorcycles | Comments Off on We have a winner!

Watch your email…

We’re sending out emails to all the good folks who have ordered RX3 motorcycles asking for information we’ll need from you to expedite processing your bikes when they arrive.  This is just a heads up…keep an eye on your inbox, and you might want to check your spam folders, too (just in case our emails to you end up there).

Thanks!


Posted in CSC Motorcycles | Comments Off on Watch your email…

An RX3 T-Shirt Contest!

Boy oh boy, I had a great day today….

ServMan24Feb_0131-650

Folks, there are five things you can see on Ol’ Blue, one of our RX3 test bikes, that are not stock.   The first person who shoots an email to me and successfully identifies what these five items are wins one of our new RX3 T-shirts (like you see below)…

ServMan24Feb_0016-650

Shoot your entries to me at jberk@cscmotorcycles.com, and we’ll let you know if you won!   As soon as we have a winner, I’ll identify to everyone what we did today!

UPDATE:  Lots of entries so far, but so far, no cigar.   Folks, the 17-inch wheel will be stock on the new bikes, so that’s not a departure from stock.   Look closely!


Posted in CSC Motorcycles | Comments Off on An RX3 T-Shirt Contest!

Hard at work…

Our focus this week is on wrapping up the Service Manual and putting a few more maintenance tutorials on line.   I’ll be in the plant today for just that reason.

In the meantime, I received a nice note from Anne and a photo she took of yours truly, hard at work, photographing the RX3s up on Glendora Ridge Road last week…

photo-2-(8)-JB

Watch the blog, folks.   More good maintenance info is coming your way, along with a review of my new Alaska Leathers seat cover!


Posted in CSC Motorcycles | Comments Off on Hard at work…

Adios, Pusan!

Yep, our bikes are on the open ocean now, folks, and the Germany is en route to Long Beach, California!

HanjinLeavingKorea

Here’s what it looks like on the open ocean around the Germany

Open-Ocean

We’ll keep you posted…


Posted in CSC Motorcycles | Comments Off on Adios, Pusan!

A super deal…

Most of the photos I’ve put here on the blog in the last few days have been with the new Nikon D3300 camera.   It’s working well, it’s small, and it’s light.   That last part about it being light is a big deal, and so is the part about it being small.   It is already working well as the new moto adventure camera.

DSC_0048-650

You may recall my telling you that I bought the D3300 Nikon for $499 at Samy’s Camera in Pasadena and it included the 18-55 lens.   It’s a phenomenal value.

Well, yesterday, I ran across the street to get some coffee at Costco for the coffee machine here in the plant, and wow, they’ve got an even better deal.   Costco is selling the same camera with two lenses (the 18-55 I have, and the 55-200 telephoto lens), and with all that their price is only $599!   That’s a great deal…a lot of performance in a compact package.     Something to think about for the Baja run, boys and girls!


Posted in CSC Motorcycles | Comments Off on A super deal…

Germany comes to Korea…

The Hanjin Germany, that is, and she’s carrying your motorcycles to Long Beach.   Every newspaper we received today (and that’s four of them, folks) led with a story about the dockworkers ‘ strike settlement.  Things are looking good as the Germany takes on more cargo in Pusan.

GermanyPosition2

I was based in Korea for all of 1975.  I’d love to go back today just to photograph the place.   It was an awesome adventure for a young man 40 years ago.

I lived on a missile site on the Yellow Sea coastline waiting for the bad guys (we thought they were bad guys back then) to launch from points west.   That little town called Gunsan on Korea’s west coast (actually it’s Kunsan, just like Busan is actually Pusan) was where our Hawk site stood guard.

Here’s a photo of yours truly and my platoon sergeant, Staff Sergeant Coleman, from August 1975…

JBandPSGColeman-650

Here’s another interesting photo, and I wish I could remember this kid’s name…

Demetrius-650

The dog was Demetrius, and he was a killer.   My platoon had a squad of MP sentry dogs, and those things were tough and mean.   They were trained to do two things:   Grab a bad guy by chomping down on his crotch and pulling him down (that was the first thing) and ripping his throat out if he attempted any resistance (that was the second thing).   It’s hard to imagine a dog doing the first without the bad guy resisting, so the story would not end well if you were the dog’s target.   From the Army’s perspective, releasing a sentry dog against a bad guy was an application of deadly force (legally, it was the same as shooting someone).   My platoon had six of these dogs.   The dogs were trained to obey only one handler; when the handler left the Army, his dog had to be destroyed.

This particular dog handler (the guy in the photo above)  was a nice kid who was a photography nut, and in particular, a Nikon enthusiast.  This guy voluntarily extended his stay in Korea because he could buy Nikon lenses for less than they cost in the US.   That made an impression on me.   I was using a little cheap 110 film Minolta (that’s what the two photos above came from).   My dog handler’s photos were professional quality.  It made an impression and the Nikon name stuck in my mind.   It’s why I use Nikon gear today.

Good times back then, folks.    Better times today.


Posted in CSC Motorcycles | Comments Off on Germany comes to Korea…