


This maintenance tutorial explains how to set up your new RX3 motorcycle. If you opt to do the setup yourself, your RX3 motorcycle will be delivered in a crate as you see in the video below.
Let’s get the warnings and stuff out of the way first:
- The first thing you should do is check the condition of the delivered crate. If there are any anomalies, stop and give us a call at 909 445 0900.
- The next thing you should do is check the VIN numbers on the exterior of the crate. Compare these numbers to the documentation delivered to you. If the numbers don’t match, stop and give us a call at 909 445 0900.
We’re not expecting any problems, but I had to tell you the above to satisfy the legal beagles.
Unpacking
Disassemble the shipping crate, taking care not to damage the motorcycle or its components. When you cut the cardboard off, cut it straight at the vertical corners so if you need to box it up again, you can tape it (bear with me, folks…more legal beagle stuff).
Carefully examine the motorcycle and the other components to make sure there’s no shipping damage. If there is any shipping damage, call us at 909 445 0900.
Unbolt the top and sides of the shipping container. Take out the parts around the motorcycle. Note that the motorcycle will not have the front wheel installed (the motorcycle forks will be bolted to the shipping container base). The motorcycle’s rear wheel will be captured in a trough in the shipping container.
At this point, it’s best to proceed with two people. You don’t have to be Arnold Schwarzenegger types; on our bikes, Steve and Lupe did the unpacking and the steps I’m going to describe next.
You have to get the motorcycle off the shipping container base to set it up. Unbolt the front forks from the shipping container base. Lift the rear of the motorcycle and swing it out of the shipping container base. Lift the front end of the motorcycle, swing the front end away from the shipping container base, and prop up the motorcycle with a suitable support. You want the front forks off the ground so you can install the front wheel.
Front Wheel Installation
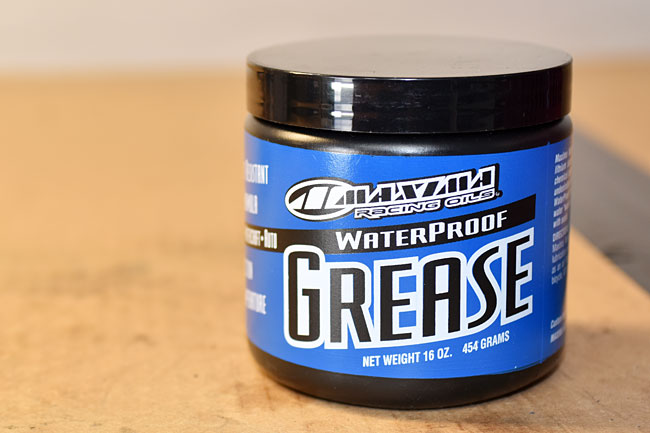
Install the front wheel using the hardware already installed in the front forks (the front axle, the front axle nut, and the four clamp bolts). Add grease to the bearings, the speedometer drive, and the axle. We recommend Maxima grease, and if you need this, give us a call at 909 445 0900.
Make sure the speedometer drive is aligned with the slots in the front wheel. Move the front axle through the forks from right to left, oriented as in the photograph. Install the 17mm axle nut and tighten. Tighten the two pinch bolts on the right fork.

At this point, you can take the motorcycle off the support used to get the front end up in the air and put the motorcycle on its sidestand.
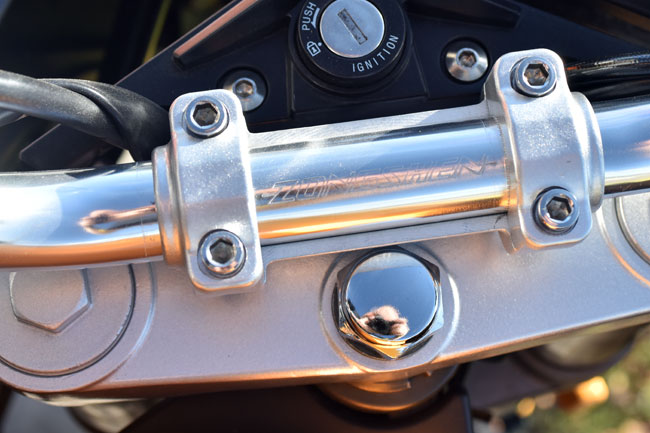
Handlebar Installation
Install the handlebar into the top yoke with it centered and adjusted before fitting the clamps. Install four M8×30 hexagon socket head screws and tighten. Be careful not to scratch the motorcycle.
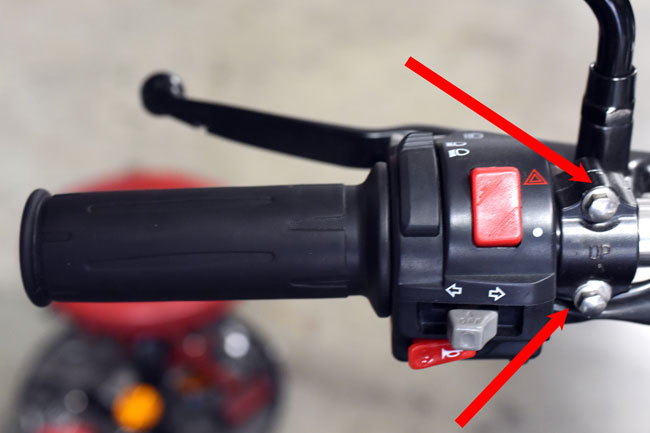
Clutch Lever Installation
Remove the bolts from the clutch lever support using an 8mm wrench. Install the clutch lever on the handlebar and tighten.
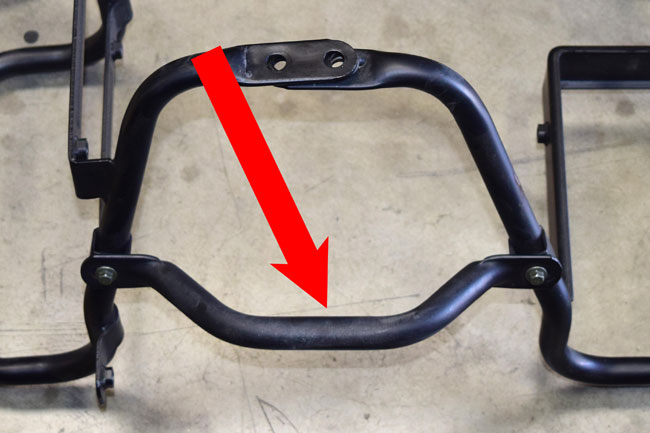
Motorcycle Guard Bar Installation
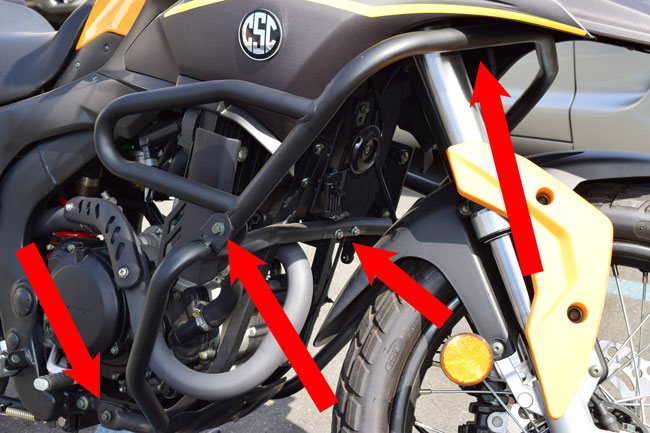
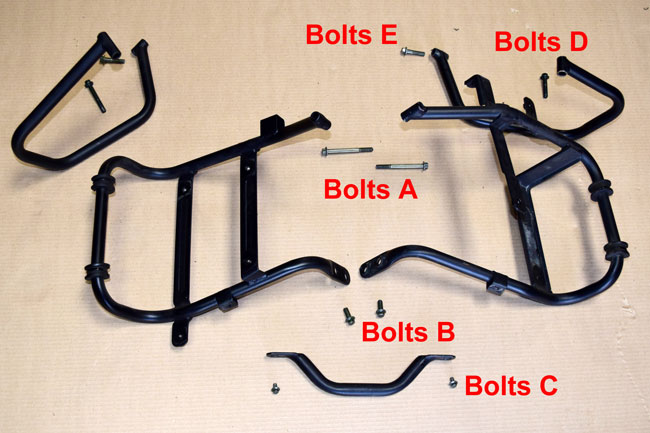
We used to call these crash bars. Now they are guard bars (ah, those lawyers again). We’re going to install the forward guards first. The forward motorcycle guard bar layout and required fasteners are shown below.

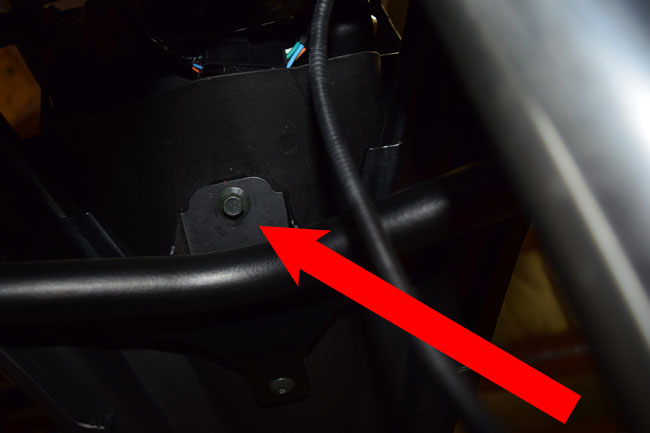
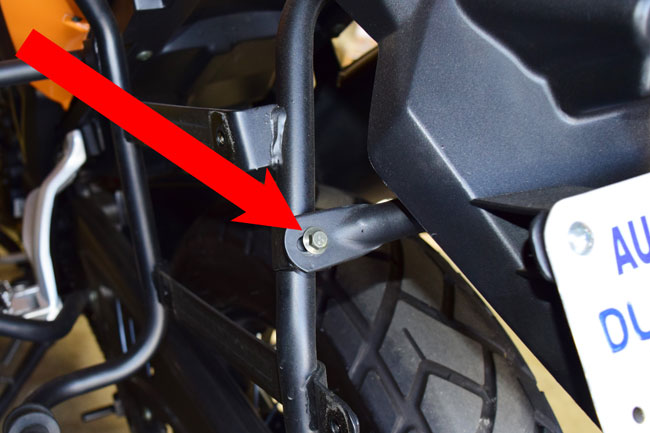
Start by installing the upper portion beneath the front fender. It attaches with a single M8×16 flange bolt as shown in the photos below. It’s under the headlight.

Next, we’ll install the lower portion of the forward motorcycle guard. Install the guard with two bushings to the lower portion of the guard and two M8×50 flange bolts. Install the U-bolt and attach to the frame using two M8 flanged self-locking nuts. Install two M8×45 flange bolts to connect the upper and lower portion of the forward motorcycle guards.
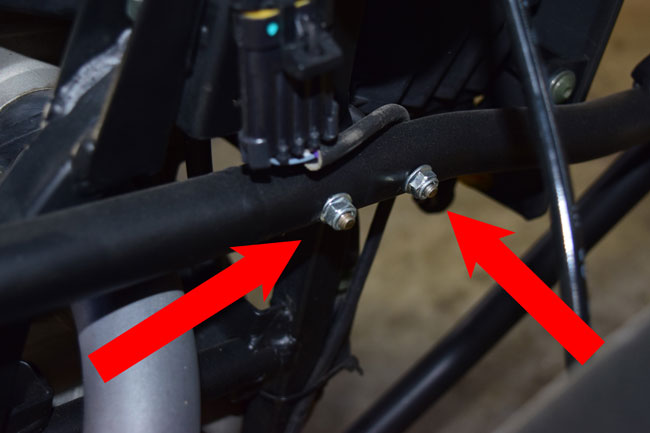

Once you’ve assembled everything with all of the nuts and bolts, tighten all of the fasteners.
When finished, the forward motorcycle guards should appear as shown below, with red arrows indicating the bolt attachment points.
Rear Rack
Okay, so far, so good. Let’s install the rear rack next. Carefully install the rear rack over the rear body panels (be real careful not to scratch the rear body panels). Although the rear rack bolts and the rear guard is shown in this photo, don’t install them yet. Steve and Lupe got a little ahead of me when I was photographing the setup of this motorcycle.
Rear Motorcycle Guard Installation
The rear motorcycle guards and their components are shown in the photo below.
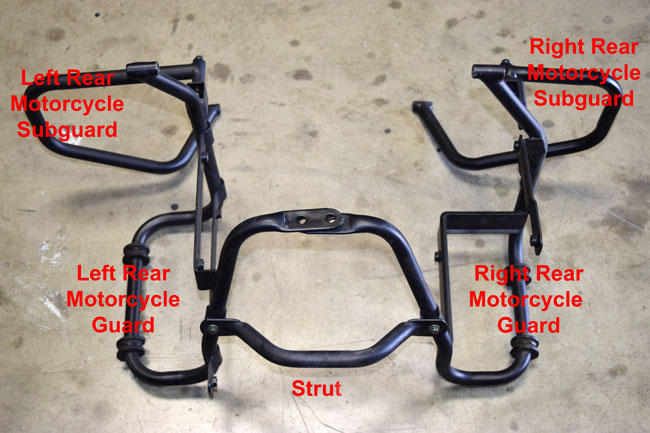
The photo below shows the rear engine guards assembled off the motorcycle. I’m showing you this photo only for the purpose of clarifying the relative position of the parts in the assembled condition. Don’t pre-assemble these pieces yet; I only wanted to show you how everything fits together so it will be more clear in the instructions below.
Position the right rear motorcycle guard on the right side of the motorcycle, like you see in the photo below.
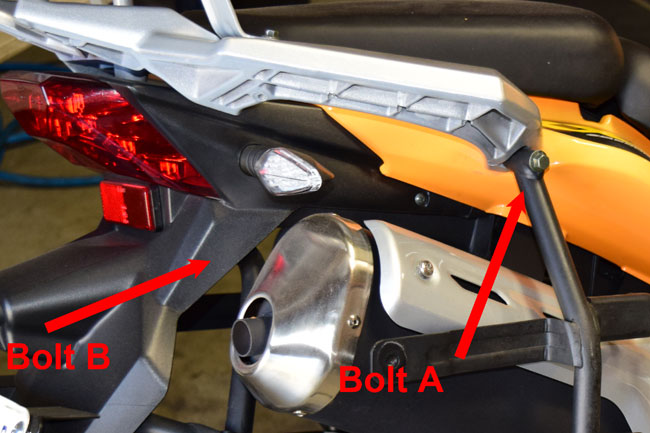
Insert Bolt A through the right rear motorcycle guard and the rack and hand tighten to frame. Do the same on the left side of the motorcycle The next stop is to install Bolt B. There are two of these bolts. They go beneath the fender, and they go through both the left and right rear motorcycle guards.
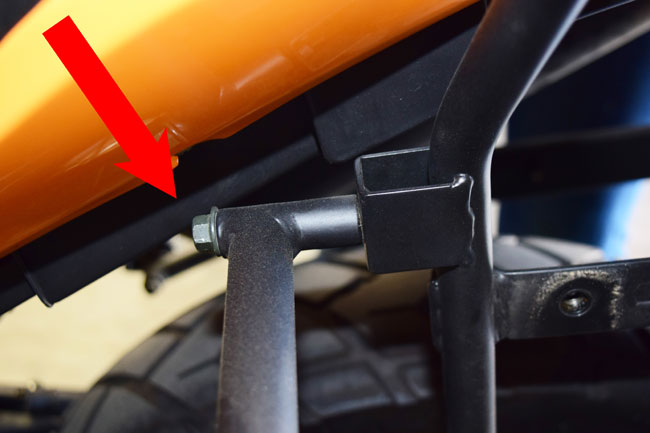
Now we’re going to install the rear motorcycle subguards. Insert Bolts D and E through both the right and left rear motorcycle subguards. The upper portion of the subguard secures to the rear motorcycle guard with Bolt D; the lower portion of the subguard secures to the rear footguard strut with Bolt E. You can see where these go in the photos below.

Once the rear motorcycle subguards have been installed, the next step is to install the strut that connects them. Install the strut to the left and right rear motorcycle guards with Bolts C, like you see in the photos below.
After completing all steps above for the rear rack and rear motorcycle guards, tighten all of the fasteners.
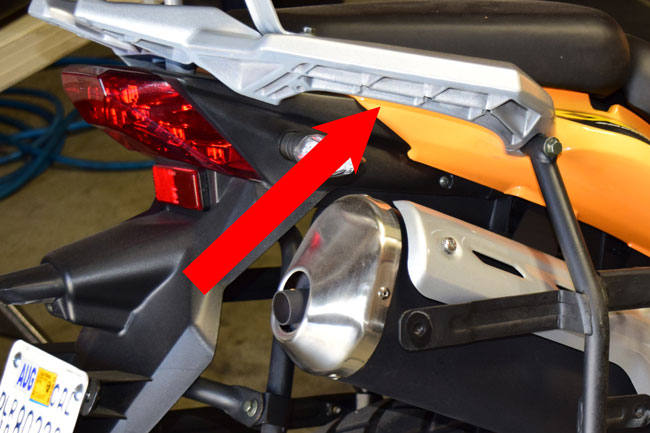
Top Case Installation
Place the trunk connecting plate bushing beneath the top case support, and install one M8×85 flange bolt.
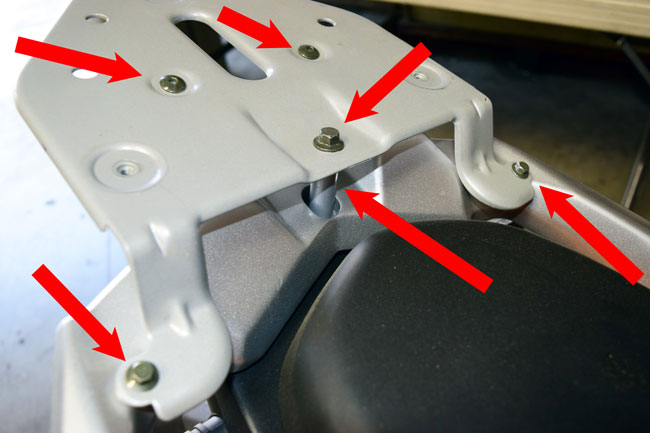
Install top case support plate with two truss head Allen bolts and two truss head bolts. Tighten all fasteners.
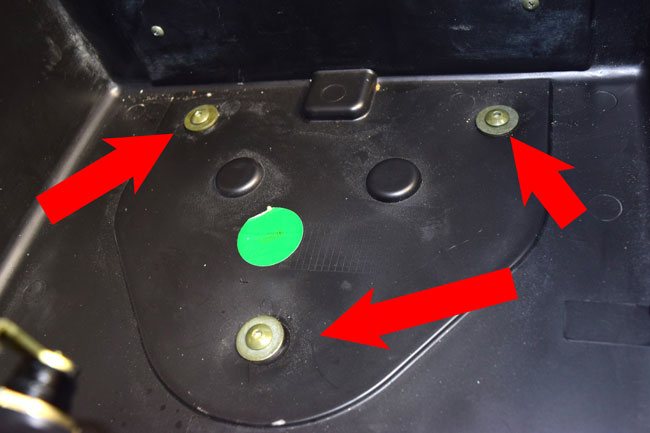
Now we can put the top case on the top case mounting plate with three 4mm Allen head bolts. Tighten the Allen bolts and then install the top case pad over the bolt heads at the bottom of the top case.
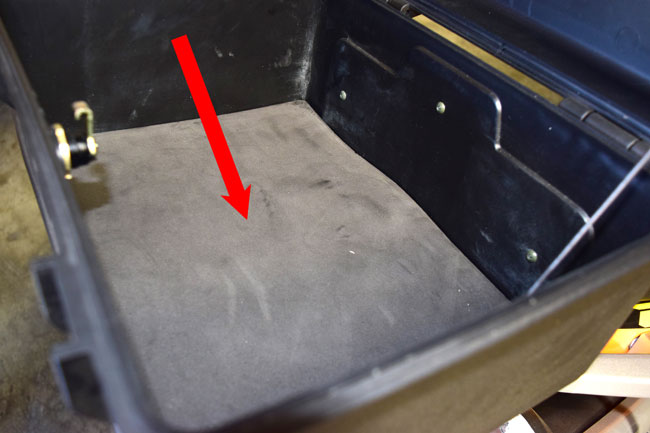
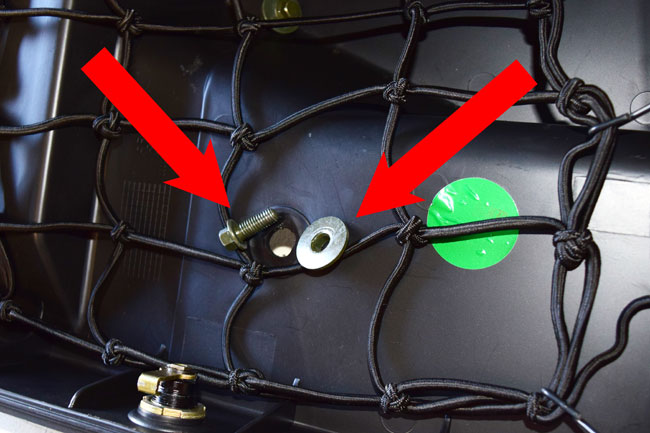
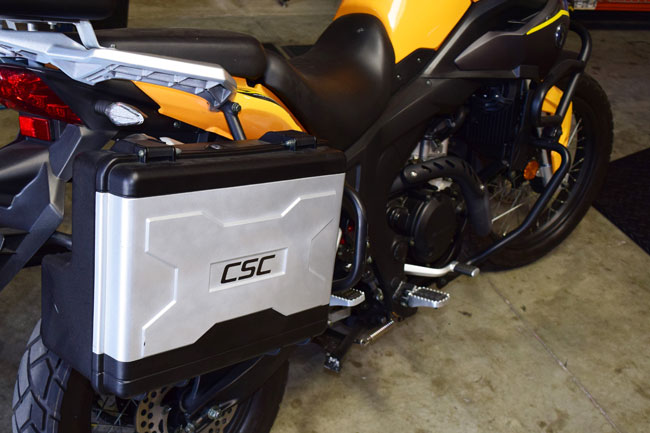
Pannier Installation
Each pannier is secured to the rear motorcycle guard with four M8×20 flange bolts and flanged washers (a pannier is what we used to call a saddlebag). The annular step on the washer faces toward the motorcycle and centers the bolt in the rear motorcycle guard bushing. Install all four bolts and tighten.
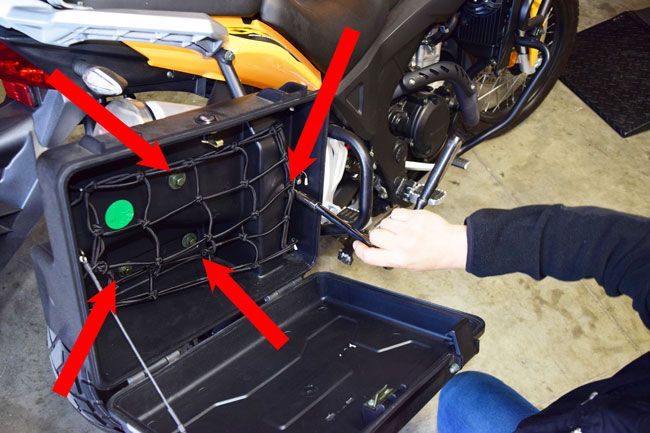
After doing the right saddlebag (oops, I mean pannier), repeat the process for the left pannier.
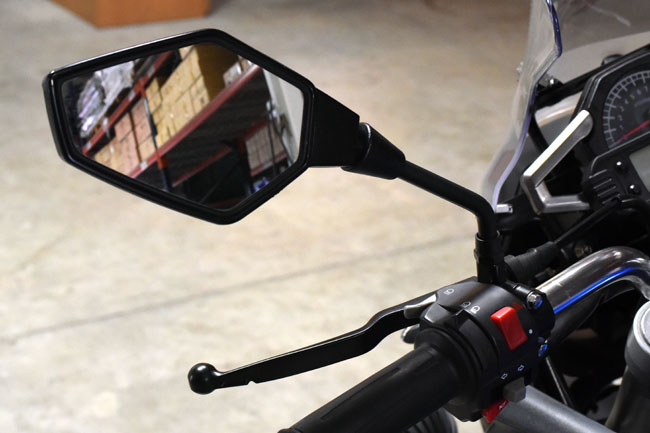
Rearview Mirror Installation
Install the left and right rearview mirrors on the handlebars.
Battery Installation
The RX3 motorcycle is shipped with the battery installed in the motorcycle, but the battery contains no electrolyte. The electrolyte is packaged separately and included in the motorcycle shipping crate.
The battery is located under the seat on the right side of the motorcycle. It is accessible by removing the right body panel underneath the seat. It is not necessary to remove the seat to gain access to the battery. It will be easier to work around the battery, however, if you remove both seats.

The red harness is the positive side of the motorcycle electrical circuit; the black terminal is the negative side of the motorcycle electrical circuit.
Remove the electrolyte container, remove the battery cells’ covering strip, and fill each cell with electrolyte. Be careful not to spill the electrolyte. If any electrolyte contacts your skin, flush the area with large quantities of water. If any electrolyte contacts your eyes, flush your eyes with large quantities of water and seek immediate medical attention.
Prior to installing the battery caps, charge the battery with a battery charging device with a charging rate that does not exceed 2 amps. When charging the battery, leave the battery cell caps off. Only charge the battery in a well-ventilated area, and keep the charging battery away from any ignition sources. We recommend using a Battery Tender charging device for this initial charge. These things are great, and I use mine all the time. I keep the my bikes on a battery tender whenever they are in my garage. If you wish to purchase a Battery Tender, please contact us at 909 445 0900.
After the battery is fully charged and the battery caps are secured, reinstall the battery in the motorcycle. The battery should be oriented so that the positive terminal faces the rear of the motorcycle, and the negative terminal faces the front of the motorcycle. Connect the red cable to the positive terminal, and the black cable to the negative terminal. Secure the rubber retention strap around the battery, and reinstall the right body panel.
Oil
We recommend that you drain all oil from the engine, and replace it with 1.7 liters (55.4 ounces) of approved 5W-40 or 10W-40 motorcycle oil. Don’t use any oils intended for automotive applications. Those oils usually contain friction inhibitors, which will make your motorcycle’s clutch slip. We sell Maxima motorcycle oil, and if you want us to ship a couple of quarts to you, give us a call at 909 445 0900.
Radiator Fluid
You should check to make sure the radiator fluid is at the proper level (it’s supposed to be even with the bottom of the radiator cap neck), and the overflow reservoir should be about half full. Add approved coolant if the radiator needs to be topped off.
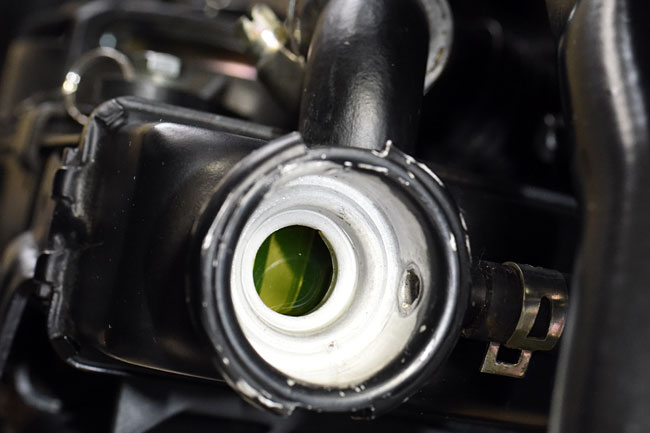

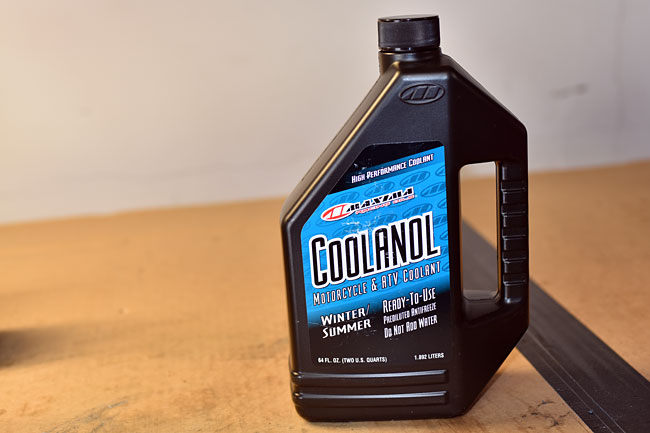
Make sure you use a coolant approved for use in a high performance aluminum engine. We sell that, too (we recommend Maxima Coolanol), so give us a call if you need this item.
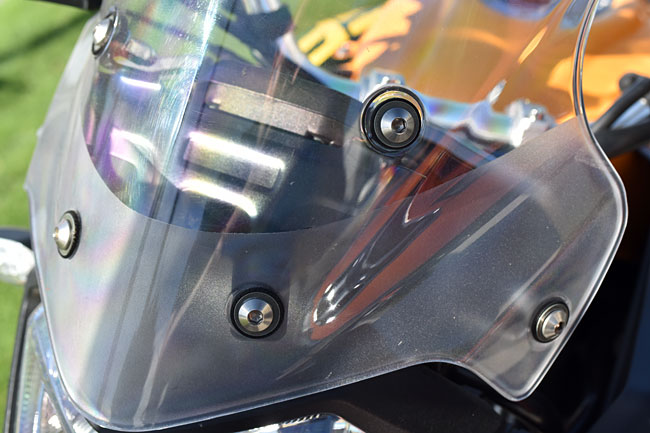
Windshield Installation
Install the windshield on your motorcycle. It is secured with six Allen head bolts like you see in the photos below. A cap head nut is used on the inside of the windshield for each Allen head bolt.

Fuel
Fill with the fuel tank with 87 octane (or higher) gasoline.
Final Inspection
Perform the following inspections after completing the setup procedure:
- Check to confirm all fasteners are properly tightened and all components are installed correctly and in an operational state.
- Swing the handlebars from side to side to make sure motion is uninhibited.
- Insert the ignition key and turn it on.
- Check horn function, turn signals, headlight high and low beam, brake lights for front and rear brake activation, and instrument panel readout.
- Check the oil level and the tire pressure.
- Check the rear wheel alignment and chain tension. These are set up from the factory, but it’s always a good idea to check these items.
- Confirm the motorcycle is in neutral.
- Pull the clutch in and start the motorcycle. Allow the engine to warm up.
- Test ride the motorcycle to confirm everything works the way it is supposed to.
And folks, that’s it. It’s time to go for a ride!


 SG250 San Gabriel Cafe Racer
 TT250 Enduro