Secret Missions, Moto Colombia, Baja, Tutorials, Service Manuals, and more…

Wow, there is a lot happening.   I’m going “wings in the wells” in a few days on another secret mission…this time to Singapore.   It’s 22 hours to get there, and 25 hours to get back.   I’ll be catching up on a lot of reading!

Singapore!

Singapore!

Moto Colombia, my book about the recent adventure in Colombia, is nearing completion.  I finished the first draft last weekend and I’m in the polishing phase (you know, correcting errors, adding photos, and that sort of thing).    There were many things about the Colombia ride that made it special, including the camaraderie and the conversation.   During one of our dinner conversations, my good buddy and guide Juan told me his interest in riding started almost at birth.   His Mom had a moped, and every where they went, they went on two wheels…
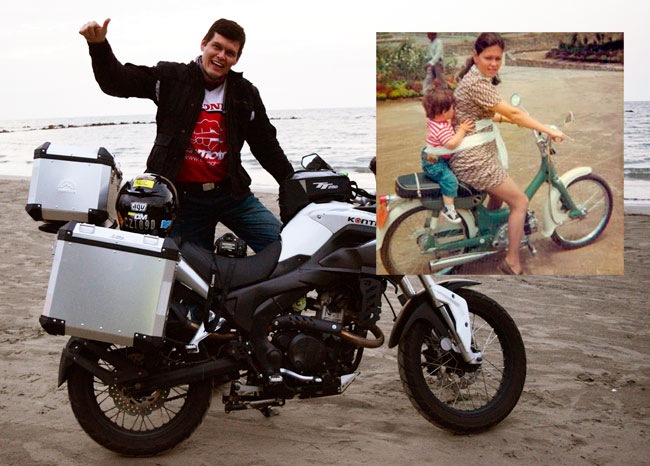
Then and now...Juan on the shores of the Caribbean during our recent Colombia moto adventure, and riding with Mom as a child!

Then and now…Juan on the shores of the Caribbean during our recent Colombia moto adventure, and riding with Mom as a wee one!

I don’t think I’ve ever enjoyed writing any book as much I have enjoyed writing Moto Columbia.   Colombia was one hell of an adventure and I found myself reliving it as I wrote the book.  You guys will love the book, and it will go to press before I leave for Singapore.

Cover-Prel

If you enjoyed 5000 Miles At 8000 RPM, you will love Moto Colombia!

Baja! 

The Mission in San Ignacio, one of the many cool places we’ll visit on the CSC 2nd Annual Baja Run!

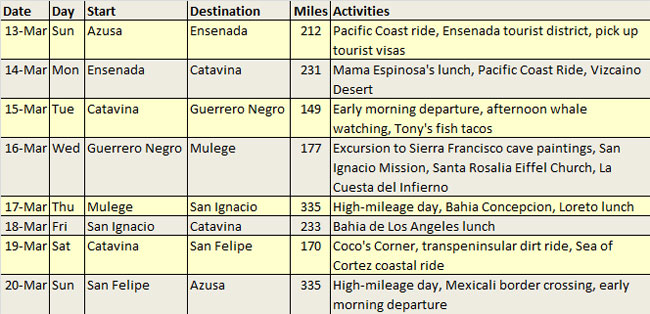
Ah, on to the next adventure!  Baja is coming up quickly, folks.  If you’re riding with us, shoot me a note (jberk@cscmotorcycles.com) to confirm your participation.   We’re not looking for any “I’d like to go if…” or other conditional inputs….if you’re going, you need to let us know.  We have a couple of openings due to folks dropping out, and we’re finalizing the participant list now.  It’s RX3s only on this ride (we’ll do another ride later for those of you who want to do Baja on your TT250s).

Here’s our Baja itinerary:
Here’s a list of what I think you’ll need for Baja:

  • I’m recommending you bring $800 to $1000 with you.
  • You’ll need a US passport.
  • You’ll need Mexican insurance.  Your US insurance won’t do you any good in Mexico, and if you are stopped by a police officer and you cannot show that you have Mexican insurance, you’ll be in a tough spot.  I always get my insurance online, and I always use BajaBound.  You can get to them at www.BajaBound.com.
  • You’ll need to bring any spare parts you think you might need.  I’m bringing tubes, a small tire pump (we sell the electrical ones), tire irons, my tools, a spare clutch cable, a spare throttle cable, a spare headlight bulb, a chain master link, a countershaft sprocket nut, steel wire, and chain lube.  You’ll need to bring your own spares.  The important thing is that you have your own spares and you will need to address any issues you have with your bike while we are in Baja.  We won’t have a chase vehicle.
  • Regarding tools, I always have the stock RX3 tool kit under the rear seat, and I bring along a few extra things.  I’ll have a large extension and a socket for quick chain adjustments, 10mm and 12mm wrenches, a few sockets and a ratchet, a combination Phillips head/flathead screwdriver, and my Gerber multitool (it’s like a Leatherman multi-tool).
  • My advice is to put a new battery in your bike.  I would not go to Baja limping along on a battery that’s getting old.
  • You’ll need good tires.   If your tires are worn, don’t assume you can get one more trip out of them; they go really fast once they are worn.
  • If you are on the stock (original) chain and this 1800-mile trip will take you past 6000 miles, you should probably put a new chain on your bike.
  • I’d advise bringing along some Immodium.  If you’ve never been to Mexico, you might want to have something in case your digestive system reacts poorly to the Baja bugs.   The good news is that if this happens, it’s a sort of an inoculation for future trips.   You probably won’t get it again.
  • I’d advise bringing a real camera.  A cell phone camera won’t do justice to what we are going to see.

If any of you have any questions on the upcoming Baja ride, feel free to email me.

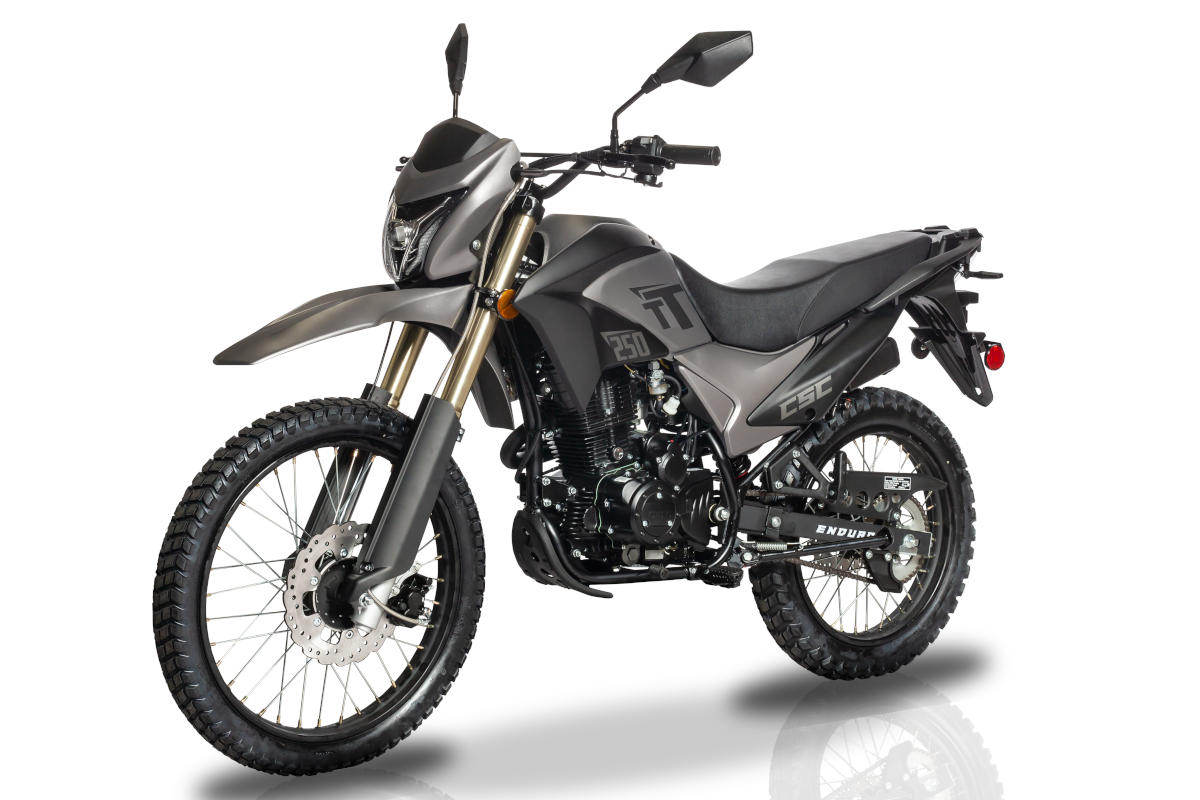
One last topic, and that’s the recent flurry of TT250 tutorial activity.   Gerry and I have been super busy on these.  We have a few more going online in the next several days.   It’s been fun doing the TT250 tutorials, and it’s been enlightening.  Getting into the guts of these new motorcycles and seeing what the engines look like inside is reassuring.   The TT250 is a quality motorcycle, folks, and it will go the distance.  At any price, it is a fantastic bike.   At $1895, it’s incredible.  You’re going to love the bike.  We’ve had a lot of compliments on the tutorials from you and we appreciate your kind words.  One more bit of good news here:  We’re assembling our TT250 Shop Manual, and everyone who buys a new TT250 will get a free copy.

That’s all for now, my friends.   Hey, I don’t know about you, but I’m getting out for a motorcycle ride this weekend!

Posted in CSC Motorcycles | Comments Off on Secret Missions, Moto Colombia, Baja, Tutorials, Service Manuals, and more…

TT250 Air Filter Replacement

This maintenance tutorial addresses removal and replacement of the TT250 air filter.  The TT250 uses a paper air filter.   We stock all parts for the TT250 motorcycle, so when you need a new air filter, please call us at 909 445 0900 and we will ship an air filter to you.

You should check your TT250 air filter every 2500 miles.  If it is dirty or clogged, it will reduce the motorcycle’s performance and you should replace it.  You should never operate your TT250 without the air filter.

Access to the TT250 air filter is gained by removing the rear body panels, the rear seat, and the airbox cover.

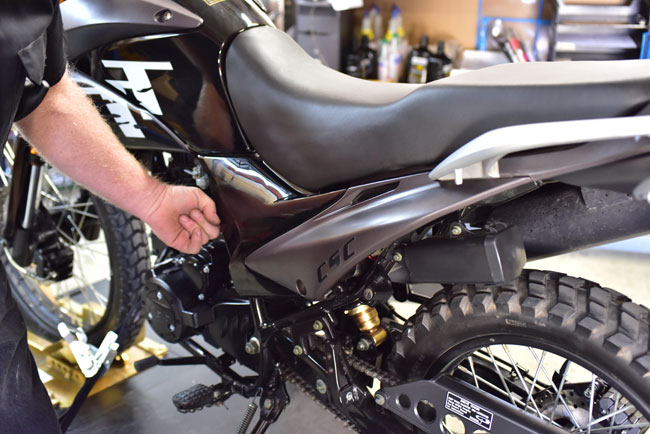
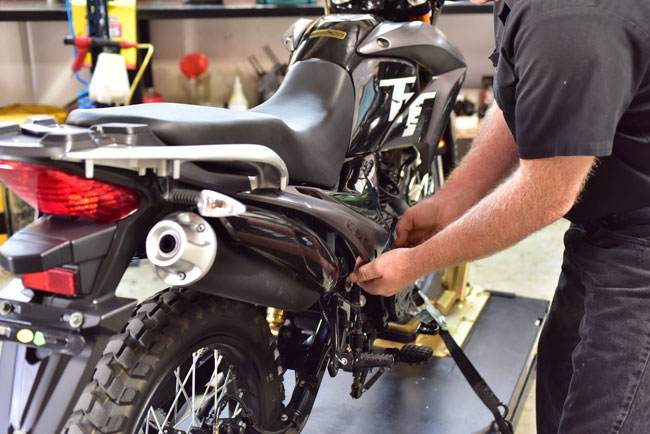
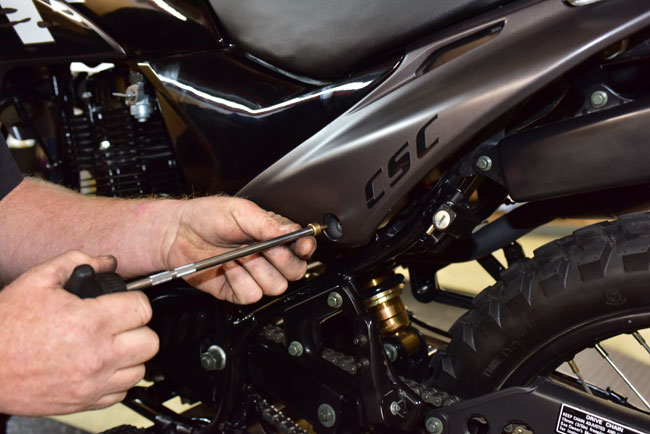
The rear body panels are each secured by a single screw and two rubber pop-off retaining posts.  Remove both rear body panels.

150126_3486-650

150126_3487-650

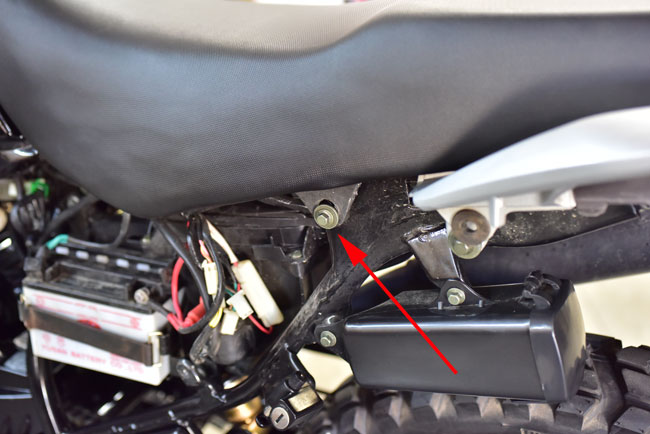
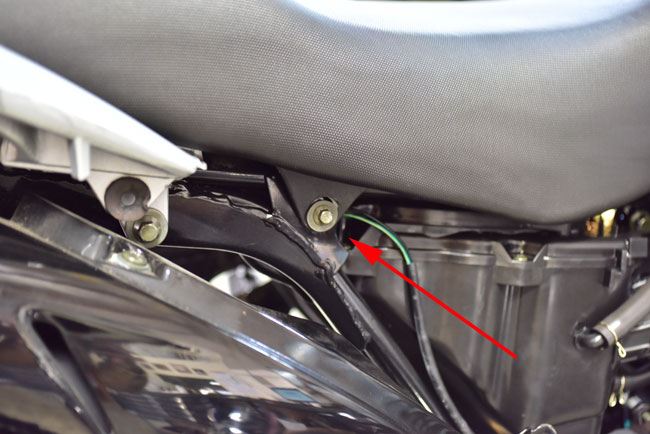
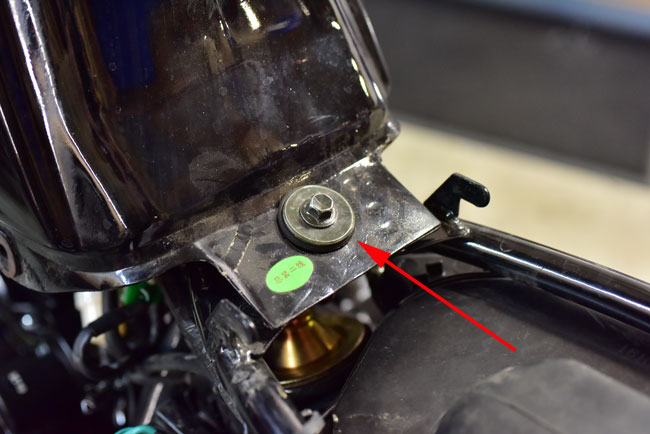
The seat is secured by a 10mm bolt on either side.  Remove both 10mm bolts and slide the seat to the rear of the motorcycle to remove it.

150126_3488-650

150126_3489-650

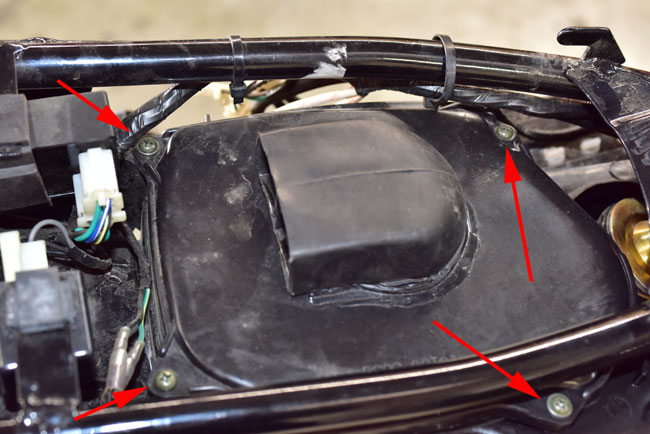
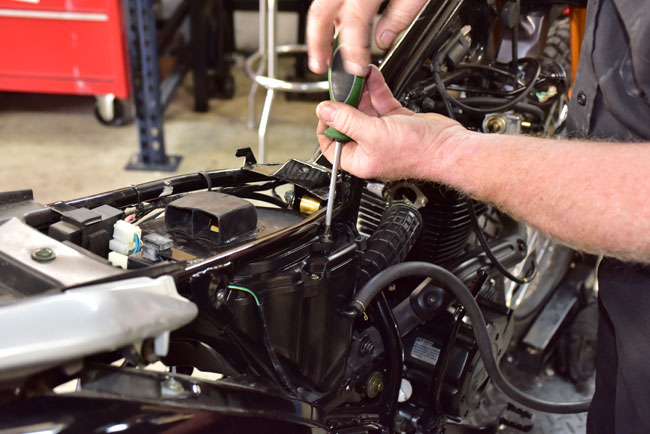
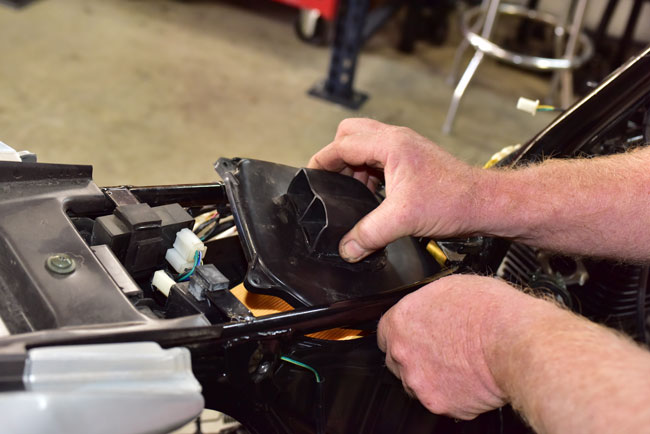
After removing the seat, you will see the airbox cover.  It is secured by four Phillips head screws.  Remove the screws and the airbox cover.

150128_3641-650

150128_3642-650

150128_3643-650

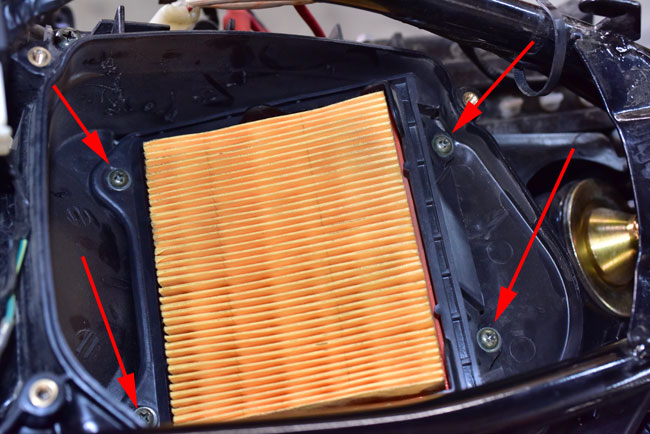
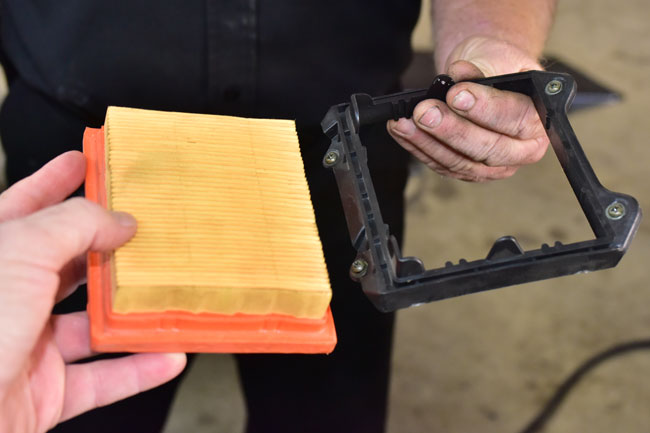
After removing the airbox cover, the air filter and the air filter retainer will be visible.

If the air filter is dirty or clogged, it should be replaced.  Please contact us at 909 445 0900 to order replacement air filters.

The air filter retainer is secured by four Phillips head screws.  To remove the air filter, remove the four air filter retainer screws.

150128_3645-650

The air filter can be removed from the retainer at this point.

150128_3649-650

Assembly is the reverse of disassembly.   Install the new air filter, and you are ready to ride!

Posted in CSC Motorcycles | Comments Off on TT250 Air Filter Replacement

Consumer Reports, well, reported…

I guess I missed this in the LA Times when I slurped down my coffee in the morning, but thanks to the alert guys at the ChinaRiders.net site, I saw it.   It’s worth a read…

http://www.latimes.com/business/autos/la-fi-hy-consumer-reports-motorcycle-ratings-20160127-story.html

Lots of interesting findings in there, especially as they pertain to BMW.   There’s nothing that’s surprising, though.  Harley guys are convinced they love their Harleys, and BMWs are not as reliable as their public relations people think they are.  We’re too small to have been noticed yet, but folks, we’re doing okay.

Posted in CSC Motorcycles | Comments Off on Consumer Reports, well, reported…

TT250 Carburetor Maintenance

150128_3549-650

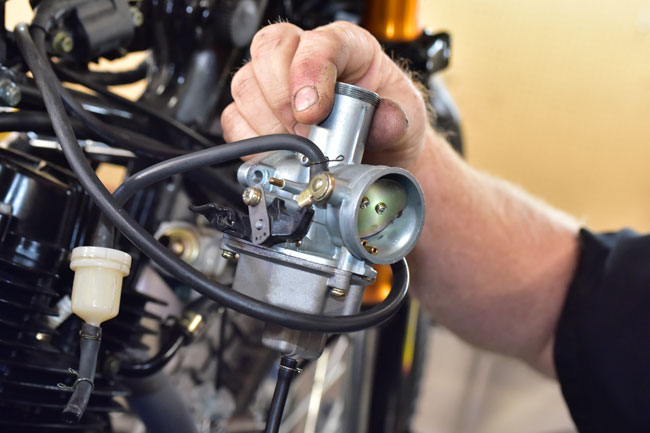
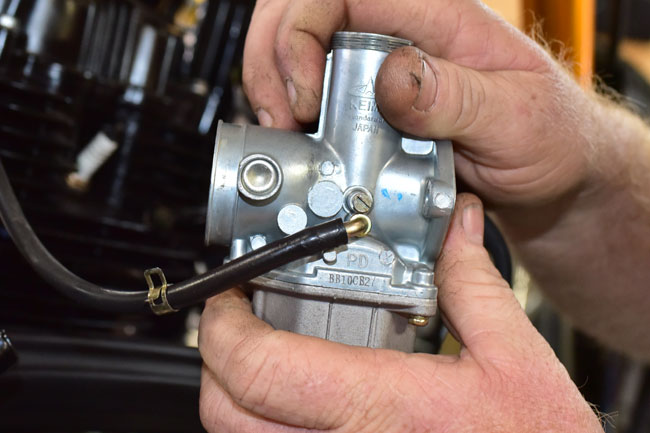
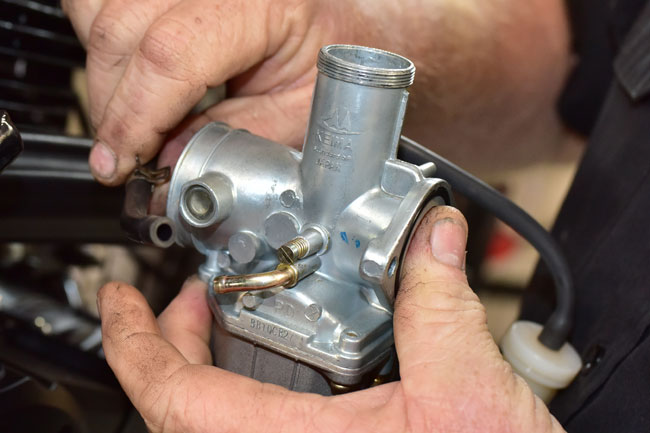
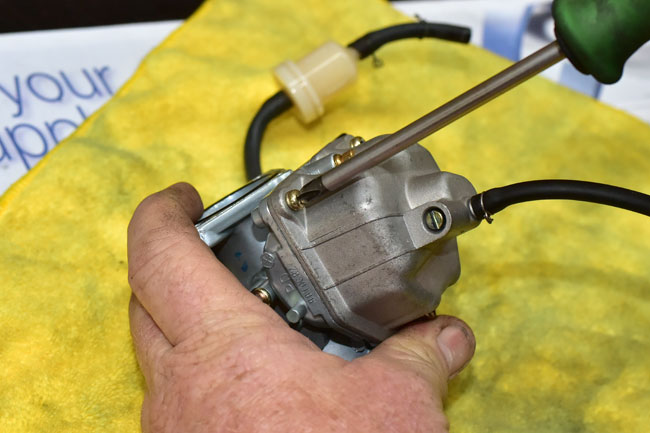
This tutorial addresses TT250 carburetor maintenance, and specifically, carburetor removal, disassembly, cleaning, and reassembly.  If your motorcycle is running rough and the problem is related to the carburetor, or if your motorcycle has not been operated for a long time and you did not treat the fuel prior to storage, the fuel will create gums that can clog the carburetor jets and affect engine performance.  This tutorial will show you how to remove, disassemble, clean, reassemble, and reinstall your carburetor.

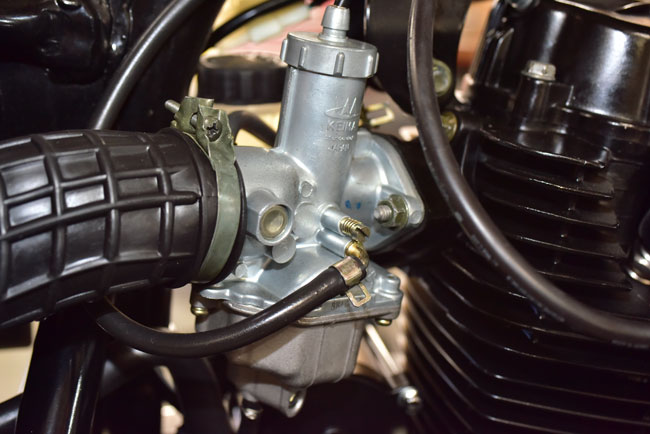
The TT250 uses a conventional Keima slide carburetor.   It will be much easier to gain access to the carburetor if the fuel tank is removed.  Removing the fuel tank involves removing the rear body panels and the seat, detaching the tank body panels from the frame (you do not need to remove the body panels from the tank), disconnecting the fuel line from the carburetor, removing the fuel tank, and disconnecting the fuel tank electrical connection to the fuel gage.

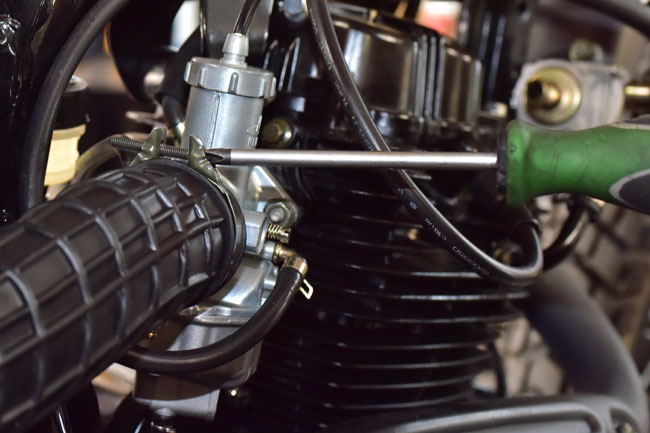
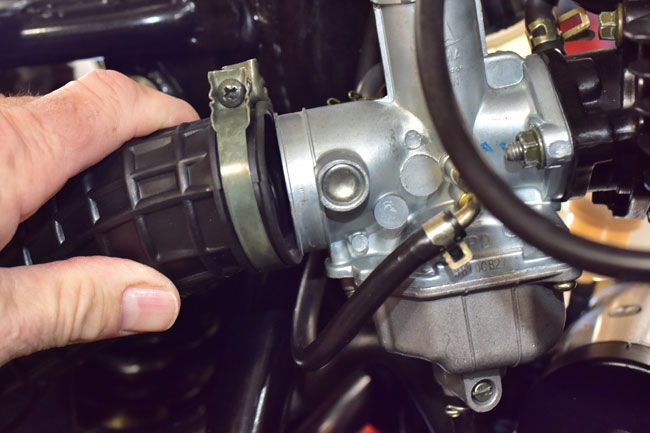
Loosen the Phillips head screw securing the airbox inlet to the carburetor and detach it from the carburetor.

150128_3550-650

150128_3551-650

Unscrew the carburetor slide assembly cap and remove the carburetor slide assembly from the carburetor.

150128_3553-650

150128_3554-650

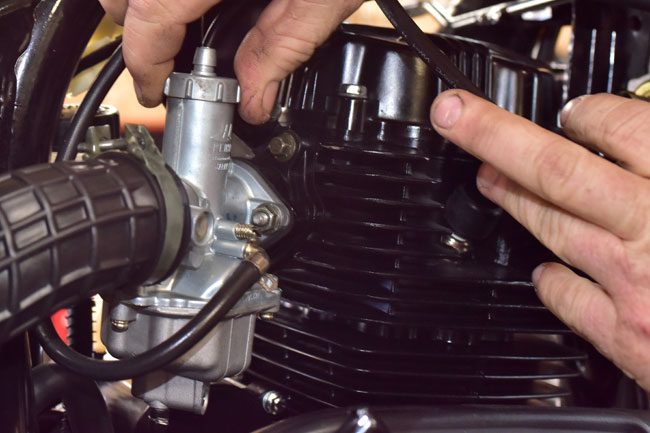
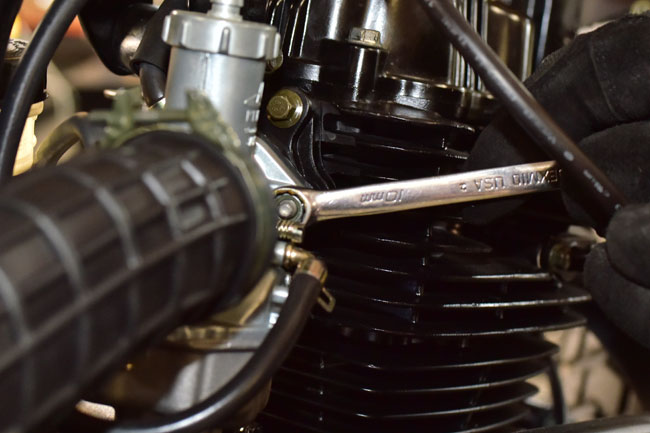
Remove the two 10mm nuts securing the carburetor to the intake manifold.   It will be easier to access the left side carburetor mounting nut if you first detach the rear brake master cylinder.

150128_3552-650

150128_3555-650

Pull the carburetor away from the engine and detach the vent hose such that you can move the carburetor to a clean work area.

150128_3557-650

150128_3559-650

150128_3560-650

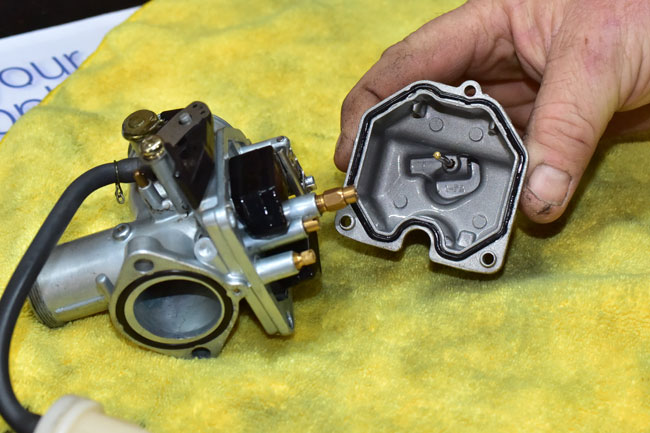
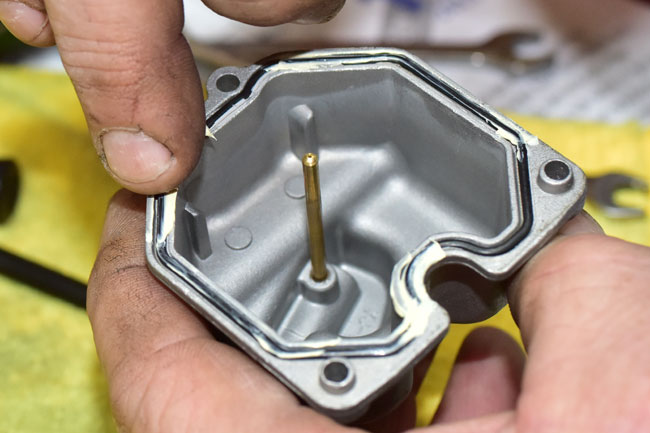
Remove the carburetor float bowl

150128_3562-650

150128_3564-650

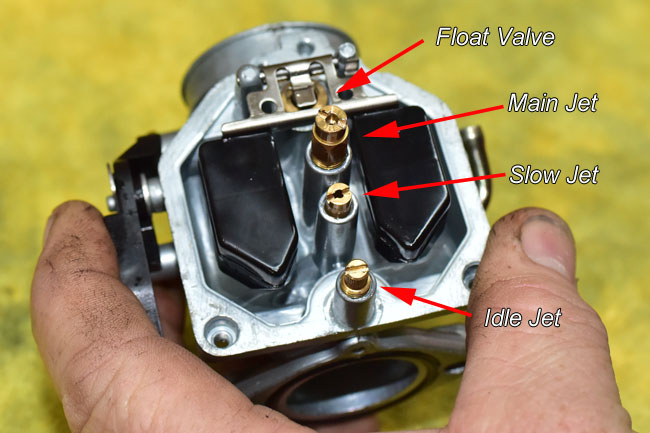
At this point, when you invert the carburetor you can see the float, the float valve, the main jet, the slow jet, and the idle jet.

150128_3569-650

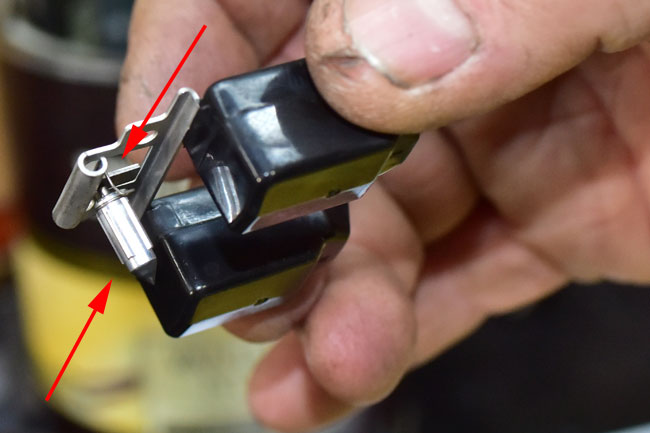
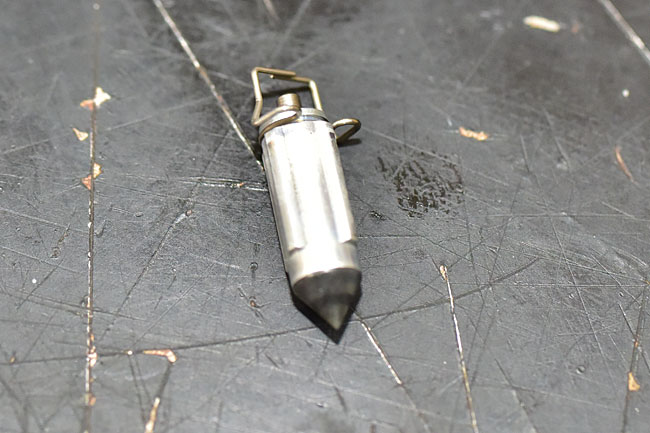
The float pivots on the float pivot shaft to operate the float valve.  The float valve is connected to the float by a wire clip.

150128_3570-650

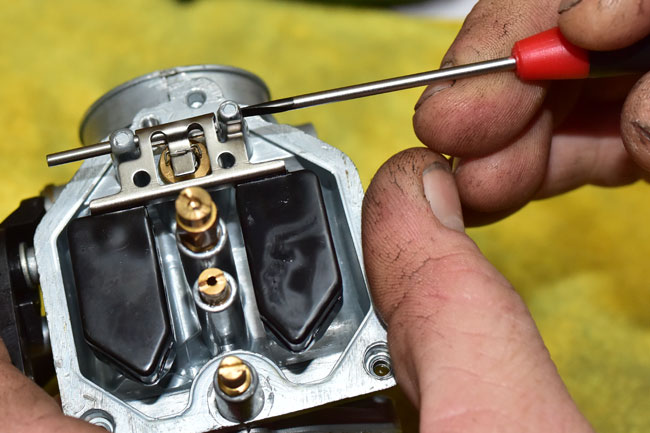
Gently push the float pivot shaft out of the carburetor body.

150128_3573-650

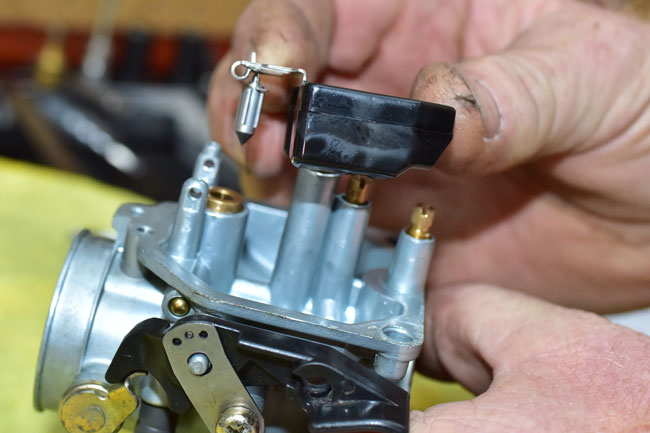
Lift the float and the float valve from the carburetor body.  Take care not to drop the float valve; it will fall off of the float when the float is tilted.

150128_3574-650

150128_3629-650

150128_3606-650

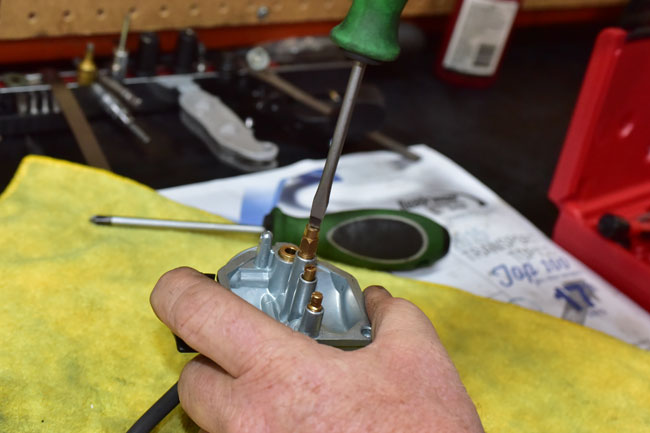
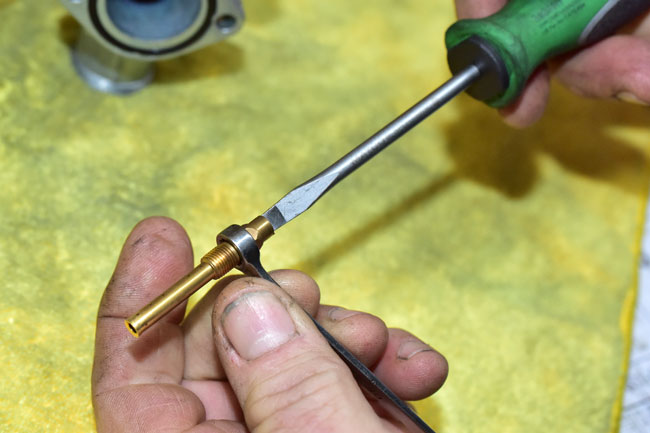
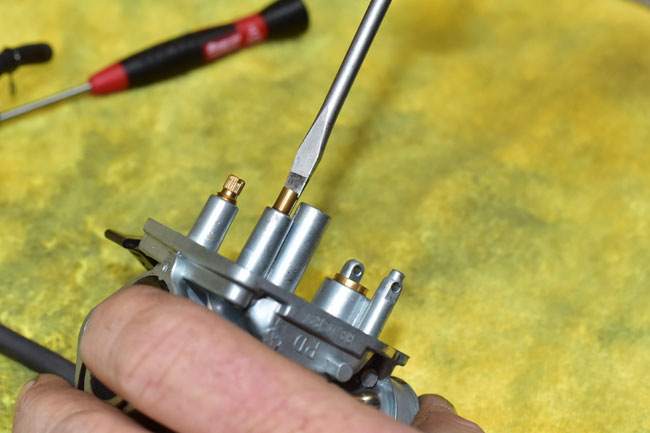
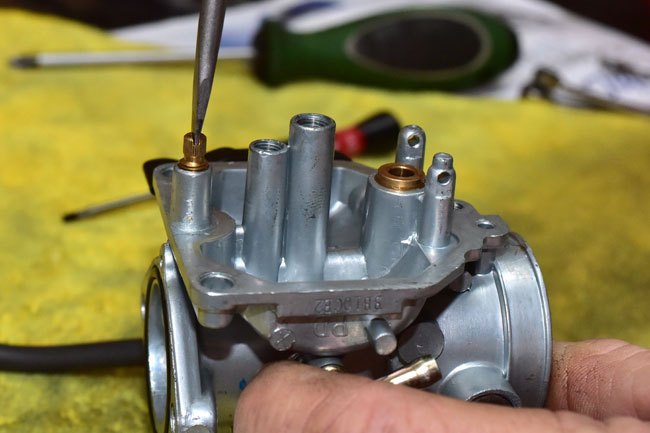
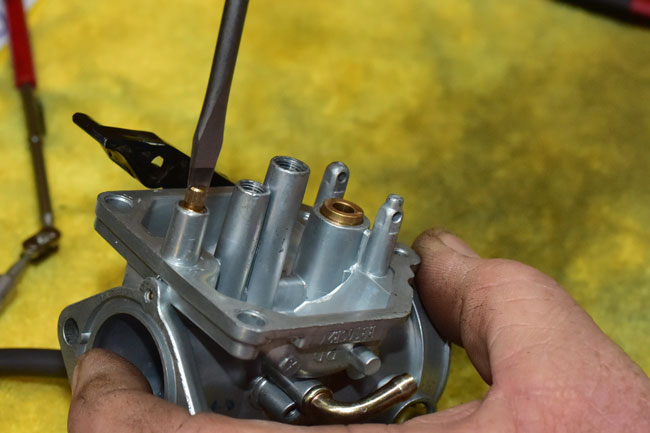
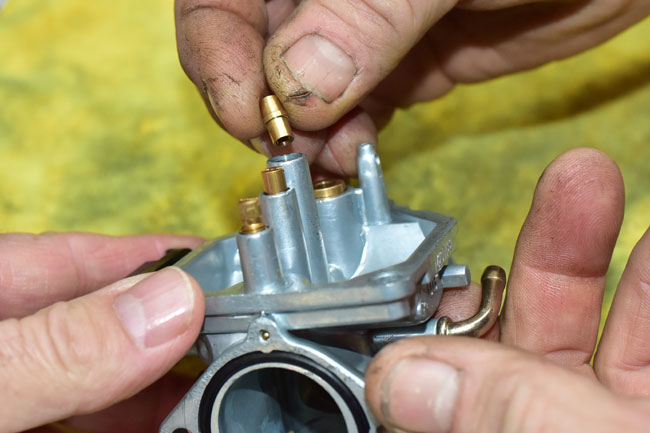
Remove the main, slow, and idle jets from the carburetor with a flat head screw driver.

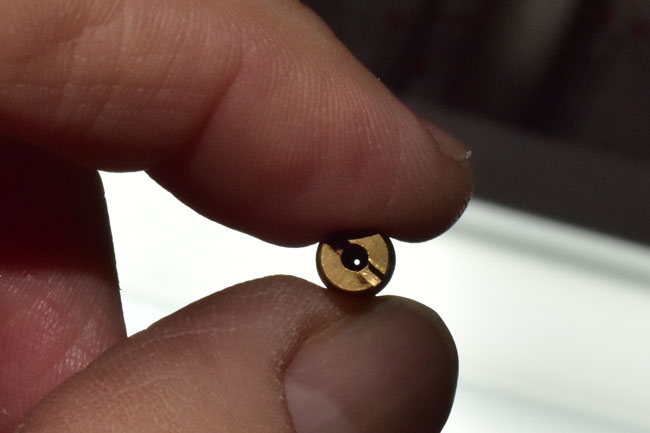
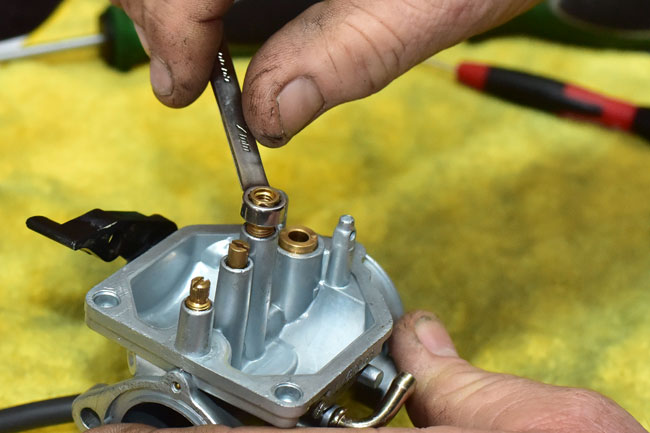
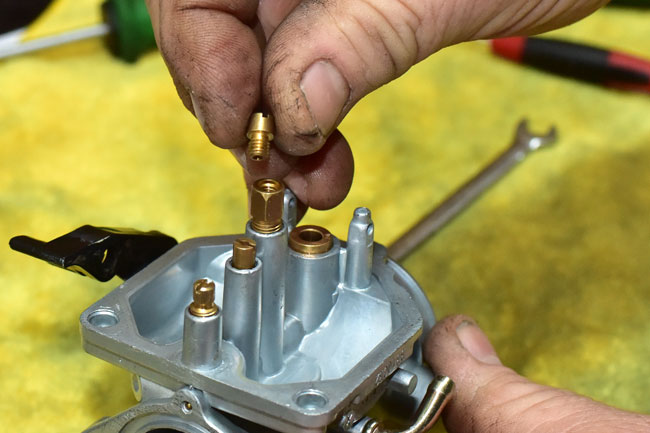
The main jet is in a brass carrier.  It’s likely the entire carrier will unscrew when you unscrew the main jet.   You can then unscrew the main jet if you secure the main jet carrier with an 8mm wrench.

150128_3575-650

150128_3576-650

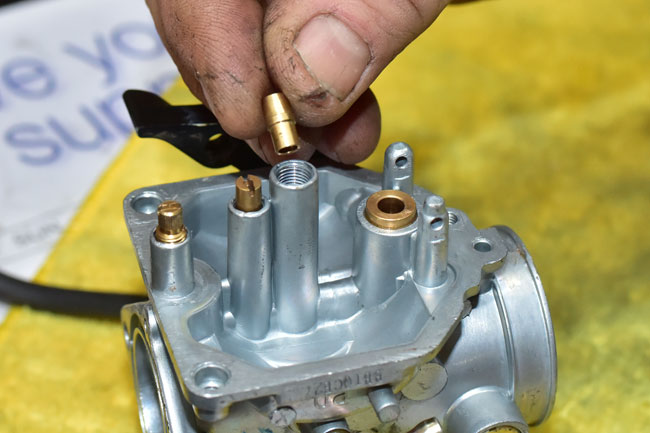
There is a brass bushing that fits in the bottom of the carburetor body.  It interfaces with the main jet carrier.   Remove the bushing from the carburetor.  Note that this bushing has a beveled end and a square-cut end.  The beveled end will interface with the main jet carrier when these parts are reassembled.

150128_3579-650

150128_3580-650

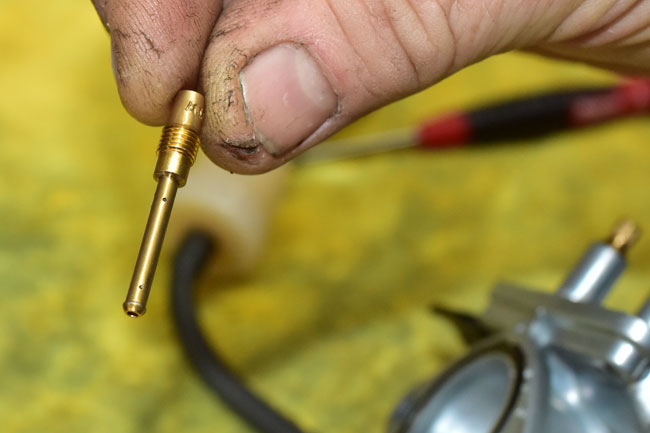
Remove the slow jet.

150128_3582-650

150128_3583-650

Remove the idle jet.

150128_3584-650

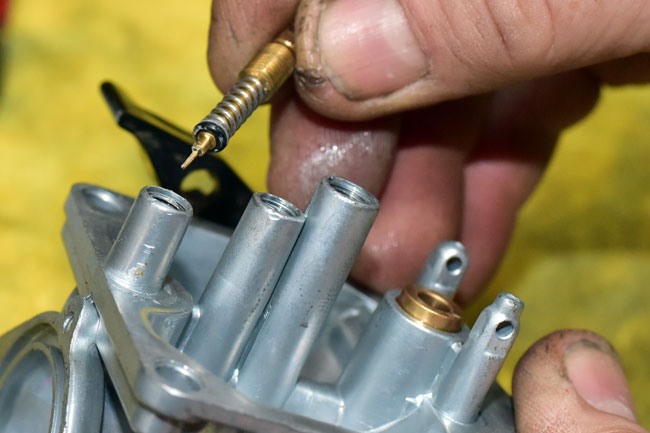
There will be a spring, a flat metal washer, and an o-ring beneath the idle jet.  Carefully remove these from the carburetor body if they do not come out with the idle jet.

150128_3611-650

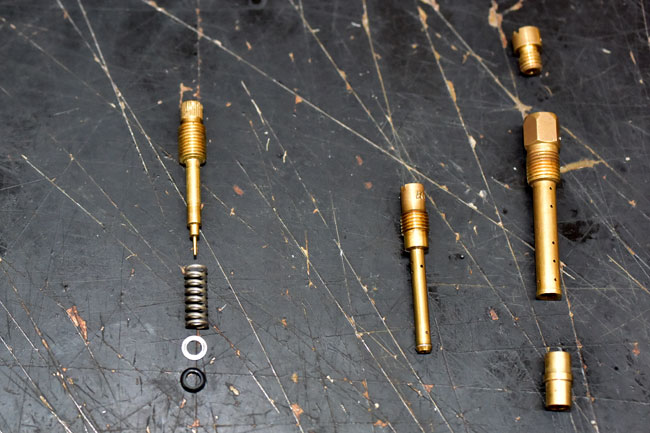
The idle jet, the slow jet, and the main jet components are shown below.   The idle jet is on the left, the slow jet is in the middle, and the main jet is on the right.

150128_3588-650

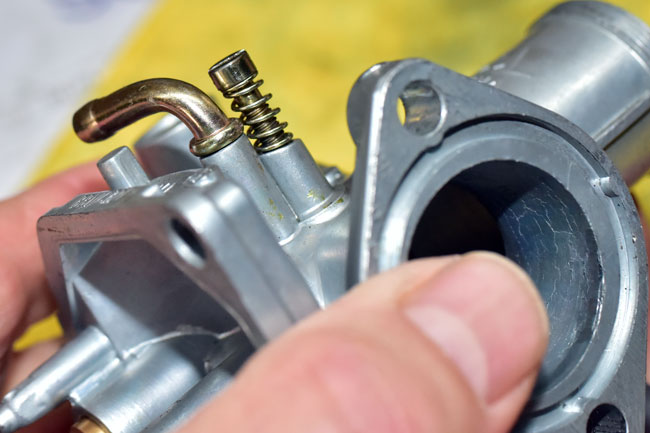
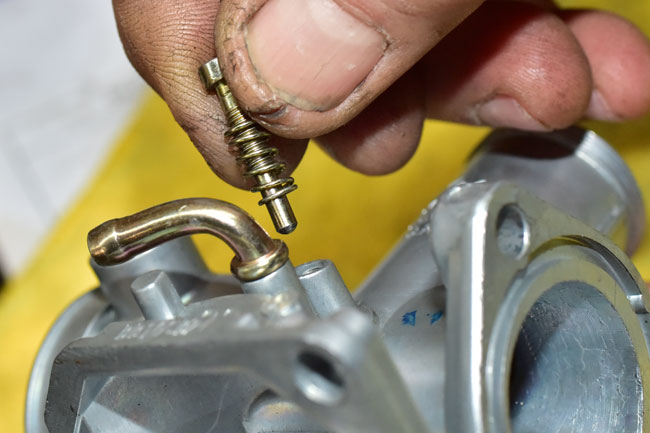
Remove the slide adjustment screw (this is the screw used to adjust idle speed) and spring from the carburetor body.

150128_3627-650

150128_3626-650

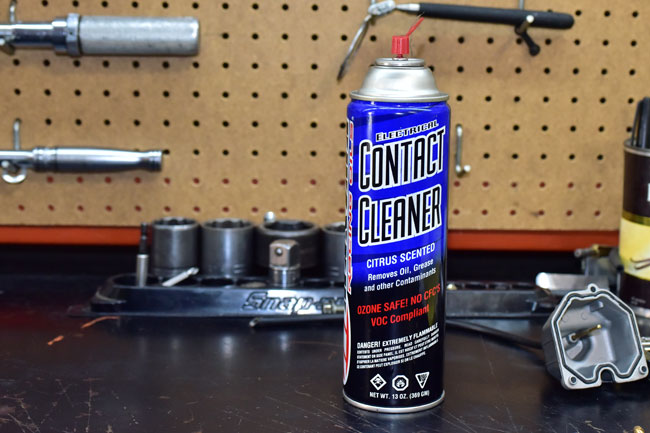
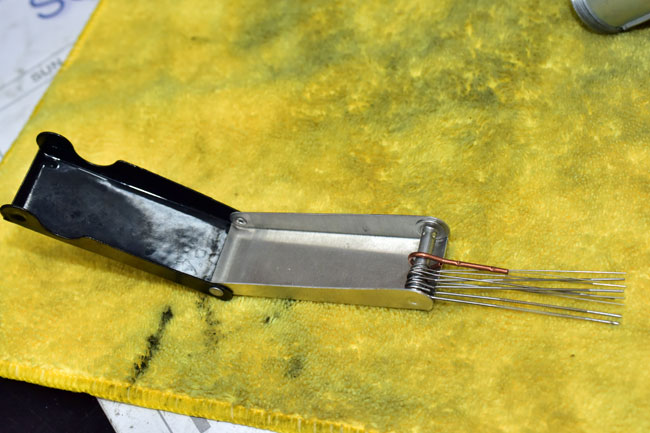
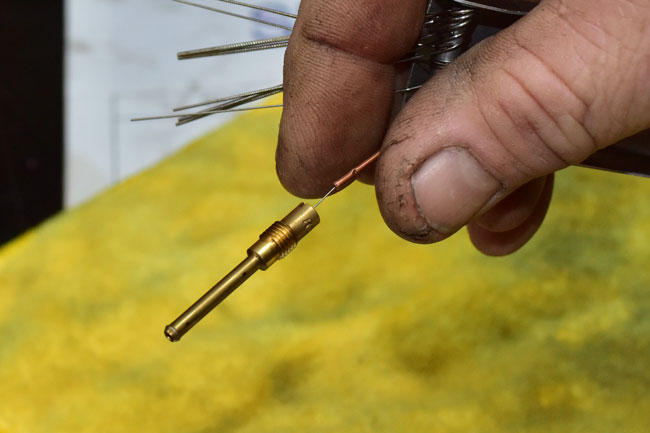
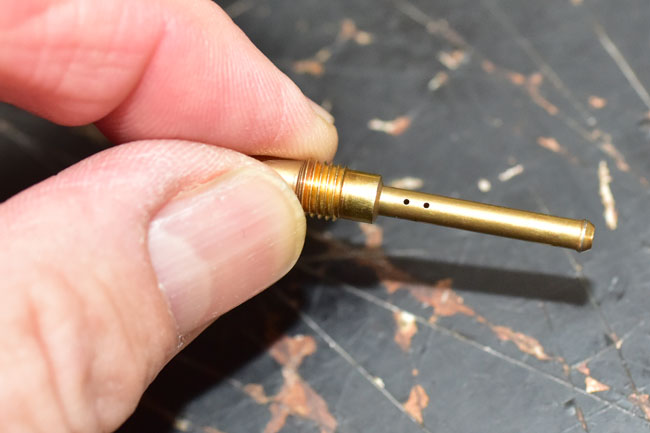
Clean all three jets using a suitable cleaning solvent and a jet cleaning tool to assure all passageways are open.

150128_3595-650

150128_3598-650

150128_3600-650

150128_3607-650

150128_3603-650

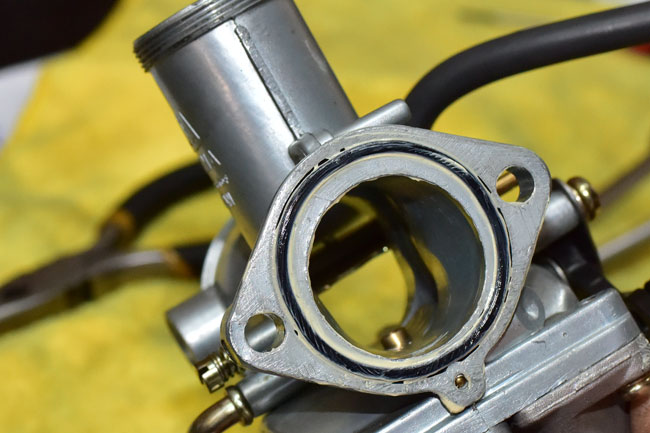
Remove the o-rings from the float bowl and the carburetor body.

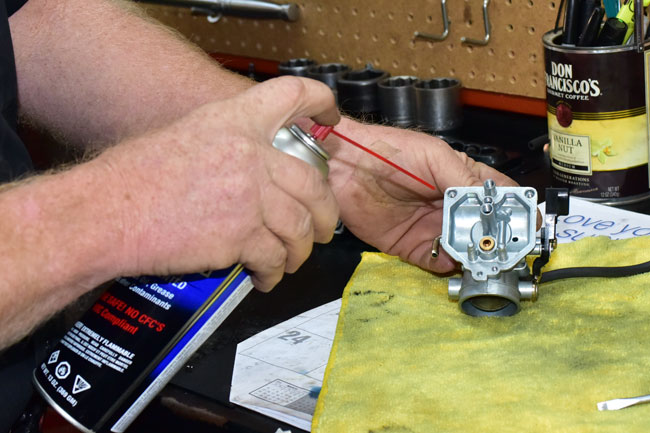
Clean the carburetor interior and exterior surfaces using a suitable solvent.

150128_3604-650

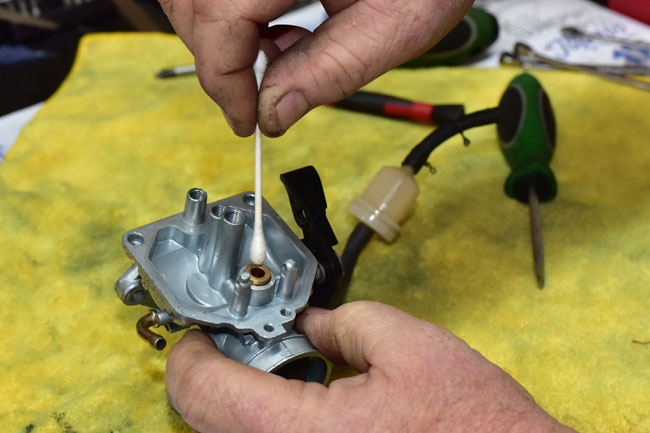
Use a q-tip to clean the interior of the float valve body.

150128_3605-650

Assembly is the reverse of disassembly.   We are including a few specific points on reassembly here in this tutorial.

When reinstalling the jets and the jet carriers, d0 not overtighten them or you may strip the aluminum carburetor body threads.

150128_3613-650

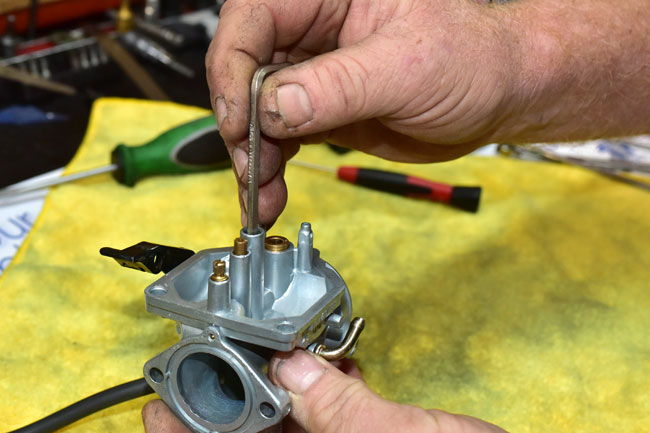
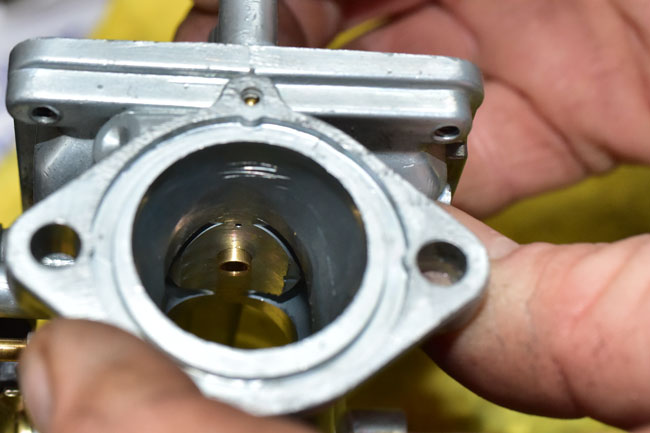
When installing the brass bushing that faces the underside of the main jet, make sure the square end faces away from the main jet carrier and the beveled end faces the main jet carrier.  When you insert this piece in the carburetor body, it is not likely to fully seat or go in straight without assistance.  We use an Allen wrench to make sure this bushing is properly guided into its seat.

150128_3620-650

150128_3621-650

150128_3622-650

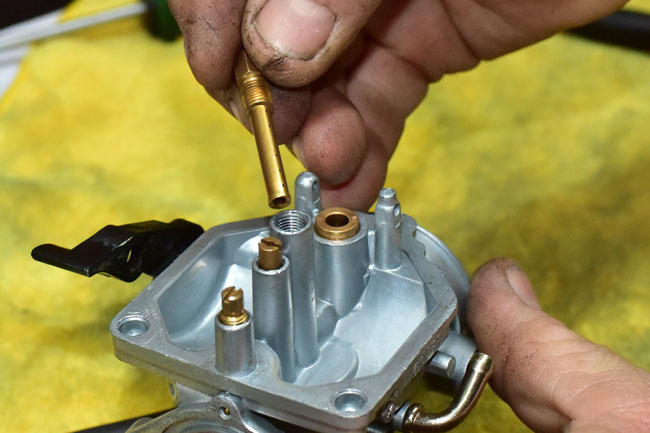
After the bushing is in place, install the main jet carrier and lightly tighten it.  Do not overtighten it.

150128_3623-650

150128_3624-650

Install the main jet and lightly tighten it with a flat head screwdriver.

150128_3625-650

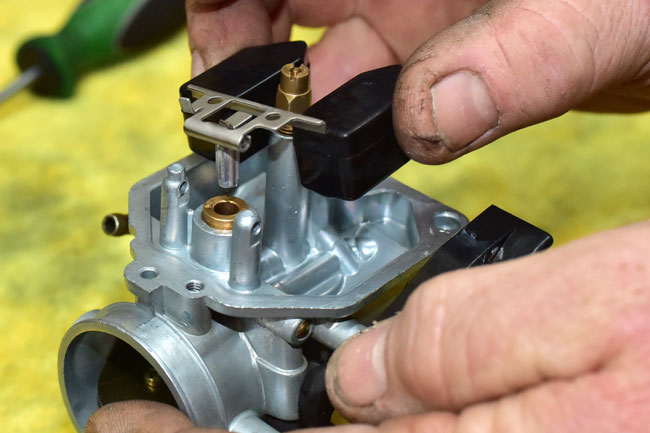
Put the float valve on the float and guide it over the float valve seat.  Take care not to let the clip that connects the float valve to the float come off the float.

150128_3629-650

150128_3631-650

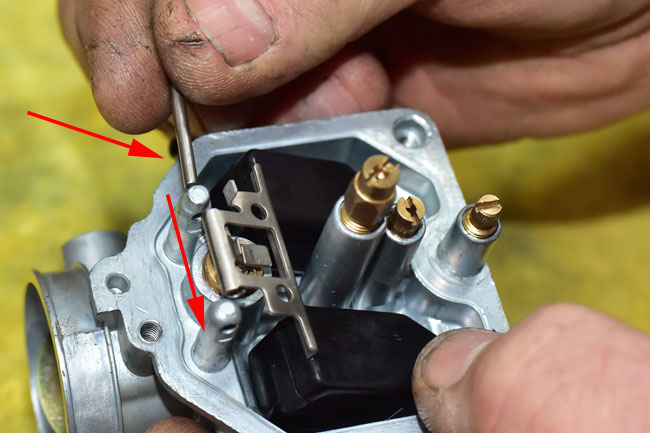
Guide the float pivot shaft through the carburetor body tangs’ drilled pivot points and the float.

150128_3633-650

Reinstall the O-rings on the float body and the carburetor body.   We apply a light coating of grease to the O-rings.

150128_3636-650

150128_3639-650

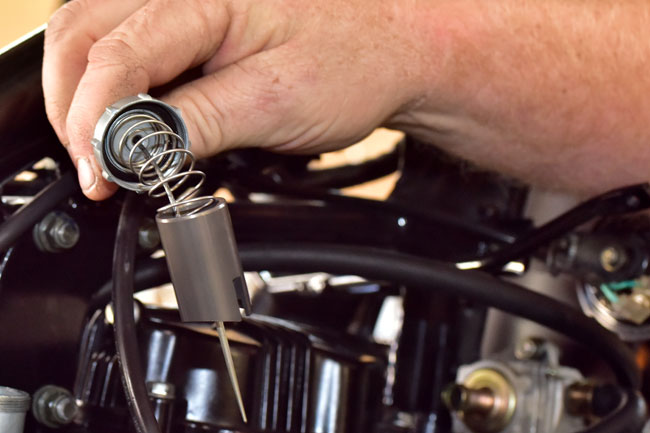
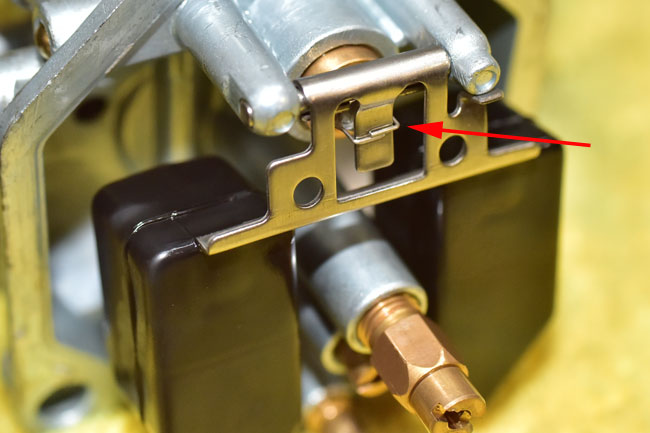
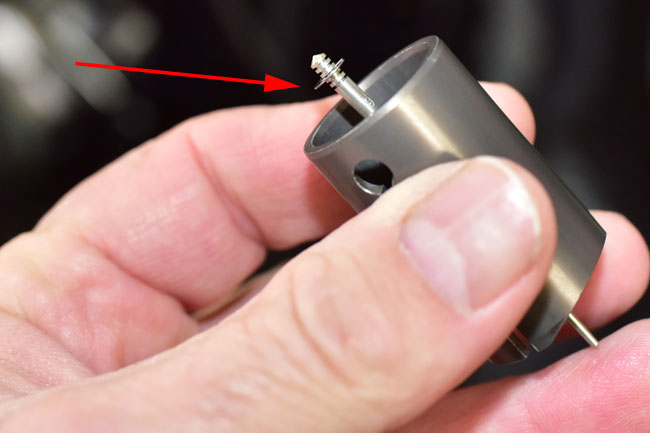
Reinstall the carburetor slide assembly.   The carburetor slide assembly includes circlip that attaches the needle to the slide, as shown in the photo blow.  Positioning the needle higher in the slide will enrichen the air fuel mixture; positioning the needle lower in the slide will cause the engine to run leaner.

150128_3652-650

Re-installation of the carburetor on the motorcycle is the reverse of installation.  After installing the carburetor and reassembling the motorcycle, start the engine and allow the motorcycle to come to operating temperature.  Adjust the idle speed with the carburetor slide idle speed adjustment screw to approximately 1500 rpm (the TT250 does not have a tachometer; we make the adjustment by sound).

Posted in CSC Motorcycles | Comments Off on TT250 Carburetor Maintenance

TT250 Battery Maintenance

This maintenance tutorial addresses TT250 battery maintenance.

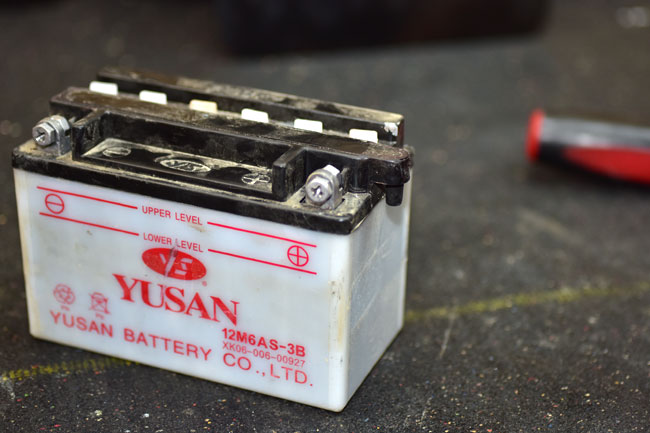
There’s not a lot to maintaining your battery, folks.   The trick is to keep the terminals clean, keep the acid level within an acceptable range, and replace the battery when it won’t hold a charge.

In this tutorial, we’re showing everything with the battery removed from the motorcycle (which is the way I prefer to work on the battery), but everything you see in this tutorial can be done with the battery in the bike.

You will need to remove the left rear body panel to gain access to the battery.   We had more stuff removed on the TT250 we used for this tutorial, but you don’t have to take the seat or the tank off.   We just used a bike that already had those things off.

Remove the left rear body panel by unscrewing the body panel screw.  The body panel will pull off after the screw has been removed.

150126_3486-650

Inspect the battery terminal area.  If oxidation is present around the terminal (it will appear as a white growth around the terminal), pour a water-and-baking-soda solution over the terminal area to eliminate the oxidation.  After doing this, flush the area with water.

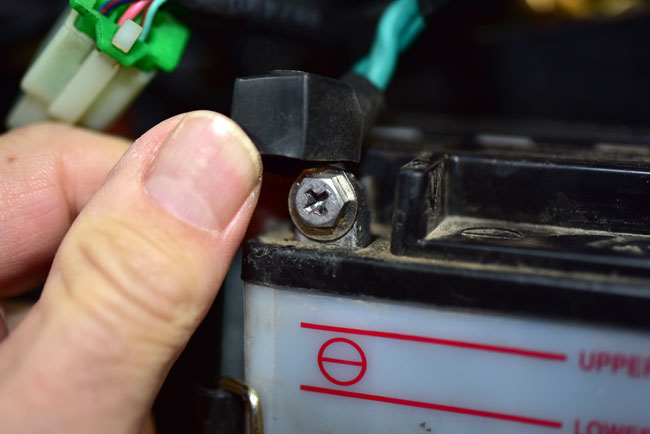
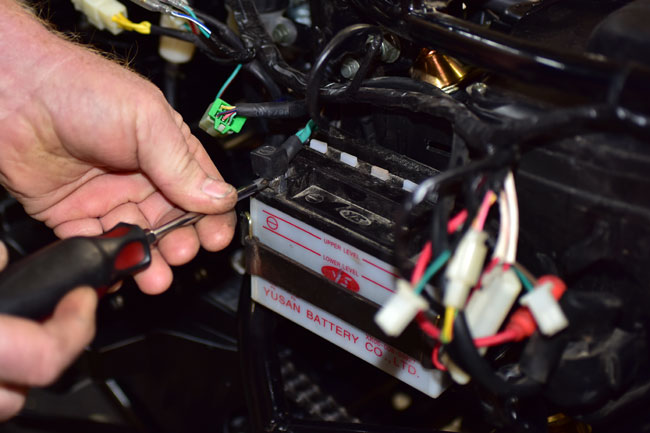
Disconnect the battery.   Disconnect the negative terminal first (the one with the green insulation on the lead) and then disconnect the positive terminal.

150202_3758-650

150202_3760-650

150202_3762-650

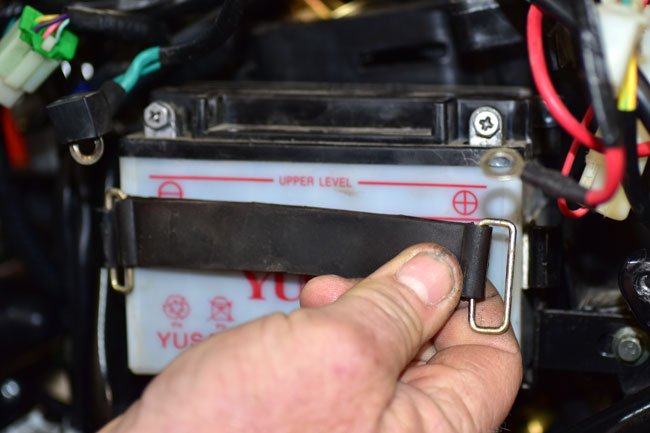
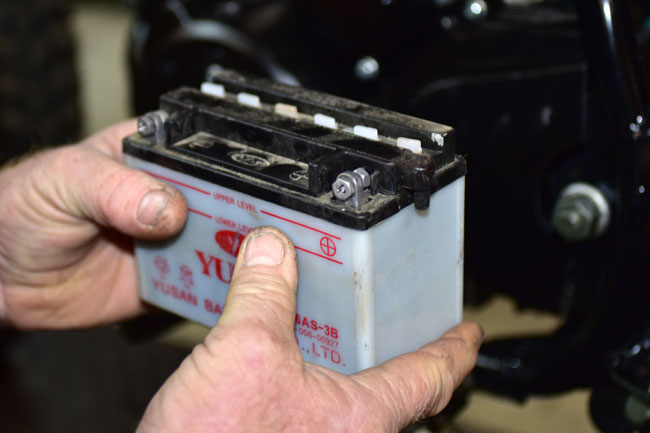
Unhook the battery’s rubber retention strap and remove the battery.

150202_3763-650

150202_3765-650

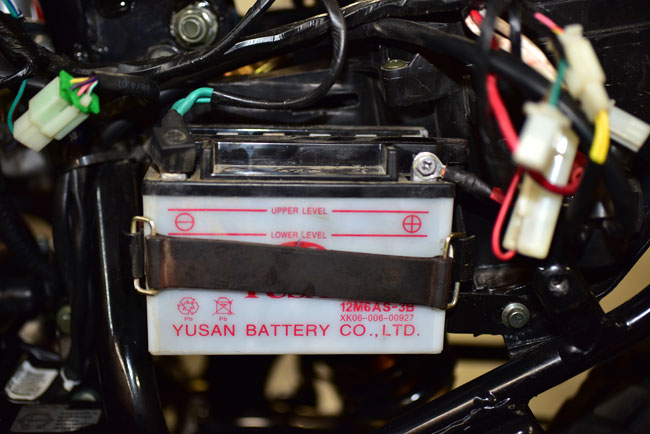
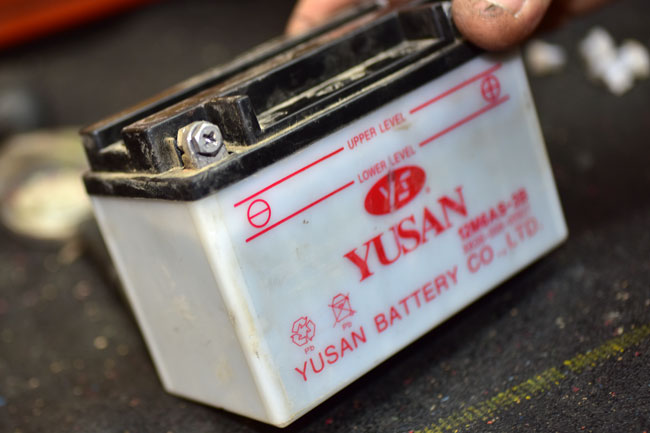
Check the acid level in the battery.  The level should be between the upper and lower red lines on the front of the battery.  It’s a little difficult to see this in the first photo below, so I tilted the battery so you can see it better.

150202_3766-650

150202_3773-650

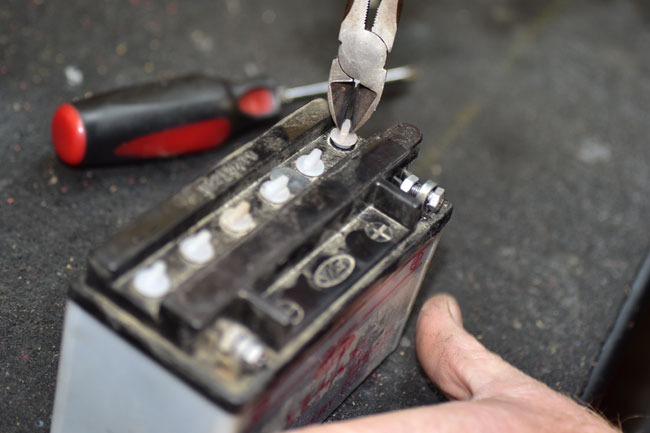
If any of the cells are below the minimum level, remove the filler cap for each affected cell.  Add only distilled water to a cell if it is below the minimum level such that the cell level is within the acceptable range.

150202_3769-650

At this point, a question we frequently hear is:   When should I replace my battery?  Here’s how I make that decision:

  • If the battery is more than 2 years old, I replace it.   That’s my opinion.  Opinions are like belly buttons (everyone has one), but that’s what I do.
  • If my battery won’t hold a charge, I replace the battery.
  • If I am going on a long trip and I am close to the 2-year mark, I replace the battery.   Before I do the Baja ride next month on my RX3, I’ll throw a new battery in it.

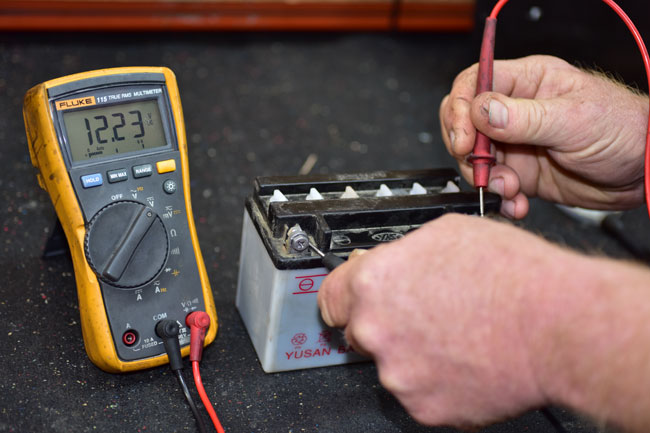
I evaluate the battery’s ability to hold a charge by leaving it on the charger long enough to fully charge, and then I’ll measure the voltage.  If it’s less than 12.8 volts, it’s time for a new battery.

150202_3774-650

If you need a new battery, we stock all of the parts for your TT250.  Give us a call at 909 445 0900 and we’ll take care of you.

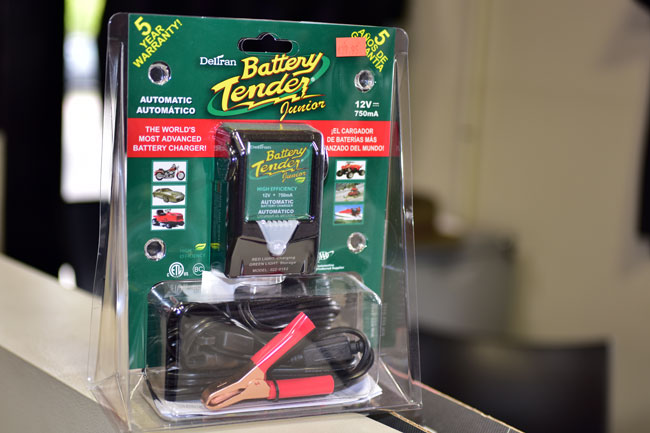
One last thing, and that’s using a trickle charger.  I recommend you keep your bike on a Battery Tender when it’s parked.  I’ve used a Battery Tender on all of my bikes and they do a great job.   We sell these (they’re $39.95).  If you want one, give us a call at 909 445 0900 and ask to speak to Ryan.

150202_3794-650

Posted in CSC Motorcycles | Comments Off on TT250 Battery Maintenance

RIP, Doug Bingham

Doug Bingham, a guy I admired enormously, passed away recently and I thought I would take a moment to tell you a little bit about him here on the CSC blog.

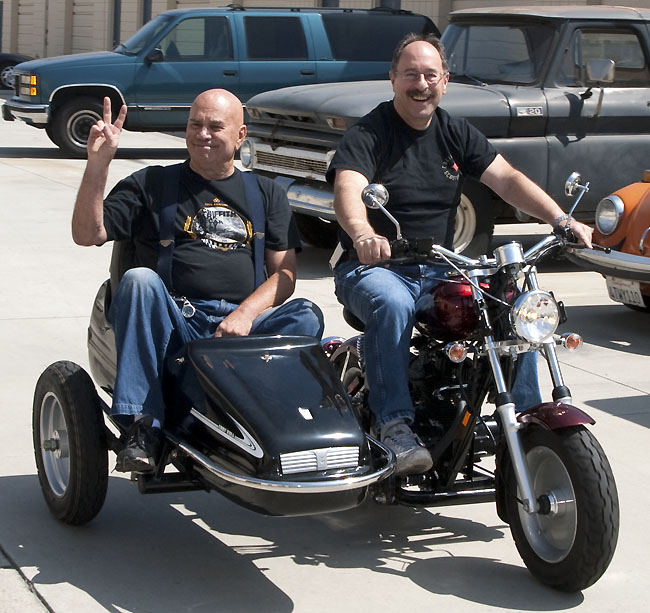
Taking Doug Bingham for a ride in a California Scooter!

I first met Doug Bingham at the annual So Cal sidecar gathering in Griffith Park (an event Doug started many years ago).   I wrote a story about that event for Motorcycle Classics magazine (you can read about it here), and a big part of the story was about Doug.   He was known in the motorcycle industry as “Mr. Sidecar,” and when we wanted to equip one of our Mustang replicas with a sidecar, we knew there was only one guy to see:  Doug Bingham.

Doug knew exactly what to do, and the rig he put together for us was awesome.   I visited his So Cal shop as he was finalizing construction, and before I knew it, Doug pushed the California Scooter out of his shop, hopped in the sidecar, and gave the keys to me.   It was a hell of treat.   Little old me, piloting a sidecar, with none other than Doug Bingham as my passenger!

Let me tell you a bit about this man.   If you’ve ever seen a movie with a sidecar in it, Doug Bingham would have been the guy who built and piloted the rig.  Think The Great Escape, Indiana Jones and the Last Crusade, and many, many more.   With all those good things on his resume, Doug was Mr. Nice Guy.  He was not pretentious at all, he took all the time I needed to explain things to me about sidecars, and he was a real decent human being.  I enjoyed being around him immensely.

If you’ve wondered what it is like to pilot and ride in a sidecar, you can get a bit of a feel for it from this YouTube video we did featuring the rig Doug built for us…

RIP, Doug.   We’ll miss you.

Posted in CSC Motorcycles | Comments Off on RIP, Doug Bingham

TT250 Steering Stem Bearing Adjustment

This maintenance tutorial addresses TT250 steering stem bearing adjustment.

The concept here is to adjust the steering stem adjustor nut and the steering stem bolt such that there is no free play in the steering stem bearings, but not make them too tight.

You only need to do this if there is free play in the steering stem bearings, or if the bearings are adjusted too tight.  Sometimes you can detect this by applying the front brake when coming to a stop, or by rocking the bike back and forth with the front brake applied.  If you hear or feel clicking in the front end, it is likely you need to adjust the steering stem bearings.

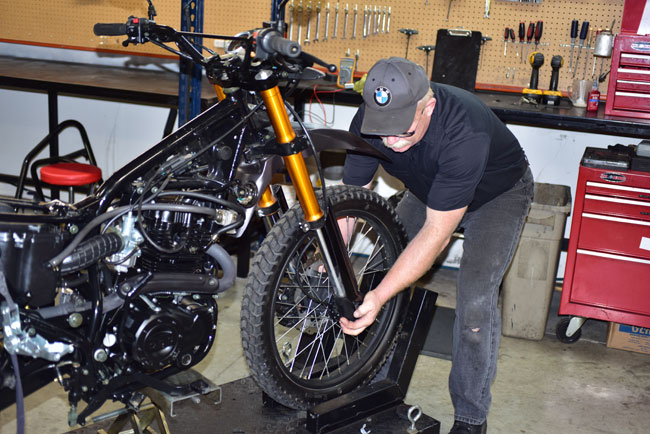
The best way to test for appropriate steering stem bearing adjustment is to put the bike on a lift to get the front wheel off the ground.   Once the wheel is off the ground, grab the front forks near the front axle and pull the front end back and forth.  If you feel any play and hear the steering stem bearings clicking, the steering stem bearings are too loose.   Next, turn the front wheel from left to right and from right to left.  If you feel too much resistance (it’s a subjective assessment), the steering stem bearings are too tight.

Note that in the photos below, we show the fuel tank, the seat, and the rear body panels removed.  You don’t need to remove these components for this maintenance activity.  We had a TT250 with the panels removed for the other maintenance tutorials, and we left the bike in that configuration for this tutorial.

150202_3777-650

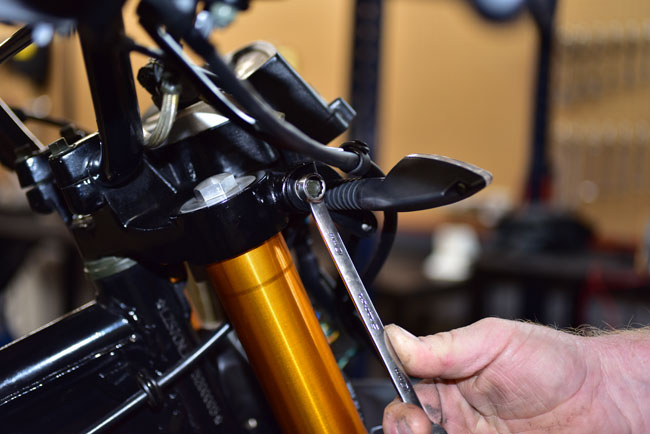
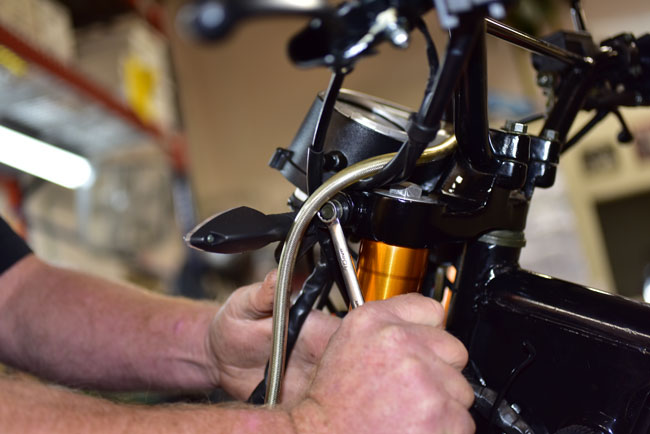
If your assessment indicates the steering stem bearings require adjustment, loosen the upper triple tree pinch bolts on the left and the right side of the motorcycle.  You don’t need to remove the bolts; you only need to loosen them.  The intent is to allow the upper triple tree to move with respect to the fork legs.  The upper triple tree pinch bolts take a 10mm wrench.

150202_3778-650

150202_3779-650

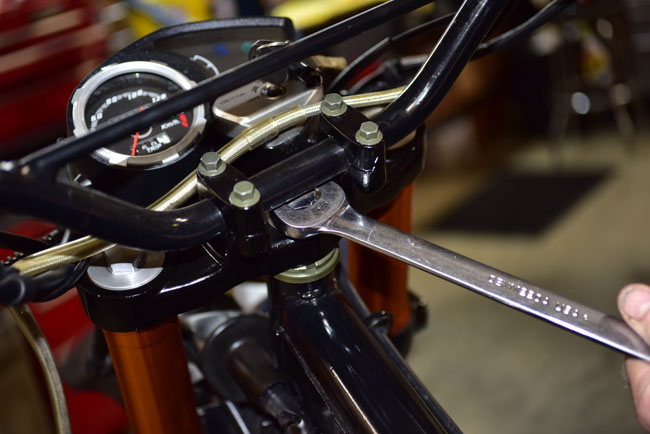
Loosen the steering stem bolt. It takes a 22mm wrench.   You don’t need to remove the handlebars to do this, but it is a tight fit for the wrench if you do not.  In this tutorial, we did not remove the handlebars.

150202_3780-650

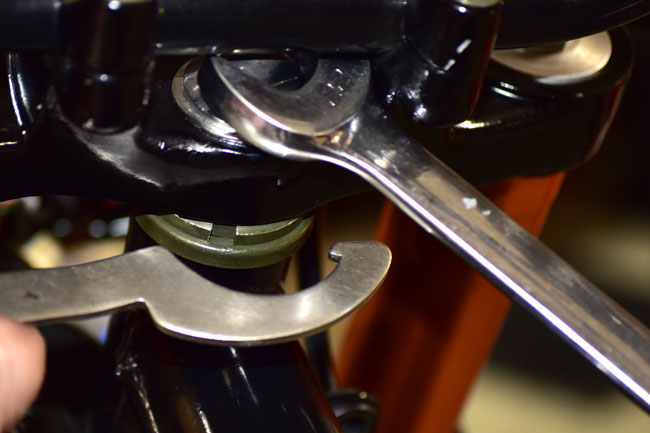
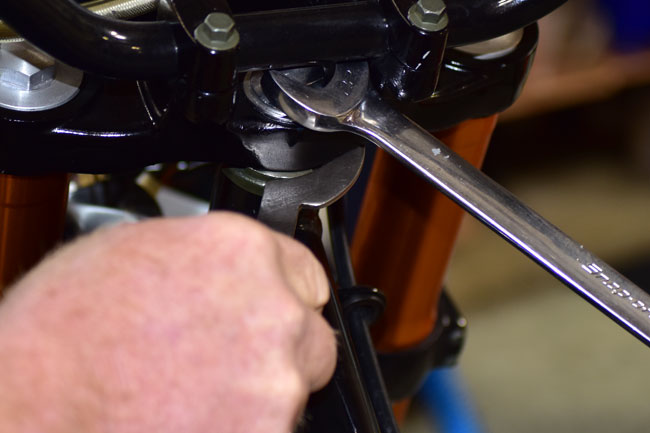
Use a spanner to either tighten or loosen the steering stem adjustor nut.   You’ll want to tighten it if the steering stem bearings are too loose (as indicated by free play or clicking when moving the forks back and forth).  If the forks have too much resistance when turning them from left to right (and vice versa), you’ll want to loosen the steering stem adjustor nut.

150202_3782-650

150202_3784-650

After making the adjustment, tighten the steering stem bolt.  If you are a stickler for torque values, tighten it to 50 ft-lbs.   Check the front end of the motorcycle again to make sure the adjustment provides no clicking or movement of the forks when pulling the forks back and forth, and that the steering is not restricted when turning the front end from side to side.   When you are satisfied with the adjustment, tighten the upper triple tree pinch bolts to 10 ft-lbs.

Posted in CSC Motorcycles | Comments Off on TT250 Steering Stem Bearing Adjustment

Police Bikes!

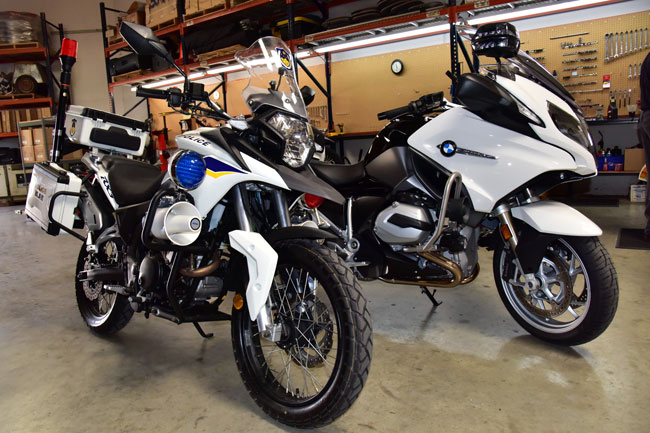
150129_3711-650Our service department works on all kinds of bikes, and last Friday Gerry serviced a BMW boxer twin police bike from one of our local So Cal police agencies.    I couldn’t resist getting a photo of the bikes side by side.

The police Beemer was brand new (it was in for its first service), and it was an impressive bike.   So was the purchase price.  According to the motor officer who brought it in, the new Beemer goes for a cool $28,000!  Wow!   The RX3-P, on the other hand, goes for $4,295.

Posted in CSC Motorcycles | Comments Off on Police Bikes!

TT250 Electrical System Tutorial

The TT250 electrical system is simple, easy to understand, and easy to maintain.  This maintenance tutorial explains the system’s main components, their locations, their functions, and some suggestions in the unlikely event you’ll ever need to troubleshoot the system.

The TT250 has an 18-pole, 300-watt stator that puts out plenty of power.  Many riders like to run accessories (heated vests, spotlights, heated grips, etc.), and on bikes with smaller electrical outputs, you can run the battery down while riding with all the accessories powered up.   The TT250 won’t have this problem.   It’s got the juice you need.

A cool feature on the TT250 is the built-in accessory outlets already wired into the main harness, and the accessories switch located on the right handlebar.   On the non-US bikes, that switch was used for the headlights and parking lights.   In the US, the headlights have to be on all the time, so the switch isn’t necessary.   We didn’t want to give up the switch, though, so we’re using it to control the underseat accessories outlets.

Let’s get on to the main attraction, and that’s the CSC TT250 electrical system and its components.  Most of the electrical and electronic components on this bike are located under the seat and tank, and behind the headlight.

You can decide best which components you’ll need to remove based on which components you want to access.   In this tutorial, we’ve removed the seat, the fuel tank, and the headlight so you can see everything. The first part of our tutorial below focuses on removing these items; the second part identifies various electronic component locations.

Body Panel, Seat, Fuel Tank, and Headlight Removal

Remove the rear body panels on the left and right side of the motorcycle.  There’s a single bolt in each one.  They pop off after you have removed the bolt.

150122_3448-650

150126_3487-650

Next, remove the seat.  There’s a 10mm bolt on either side.  Remove these bolts and pull the seat to the rear to remove it.

150126_3489-650

150126_3488-650

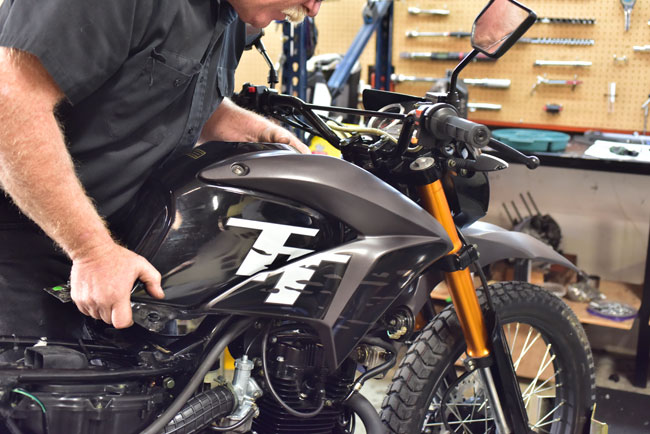
Removing the tank involves:

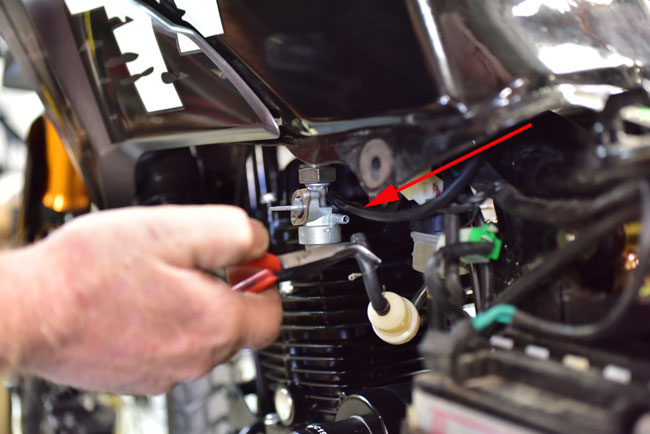
  • Closing the fuel petcock.
  • Disconnecting the fuel line from the fuel petcock to the carburetor.
  • Removing the 10mm bolt at the rear of the tank and the two Phillips head screws under the forward body panels (one on each side of the tank).
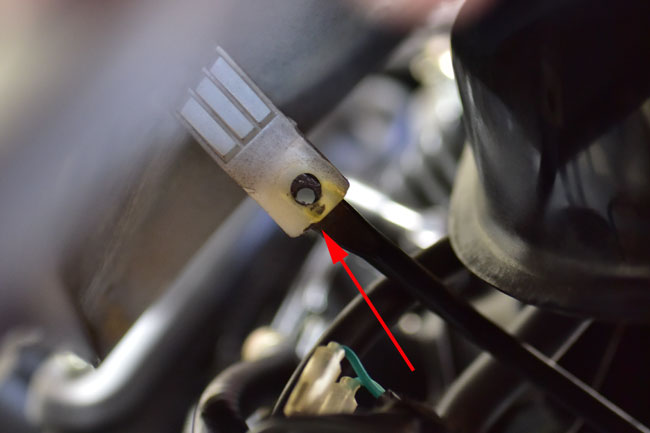
  • Disconnecting the fuel sending unit connector plug.
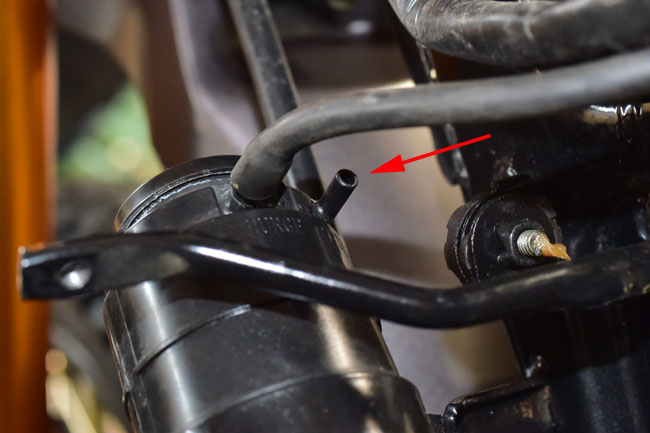
  • Disconnecting the tank vent line from the carbon canister.

These actions are shown in the photos below.

150126_3494-650

150126_3496-650

150126_3495-650

150126_3493-650

150126_3539-650

150126_3497-650

150126_3498-650

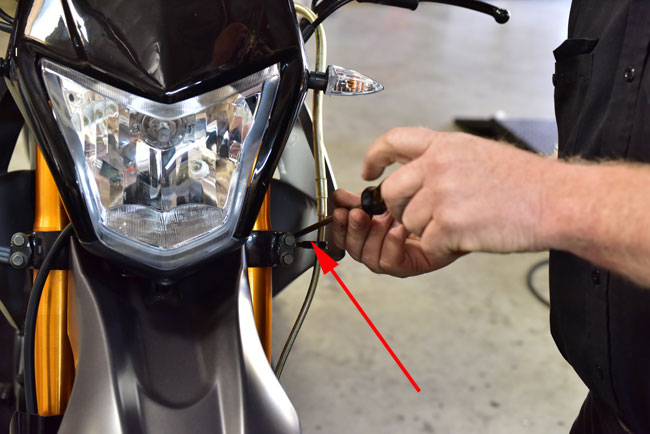
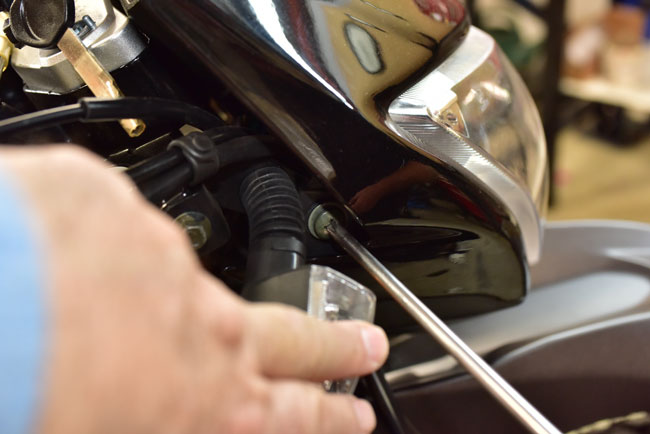
The headlight is removed by unscrewing two Phillips head screws on either side.

150129_3740-650

Electrical/Electronic Componentry

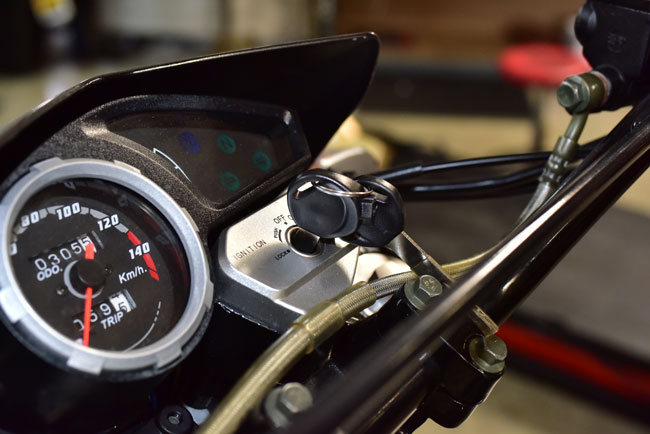
The first component is the ignition switch, located on top of the forks.

150129_3734-650

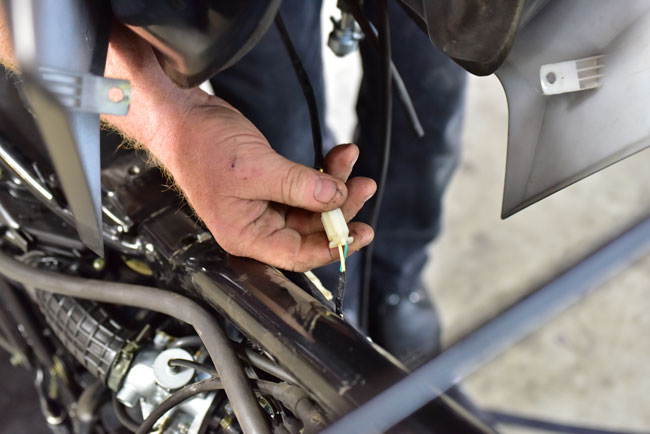
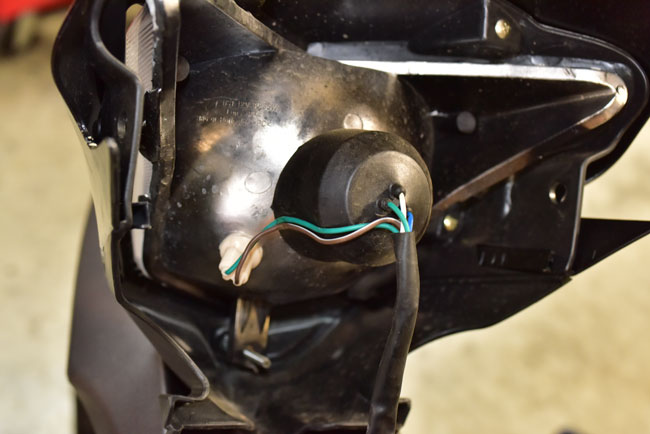
The headlight nacelle includes the harness running into the headlight bulb.   In this photo, you can also see the wiring for the parking light (not separately operable on the North American bikes).

150129_3741-650

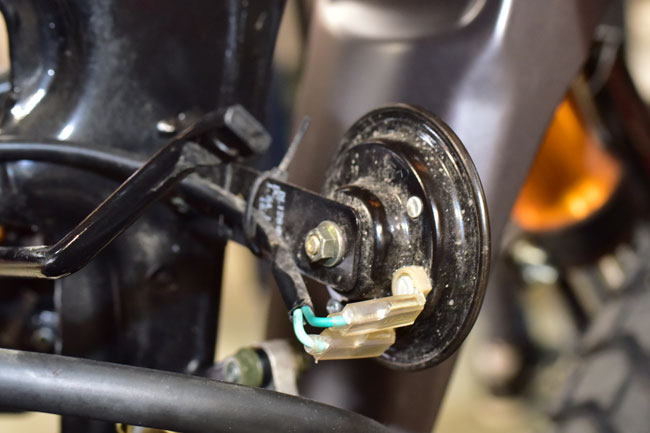
The horn is located on the right side of the frame near the front of the motorcycle.   It is accessible without removing the fuel tank.

150129_3728-650

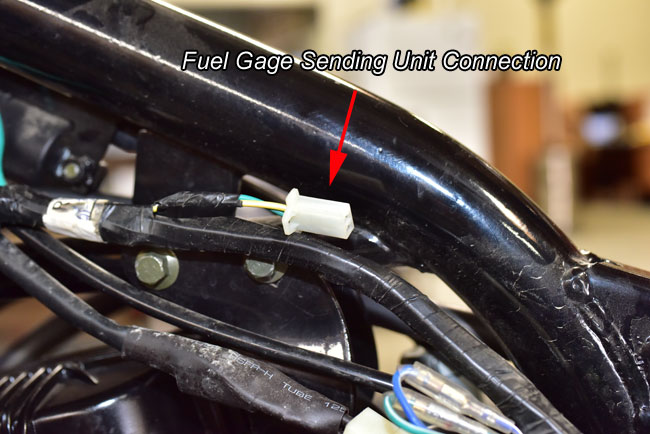
The connector from the fuel tank’s fuel gage sending unit to the fuel gage is underneath the tank.  This is the half of the connector that stays with the motorcycle when the fuel tank is removed.

150129_3724-650

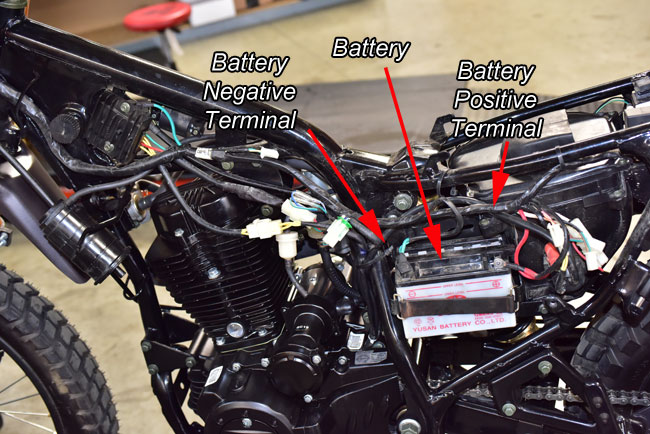
The battery is located on the left side of the motorcycle.  It is accessible by removing the left rear body panel and the seat.  It is secured by a rubber strap.

150129_3726-650

150129_3719-650

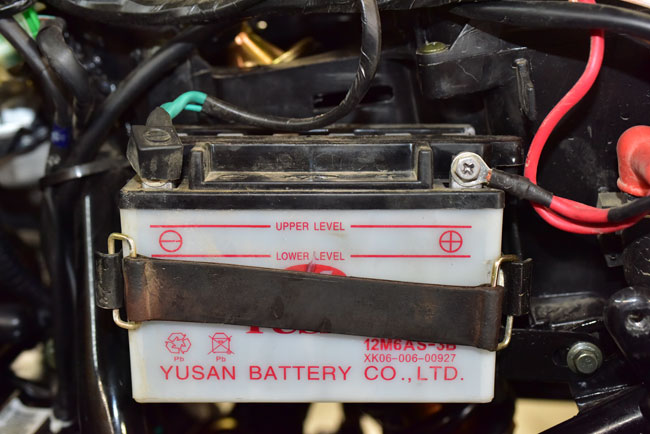
As you can see from the photo above, red is positive, and green is ground.   Throughout the motorcycle, wires with green insulation are ground wires.

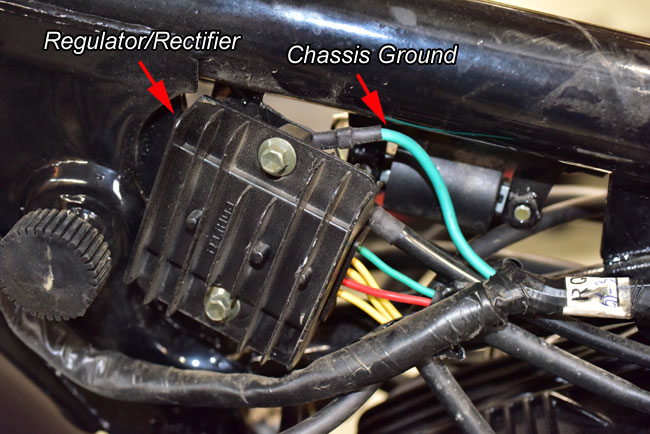
The regulator/rectifier is on the left side of the motorcycle near the front of the bike.  It mounts to the frame beneath the fuel tank.  If this component is not working, the battery will not charge properly or it may overcharge and boil over.  The red and green wires go to the battery to charge it.   The yellow wires come from the motorcycle’s stator.

150129_3725-650

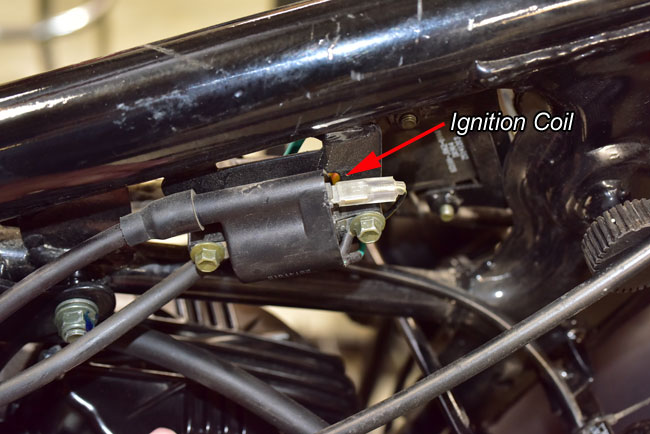
The ignition coil is located underneath the fuel tank on the right frame.

150129_3729-650

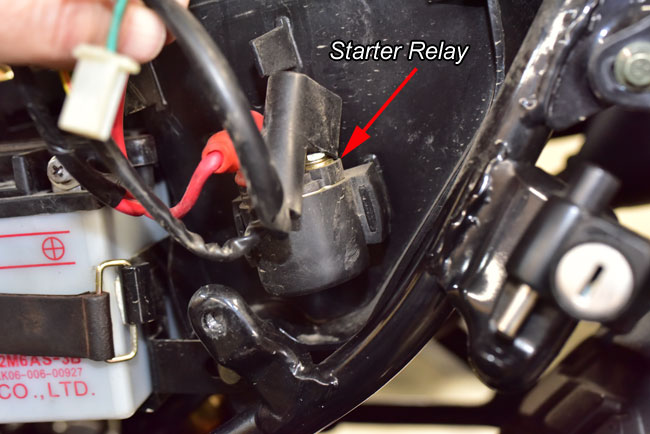
The starter relay is located on the left side of the motorcycle just to the rear of the battery.  It closes when commanded to do so to send power to the starter motor.

150129_3720-650

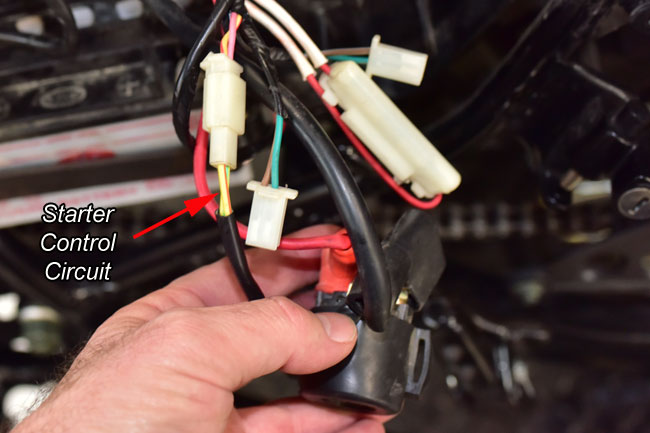
As you can see in the above photo, the starter relay is attached to the frame with a rubber carrier that fits over tabs protruding from the frame.  I removed it from the frame so you can see the wiring that sends a signal from the starter button to the relay.

150129_3755-650

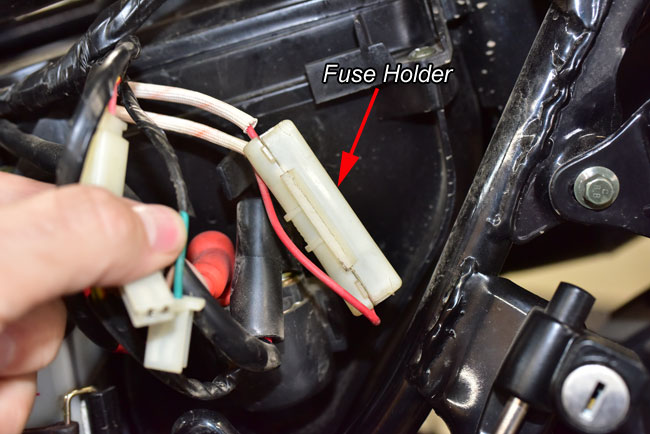
The motorcycle’s only electrical fuse is located in a carrier behind the battery.   This pops open to provide access to the fuse.

150129_3721-650

If the motorcycle loses all electrical power, there are several potential causes, but the most likely are that this fuse has opened, or the engine kill switch is in the off position.   Don’t laugh about that last one.  We regularly get calls in which the caller tells us the bike has lost all electrical power.   In those cases, it’s almost always because the owner inadvertently has the kill switch in the off position.  I’ve done it, too.   I’m just mentioning it here because it’s the first thing I would check having answered a few of those calls, and because I’ve made that mistake myself (i.e., leaving the kill switch in the off position).

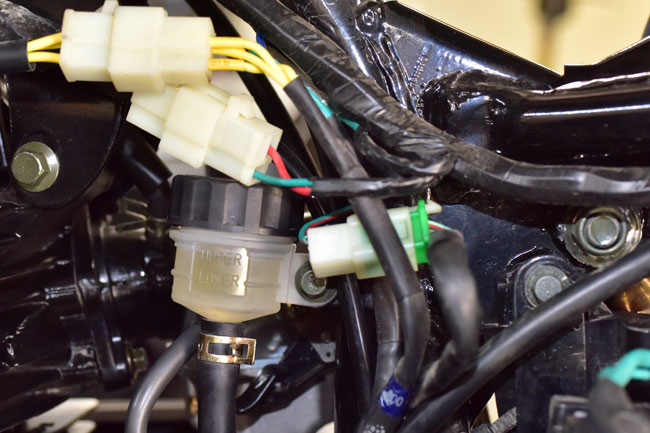
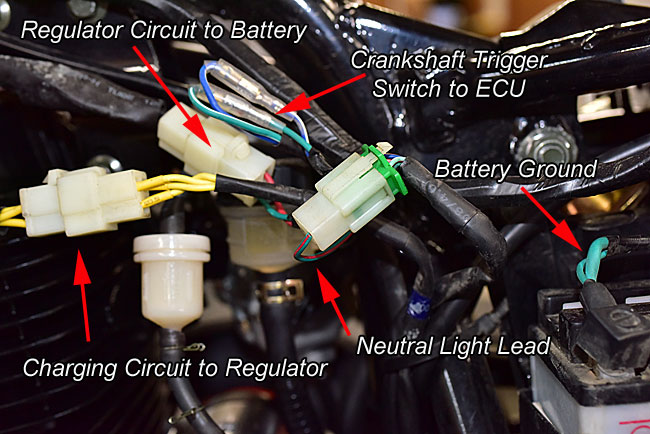
Several of the connectors and harnesses in the battery area (on the left side of the motorcycle) are identified below.

150129_3723-650

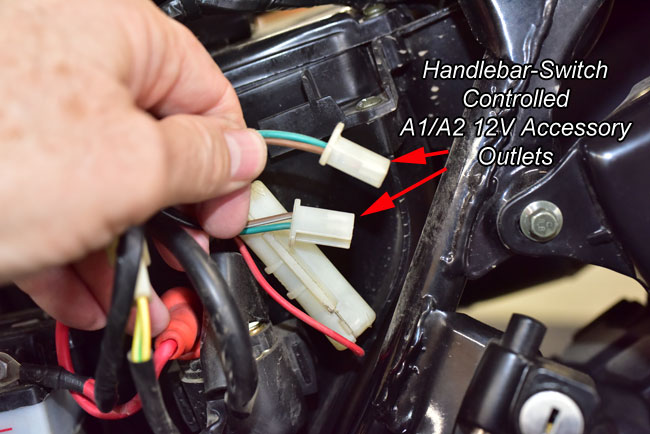
The two 12V underseat accessory outlet connectors are also on the left side of the motorcycle.  These are controlled by the handlebar-mounted switch and they are provided as a convenient point for connecting accessories, heated vests, etc.   When the ignition is off, power is cut to these connectors.

150129_3722-650

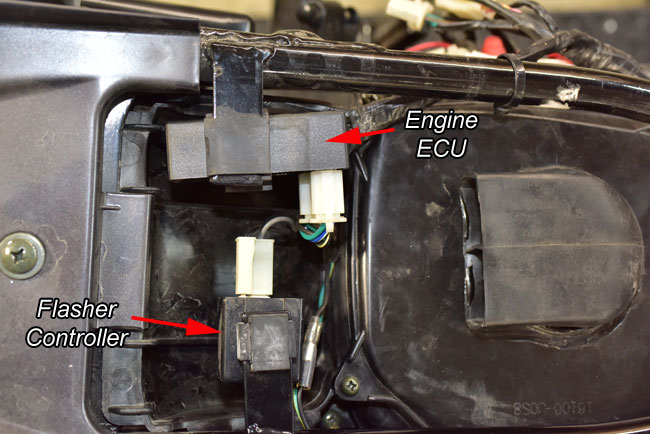
The engine ECU and turn signal controller are located beneath the seat.

150129_3718-650

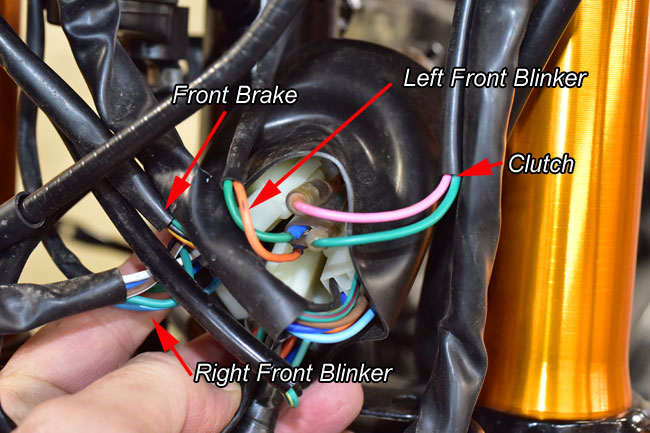
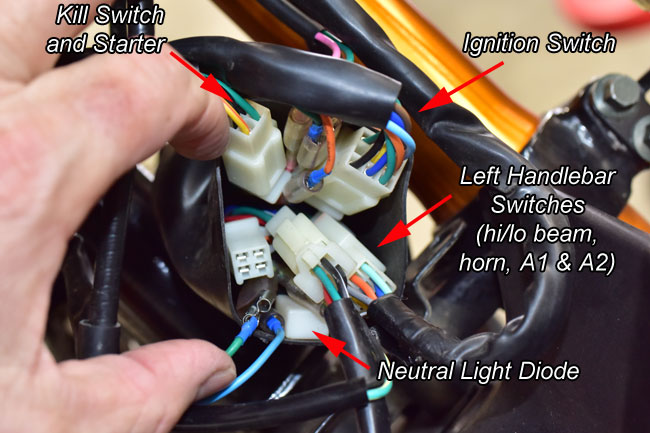
When the headlight has been removed, several connectors and harnesses are visible from the front of the motorcycle.   These are identified in the photos below.

150129_3744-650

150129_3748-650

The neutral light diode controls when the neutral light is on.   If it is shorted, it will allow the neutral light to come on whenever the clutch lever is pulled in.

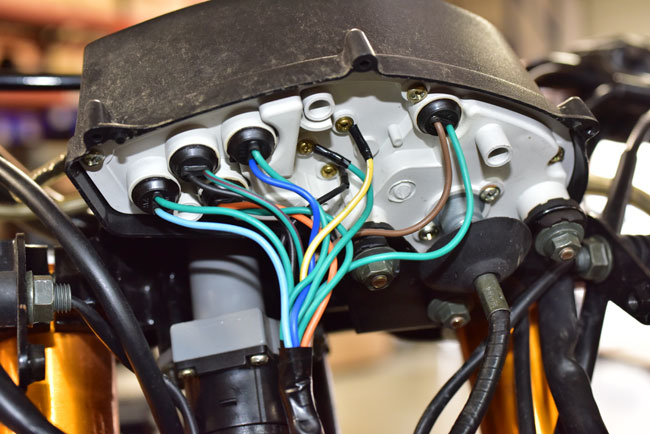
Access to the indicator lights and wiring is provided when the headlight nacelle is removed.   The photo below shows the underside of the dash cluster.

150129_3751-650

The TT250 Service manual provides a wiring diagram, which can be used in conjunction with the above photos when troubleshooting any electrical problems.

Posted in Best Of, CSC Motorcycles | Comments Off on TT250 Electrical System Tutorial

Yay!

I finished the first draft of Moto Colombia today!    From here, it’s another week or two of polishing and proofing, photo selection and editing, and then Moto Colombia is going to be available to you!   I’ll tell you…I’m wearing out my laptop’s keyboard!    We’ve published a half-dozen TT250 maintenance tutorials in the last few days, we have several more maintenance tutorials in work, I have the TT250 shop manual in work, and of course, I’ve been working on the story of the greatest adventure ride of my life:  Moto Colombia!
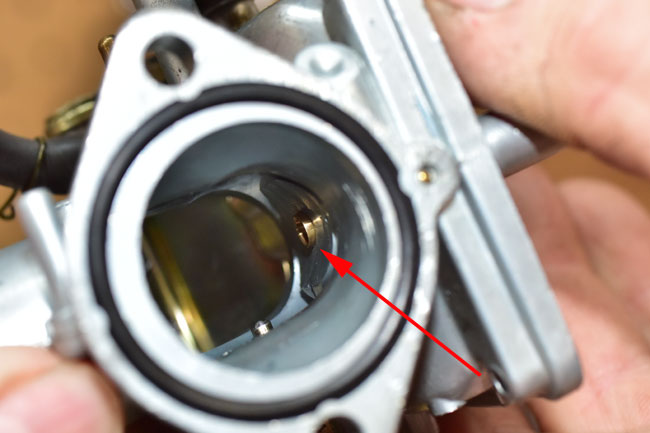
I’m taking a break from the book and jumping on the TT250 electrical system maintenance tutorial next.   The TT250 carb maintenance tutorial will follow right after that.   Then it’s back on the Moto Colombia book for a bit.   Wowee!  We’ll keep you posted, folks!
Cover-Prel

Oh, and one more thing: Don’t think for a minute I’ve forgotten about Baja. That trip is a go! I’ll have more details here on the blog real soon.

Posted in CSC Motorcycles | Comments Off on Yay!