Long Beach this weekend!

IMG_0781-(2)-650

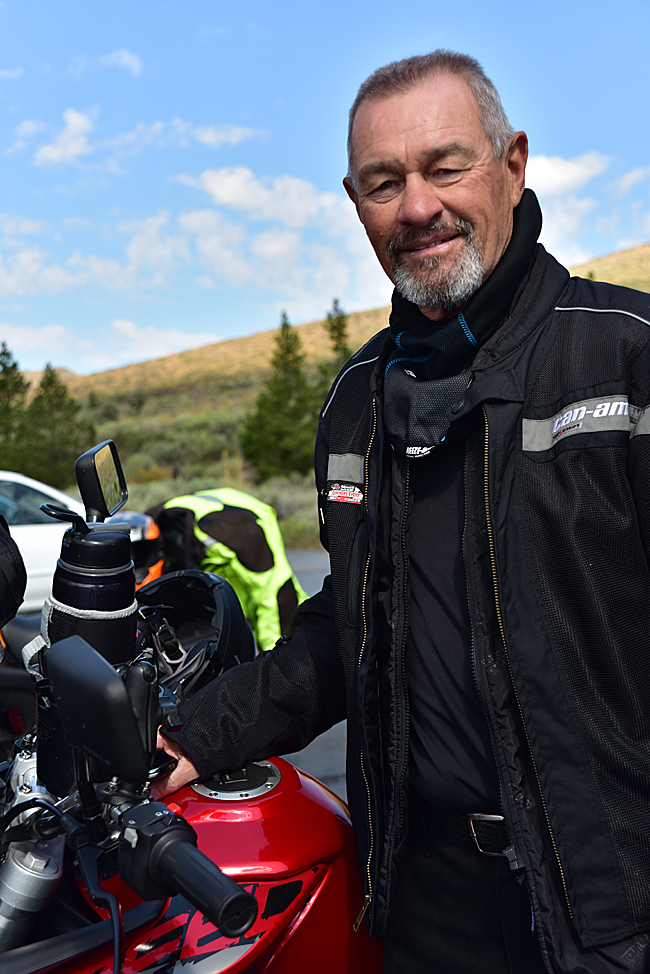
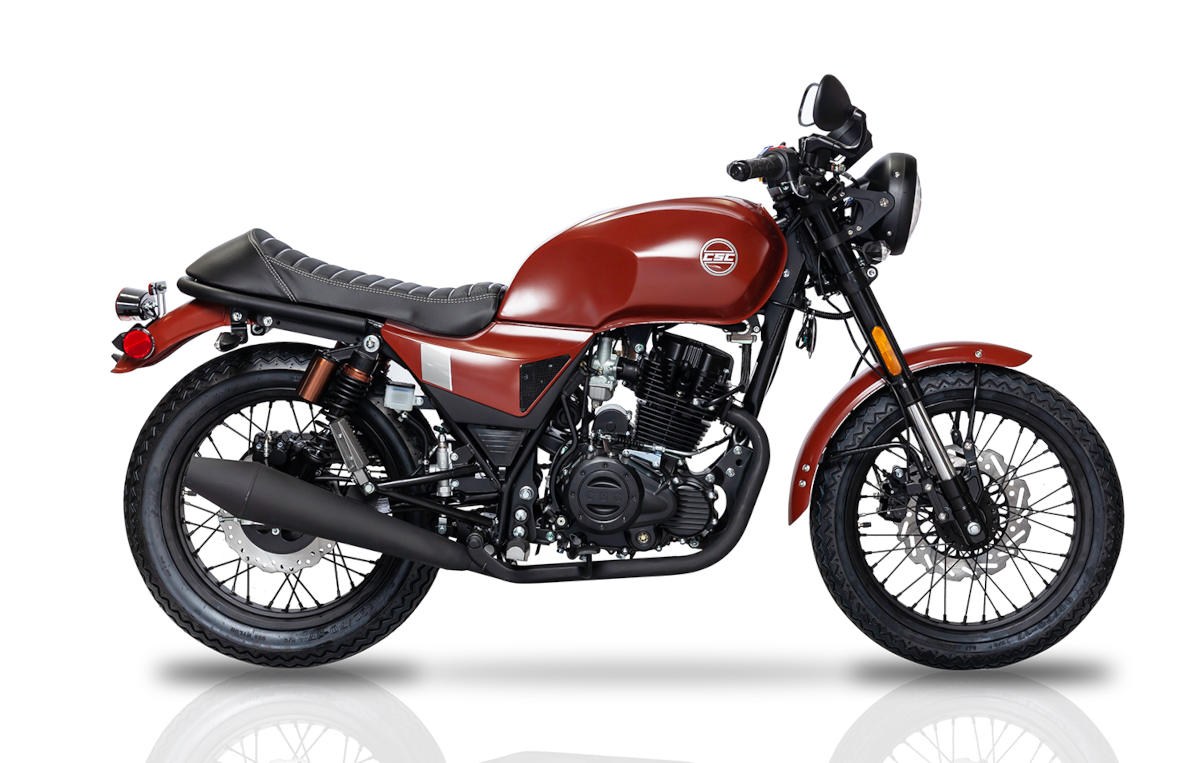
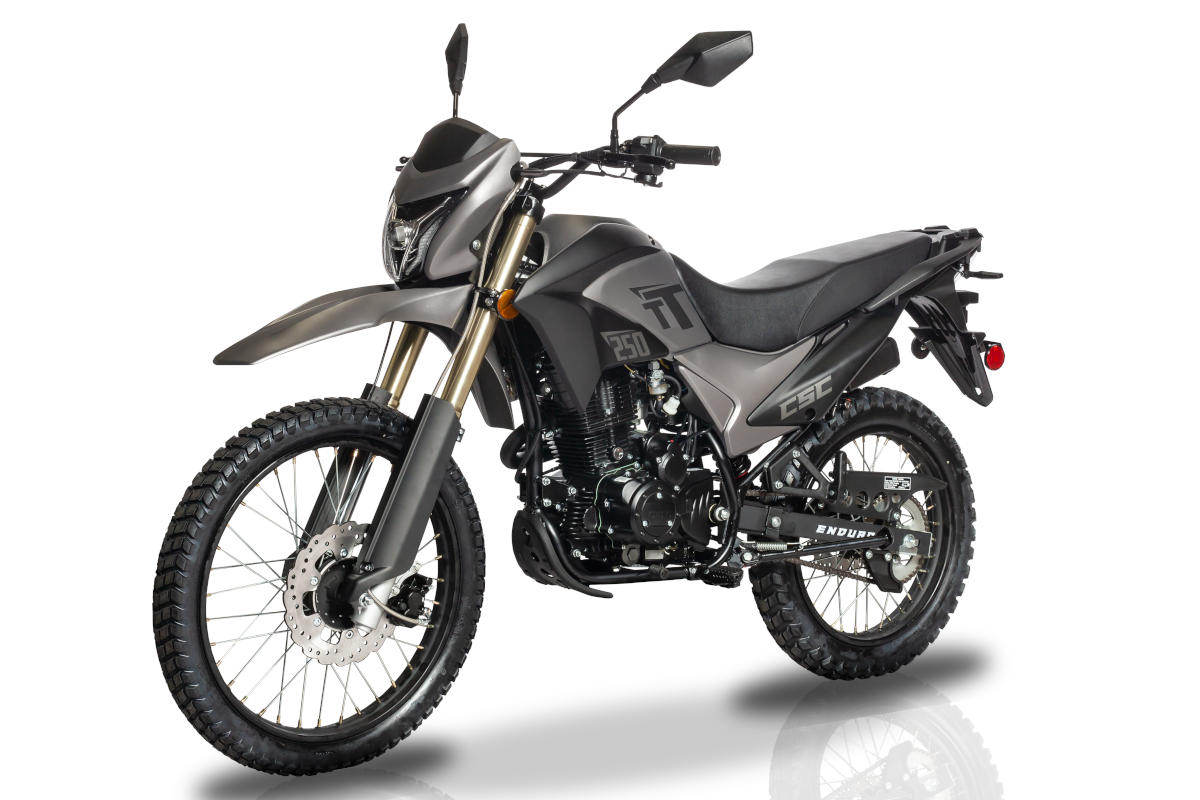
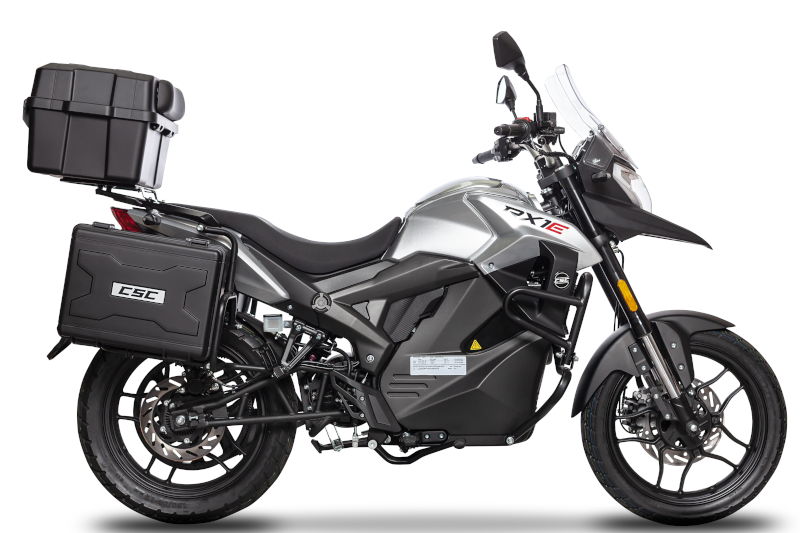
Folks, we’re really looking forward to seeing all of you this weekend at the Long Beach International Motorcycle Show!   We’re in Booth 1565, so do stop by to see the RX3, the TT Special, and the RC3!  I’ll be there on Friday and Saturday if you’d like to pick up a signed copy of 5000 Miles At 8000 RPM.

Posted in CSC Motorcycles | Comments Off on Long Beach this weekend!

I do this all the time…

My good buddy Tom sent this one to me, and it’s impressive…

I do those kinds of stunts all the time. They usually aren’t intentional, though, and they frequently end differently…

Posted in CSC Motorcycles | Comments Off on I do this all the time…

We have a winner!

We had about 50 entries in our most recent caption contest, and the winner is our good buddy Arizona George.   Many of the captions were just outstanding, but we liked the one sent in by George the best.   Here it is:

IMG_0315-650-RX3U-Captioned

I didn’t realize who George was initially, as he did not include his last name.  Then I learned it was none other than Arizona George, who accompanied us on parts of the Western America Adventure Ride!  That’s just outstanding!

George, as soon as you email your address to me, your autographed copy of 5000 Miles At 8000 RPM will be on its way!

Posted in CSC Motorcycles | Comments Off on We have a winner!

Baja!

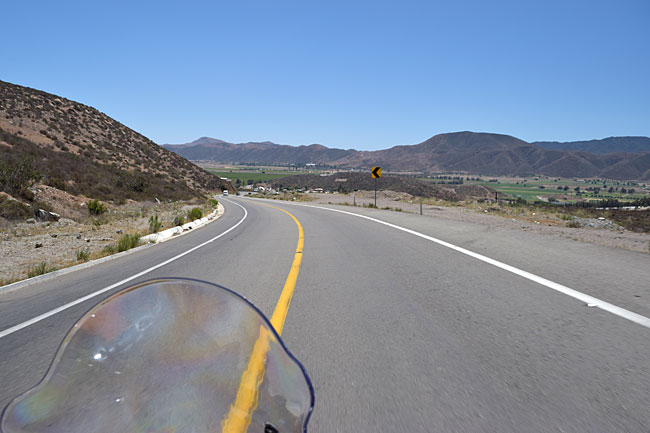
150429_2171-650

We’re at 15 folks right now for our 2nd CSC Baja Run, and that’s where I’m calling it full.   If you want to go, let me know and I’ll put your name on the waiting list.  If we get enough people, we may run a second group.

The dates are going to be 13 March to 19 March (a Sunday to a Saturday), which gives us a full 7 days in the Land of 1000 Aromas and gives each of you a day to get out here and a day to get back home after we return.

I’m working out the detailed itinerary now.  It’s a bit of a challenge, because you can’t just figure you want to do a certain number of miles per day and then find a hotel.  Things are spread out in Baja.  I’m going to keep this one to a max 250 miles per day to allow more time for photos and stops, and that’s a challenge because sometimes things are a couple of hundred miles apart in Baja.   I’ll post the itinerary sometime next week.

I’ve had lots of questions, and here are some answers:

  • We don’t want you to take your buddies along on other bikes.
  • We don’t want you to meet up with us along the route, so please don’t ask.  You need to be in at the outset.  It just takes to much time trying to meet people along the way.
  • We’ll be staying in hotels all the way (no camping).
  • You’ll need a valid US passport.   Things ain’t like they used to be.
  • You’ll need the registration for your bike, current plate(s), and Mexican insurance.  Your regular motorcycle insurance won’t get you into the country, and if you get stopped without insurance, it will not end well for you.  I’ll post where you can get Mexico insurance online.
  • You’ll need about $800 to $1000 in cash.  US cash is fine.  A lot of places where we’re going won’t take credit cards.  We don’t charge anything for the guide (uh, that would be me).  You will have to pay for your expenses (hotels, food, fuel, etc.).
  • No drugs and no guns.  Seriously.  Get caught with either in Mexico and you won’t be returning with us.  Or any time soon.  You will get to learn Spanish, I suppose.
  • There are local hotels in the CSC/Azusa area and we’ll be posting info about them in the future.
  • If you want to park your truck here, give Steve a call at 909 445 0900 to make sure we have room.
  • I’ll post a blog on what you need to bring, but keep in mind you aren’t relocating.  Riding gear, helmet, gloves, rain gear, a few tools, and a single change of clothes will work just fine.  Most folks bring way too much stuff (their bikes look like the opening scene in The Beverly Hillbillies).  The really important things are a camera and a positive attitude.  More on that later.
  • We won’t have a chase vehicle and I won’t be carrying spare parts.  I’ve always had more problems with chase vehicles than the motorcycles.  If you want to bring spare parts along, you should buy them now and pack them in your panniers.

That’s it for now.   Much, much more to follow, my friends.

Baja-650

Posted in CSC Motorcycles | Comments Off on Baja!

A cool ride…

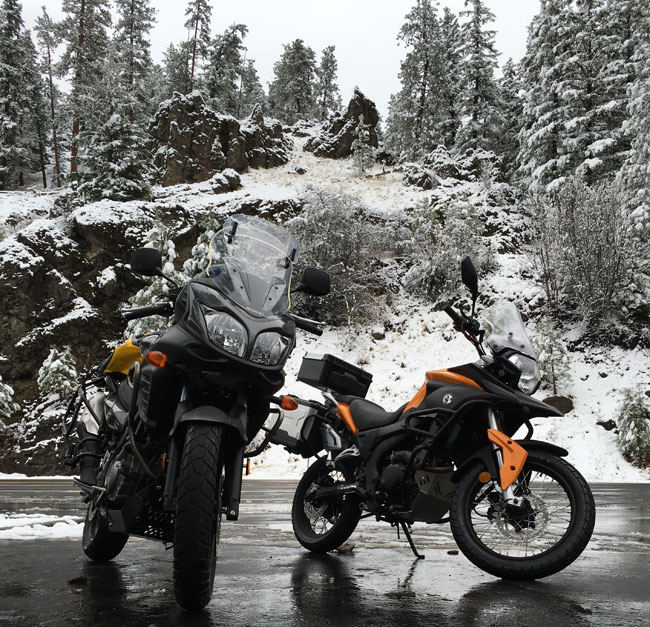
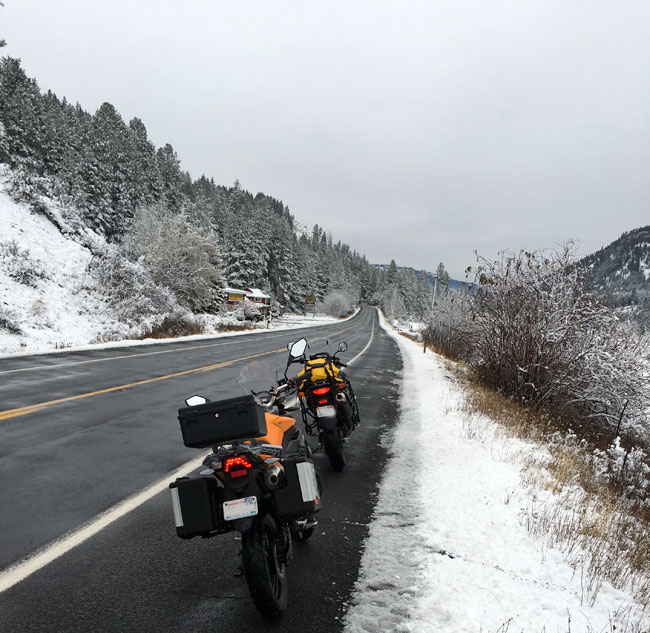
In more ways than one, too!   Check out this nice note and these awesome photos from our good buddy Jay up in Washington!

Good evening, Joe.

Couple cool pictures I took today on Chinook Pass in eastern WA. Snow can’t keep the RX-3 in the garage. First 200 miles and I love it!

Take care,

Jay

JaySnow1-650

JaySnow2-650

Awesome photos, Jay, and we’re glad you’re enjoying your new RX3.   Your photos are dramatic…some of the best I’ve seen.

We sure are getting some magnificent photos and videos from our riders.   Keep ’em coming, folks…we love seeing these!

Posted in CSC Motorcycles | Comments Off on A cool ride…

Changing the TT Special’s oil…

So, here we go…our first maintenance tutorial on the TT Special!  One of the most basic maintenance actions is changing your oil.   This one was easy to do (easier than the RX3, even), partly because the TT Special only has one oil strainer/filter (the RX3 has three), and partly because the TT Special’s engine is essentially a modification of our tried and true CSC-250 engine (and those things are bulletproof).

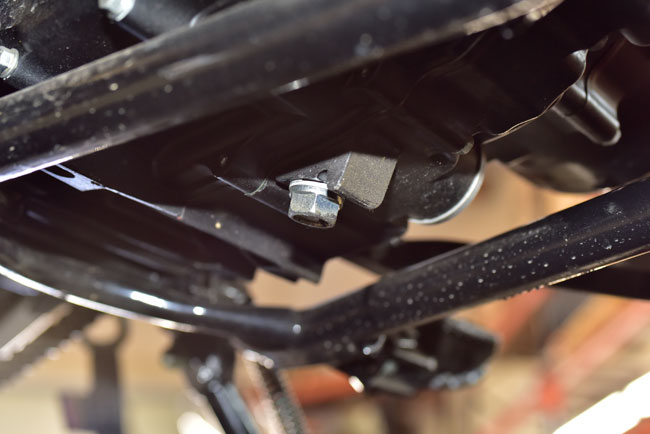
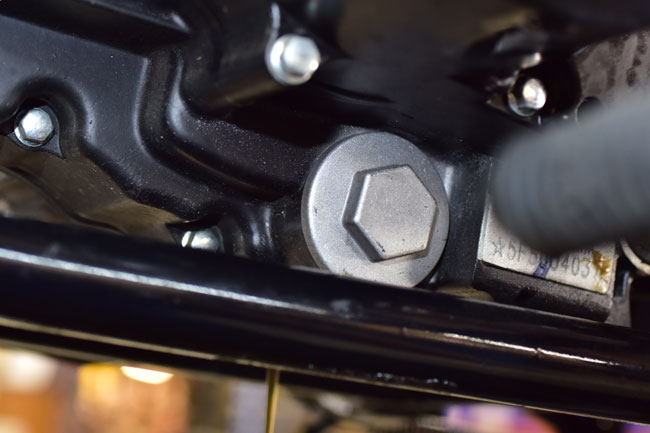
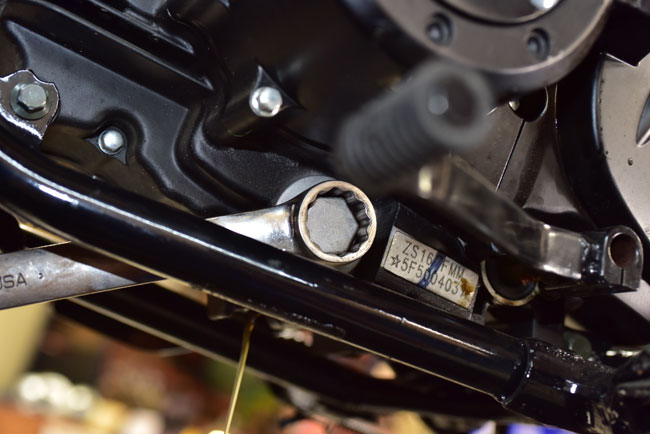
Let’s first consider the key parts of the TT Special and how we’ll use them when changing this motorcycle’s oil.   These include the oil (we use a 10W40 oil designed for motorcycles, and we sell both non-synthetic and synthetic oil), the oil dipstick (on the right side of the crankcase), the oil viewing port (on the right side of the crankcase), the 17mm oil drain plug (underneath the crankcase), the 24mm oil strainer cap (on the lower left side of the engine crankcase), the oil strainer spring (beneath the oil strainer cap), and the oil strainer (held in place by the oil strainer spring).

The first step is to put an oil drain pan underneath the motorcycle to catch the oil as it drains from the engine.

Remove the dipstick from the engine, as shown below.

141114_9062-650

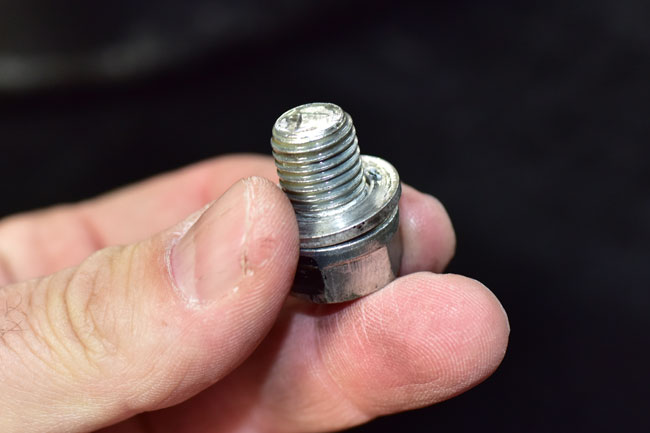
Remove the oil drain plug underneath the engine and allow the oil to drain.   Hold the bike in the vertical position so all the oil drains.

141114_9045-650

141114_9048-650Remove the oil strainer cap on the left side of the engine. 

141114_9049-650

141114_9050-650

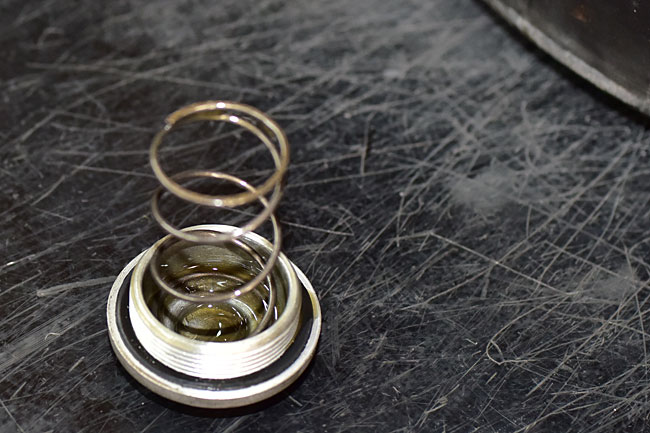
When the oil strainer cap is removed, there will be a spring inside of it, as shown below.

141114_9051-650

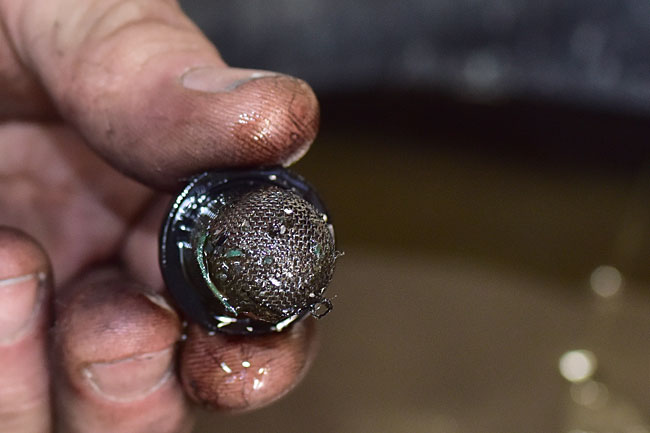
Usually, the oil strainer remains in the engine when the oil strainer cap and spring are removed.   You’ll have to reach into the engine with a pick or a screwdriver to get the oil strainer out of the engine.

141114_9052-650

When you remove the oil strainer for the first couple of oil changes (as the engine is breaking in), you will see more than a few metallic particles and probably some plastic adhesive material (the green stuff) on the strainer.   This is normal, so don’t be alarmed by it.   When I’ve done the first oil change on most of my other motorcycles, it looked like someone swept up the floor in a machine shop and dumped the sweepings into my crankcase.  It’s normal.   When the engine is breaking it, wear occurs, and what you see in the photo above is the result.

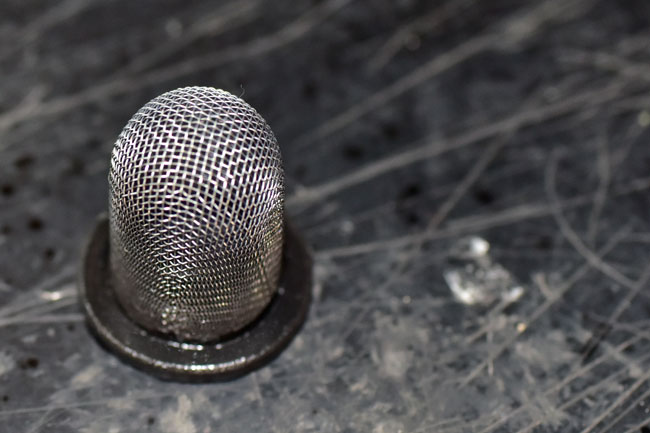
Clean the strainer.   WD-40 works well, because you can direct the spray into the strainer from the inside and blow the filtered particles off.  If you wipe them off with a shop rag, take care not to deform the strainer.

141114_9058-650After all of the oil has drained from the crankcase, insert the cleaned strainer into the spring/cap assembly, as you see below.

141114_9059-650

Reinstall the strainer, the spring, and the strainer cap.

Reinstall the oil drain plug.

Pour 1.2 liters of oil into the oil fill port on the right side of the motorcycle.   On the motorcycle you see in the photo below, we were doing lots of other stuff, so don’t think you need to remove the tank, the seat, the body panels, etc.    All you need to remove during an oil change are the things described in the preceding paragraphs.

141114_9064-650

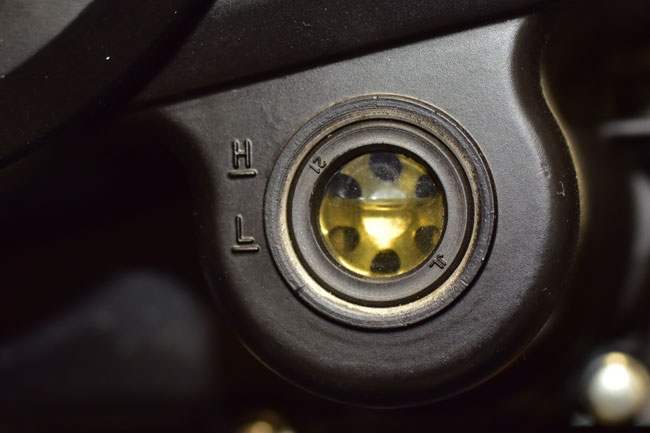
1.2 liters is about 1.3 quarts.   If you’re like me, you don’t have a graduated beaker in your garage, so the best way to get the right amount of oil in the engine is to pour in a quart, and then pour that last 0.3 quarts in at a slow rate keeping an eye on the oil viewing port (on the right side of the engine).  When you have 1.2 liters, the oil level will be between the L and H marks when the bike is vertical (off the sidestand), as you see below.

141114_9065-650

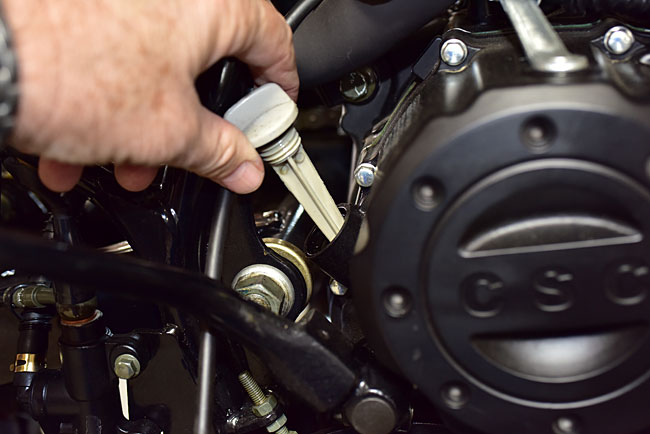
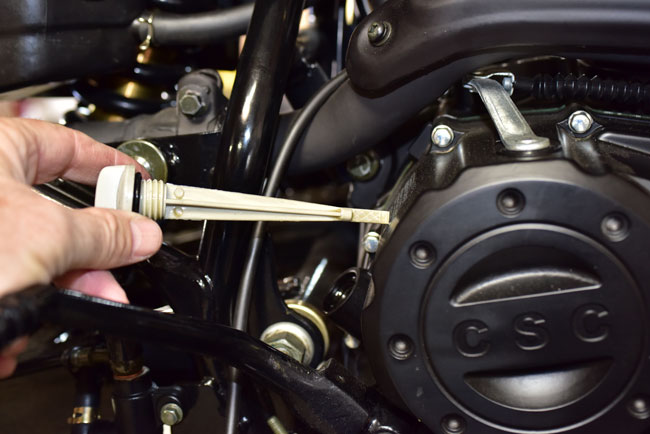
Start the engine, let the bike warm up, and then check the oil again.  You can also check the oil with the dipstick.  The proper way to do this is to let the engine warm, shut the ignition, remove the dipstick and wipe it clean, wait one minute, hold the bike vertical, and then reinsert the dipstick without screwing it into the engine.  The photo below shows that last part.

141114_9067-650

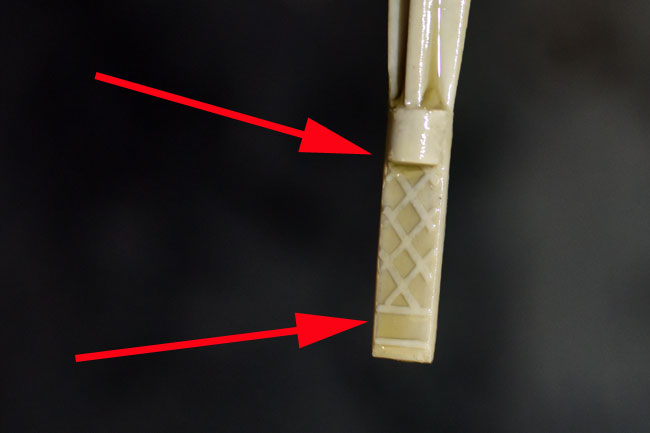
Withdraw the dipstick and check the oil level.  It should be at the upper level of the cross-hatched area on the dipstick (the oil should come up to the upper red arrow shown in the photo below).

141114_9061-650

141114_9063A-650

And folks, that’s all there is to this one.  After you’ve done this a couple of times, you’ll find changing your oil to be a 10 minute job.  It’s easy.

Posted in CSC Motorcycles | Comments Off on Changing the TT Special’s oil…

One of the best videos ever!

Our good buddy Lee in upstate New York just posted this, and folks, it’s one of the best RX3 videos I’ve ever seen!

Lee, our compliments to you. Well done, my friend!

Posted in CSC Motorcycles | Comments Off on One of the best videos ever!

Magnums, Mausers, Mosins, and Model 1911s…

Almost no motorcycle content in this blog, folks, but I had mentioned the Mosin Fun Match we were going to have this weekend and I thought I would follow up with an after action report and a proposal.

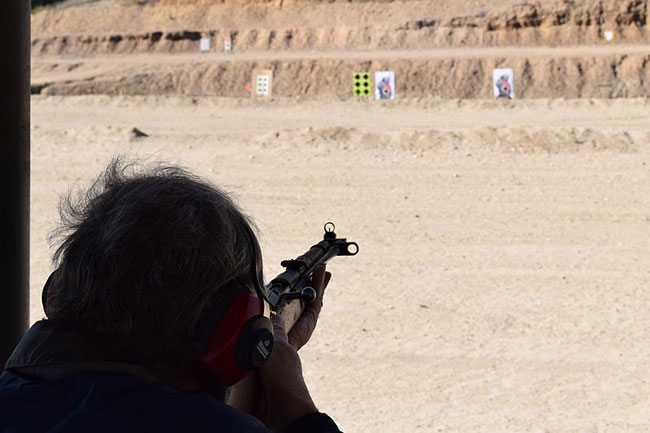
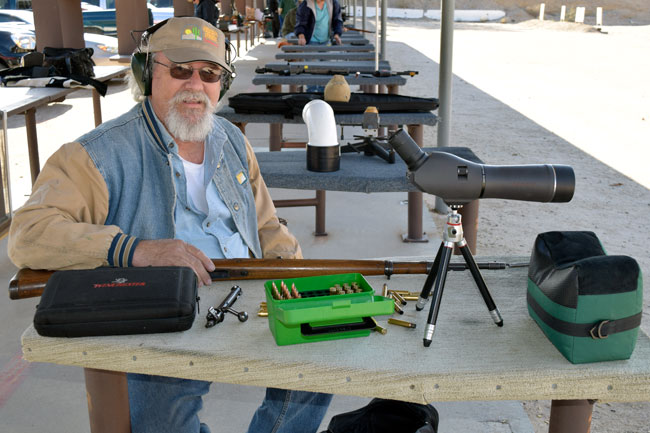
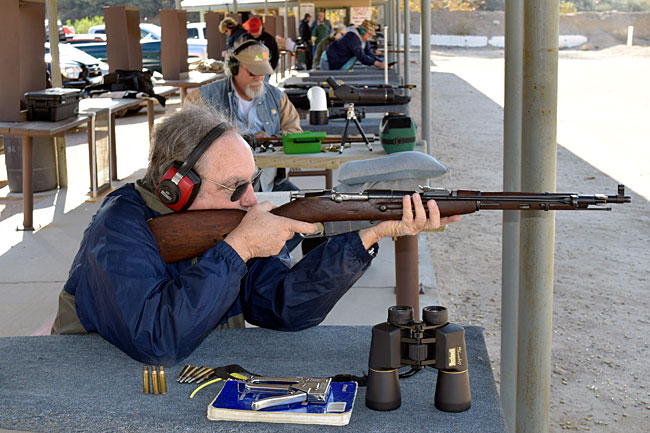
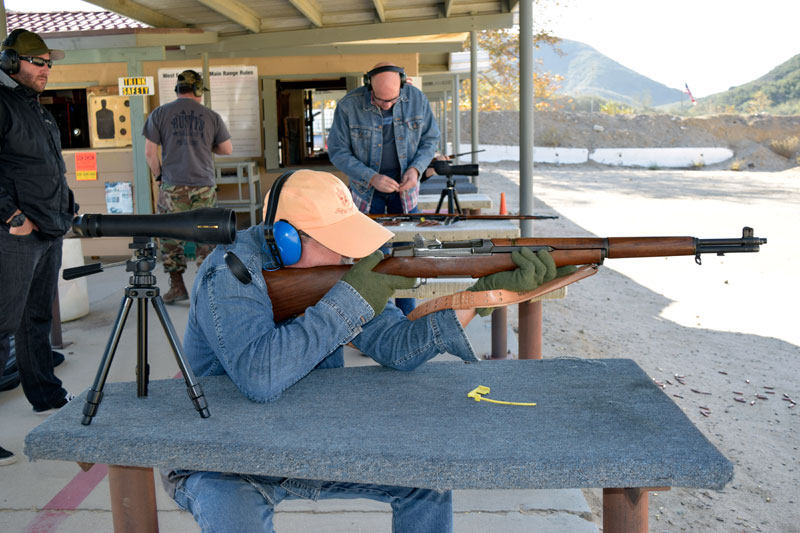
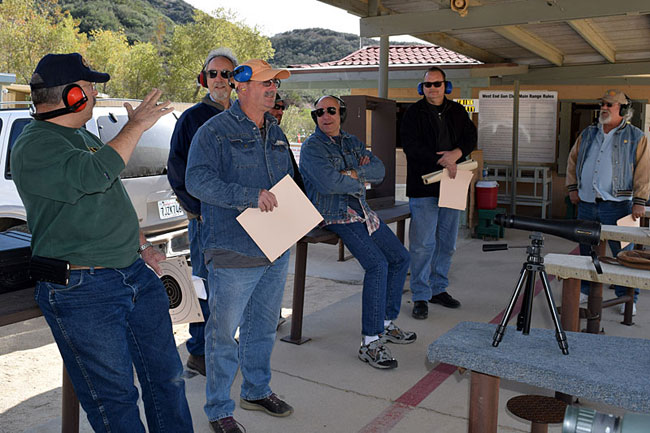
About a dozen of us met yesterday morning out at the West End Gun Club for our match.   It was cool.  Literally.  The temperature in So Cal dropped this weekend big time.  But it was also cool as in way fun.   We had a good time shooting our match with simple rules and fun targets…zombies, bullseyes, military surplus rifles, and handguns…

151115_8980-800

I’m always worried that when I post gun stuff on the CSC blog somebody will get their BVDs in a knot and start whining about it.   The fact is, though, that many of you have written or otherwise told me that you like seeing this stuff.  So, every once in a while I’ll continue to throw in some shooting stuff.

The motorcycle content first:  My good buddy Duane, who helps at CSC when we get backed up, is also an avid shooter.  Duane rides an RX3 (he did the Flagstaff run with us a ways back) and he, like me, is a range regular.  Duane shoots an ultra-collectible K98 Mauser, and he’s very, very good with it.

151115_8939-650

Here’s good buddy Rick, one of the Mosin boys, with his M44 Mosin.   Rick is into the shooting and reloading thing big time…he shoots cast bullets in his Mosin (as do I), which is a relatively advanced reloading thing to do.  It’s way harder to get good accuracy with cast bullets, and Rick is right there.   He even casts his own bullets.   Amazing stuff.

151115_8938-650

Incidentally, if you want to see what goes into reloading cast bullets in a rifle, check out this video..

A shot of my good buddy Jim, who shoots the Mighty M1 Garand.

151115_8934-800

The boys, yukking it up during a line break…

151115_8991-800

My buddy Paul’s Mosin.   Paul and I go back a long time.  We’ve been friends for over 60 years.

151115_8936-800

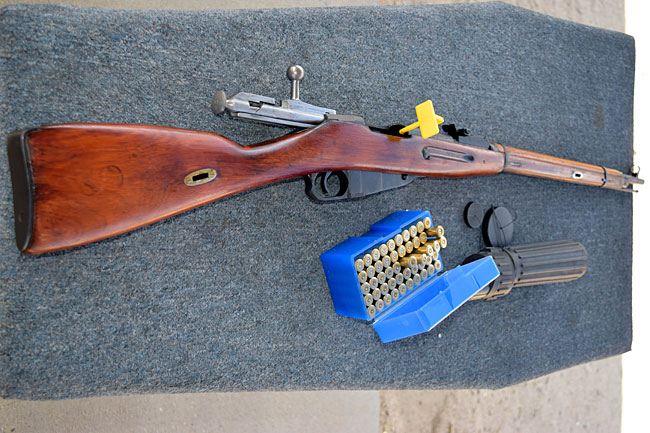
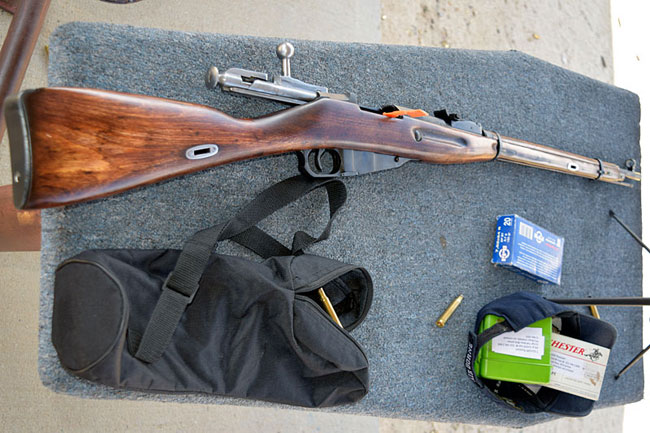
My Mosin.   It’s a 1934 rifle.   The thing is 81 years old, and it still shoots into an inch.   I refinished it and glass bedded the action.  It’s awesome.

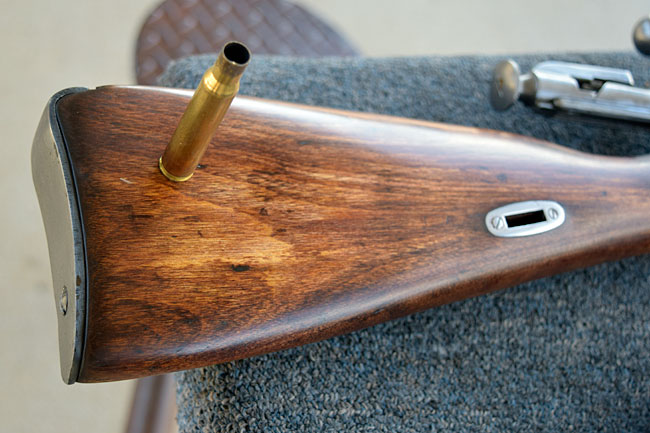
151115_8940-800Good buddy Jim was at the bench just to my left, and his Garand was throwing brass all over the place.   One of those big .30 06 cases dinged dinged my Mosin stock (it’s that little scratch just to the left of the spent .30 06 brass).   It’s no big deal, because it has an oil finish.  I’ll just throw a bit of TruOil on it and it will be as good as new again.

151115_8944-800

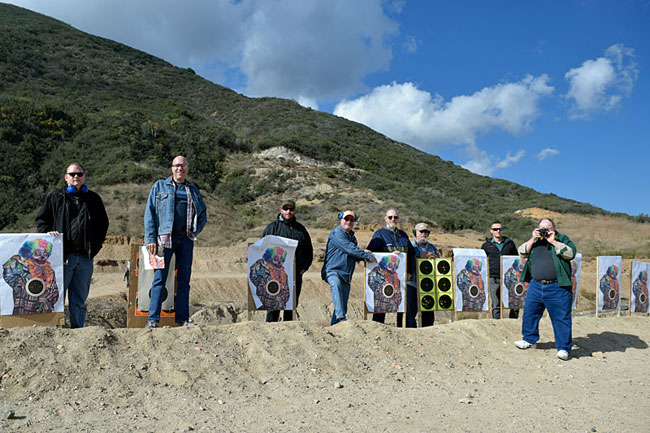
The boys downrange, checking their targets.  It was a great day to be on the range.

151115_8947-800

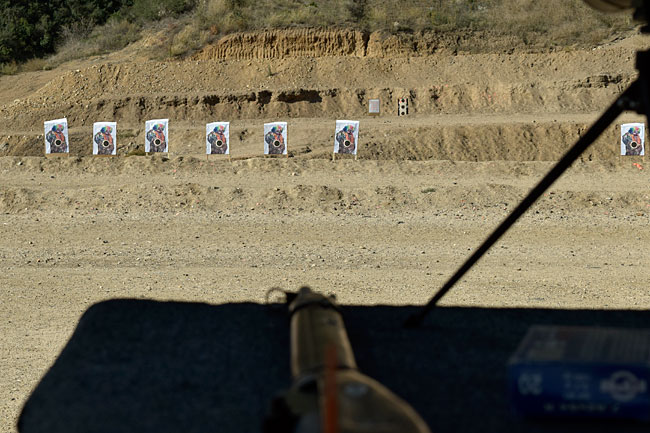
We shot rifle targets at 50 yards, and then we switched to handgun targets at 25 yards.  It was grand fun.  A couple of us were shooting .45 ACP Model 1911s, a couple of us were shooting .357 magnum revolvers, and the rest were shooting 9mm automatics.   Good times.

151115_8943-800

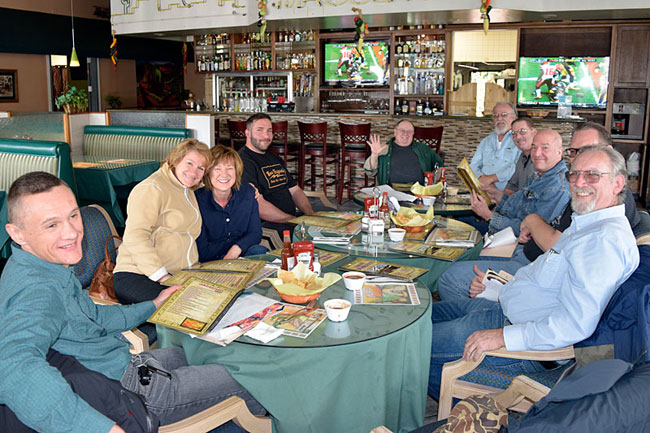
There’s something about Mexican food and rifle matches….the two just seem to go together.   Part of the tradition with this crowd is a great lunch at our local Mexican restaurant, and yesterday was no exception.

151115_8952-800

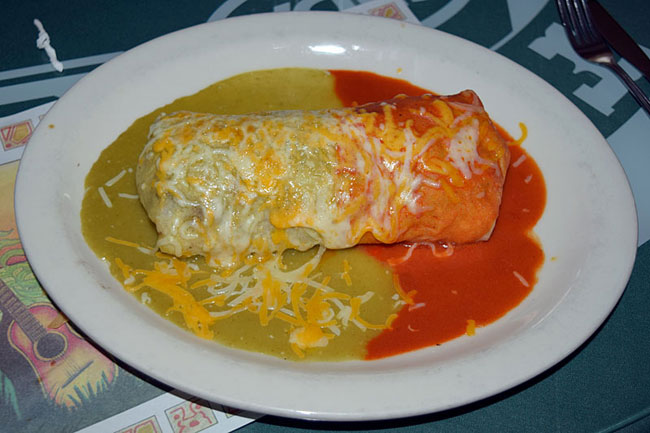
I had albondigas soup.  I don’t what an albondiga is, but they sure are good in soup.  One of the younger guys had this burrito.   You’d need to use scientific notation to denote the calories in this thing…

151115_8954-800

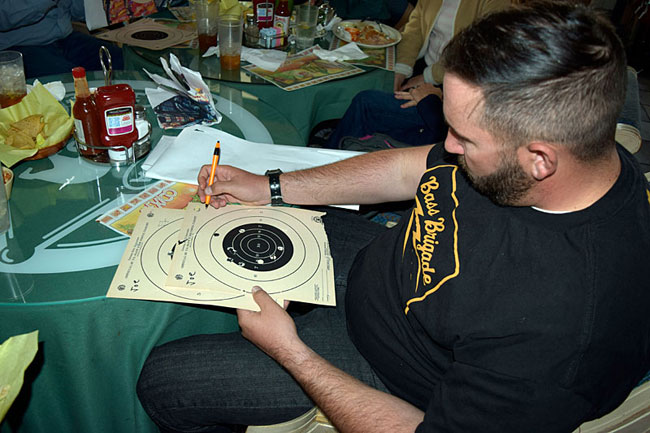
We don’t score the targets until after lunch (it’s also part of the tradition).   Here’s Tyler at work on one of the pistol targets…some of these guys are really good.

151115_8956-800

These matches are a ton of fun.  Everyone who participates is a winner, and there are no losers.  It is a really fun thing to do.

So, the proposal I mentioned earlier….we’ve been talking about a local Scoot and Shoot event…the same sort of thing as described above, but your ticket in is riding your RX3 to the match.   It would have to be handgun only (it’s kind of hard to carry a rifle on a motorcycle).    If you’re interested, let me know (write to me at info@cscmotorcycles.com), and I’ll set it up.

Hey, one more thing…if there are any more entries for the RX3-U photo caption contest, get them in to me by midnight tonight.   First (and only) prize is a signed copy of 5000 Miles At 8000 RPM.   We’ve received about 40 entries so far.   We’ll announce a winner here on the blog tomorrow!

Posted in CSC Motorcycles | Comments Off on Magnums, Mausers, Mosins, and Model 1911s…

RX3 Lowering Kit Installation

140726_6833-650-200We had a request late last week from one of our riders who recently purchased our RX3 lowering kit.   Gerry walked me through the installation on Saturday and as I was preparing to write about it last night, I noticed that our good buddy Rob (who rode with us on the Western America Adventure Tour) had already posted a tutorial on the same topic over on the ChinaRiders.net forum.   Rob did a great job (I’m a little jealous)!    I thought it might make sense to post our tutorial on the same topic anyway, as seeing how this is done from a couple of folks’ perspectives might make it easier for all of you who want to install the lowering kit.

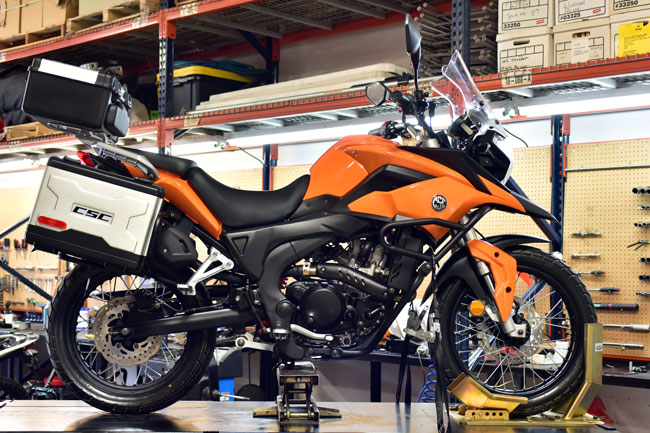
So, the first step in this process is to get the rear wheel off the ground.   We do the installation on a lift, as the bike is easier to work on when it is up on the air.  You don’t need a lift to do the job, but you do need to get the rear wheel off the ground.
141114_9068-650

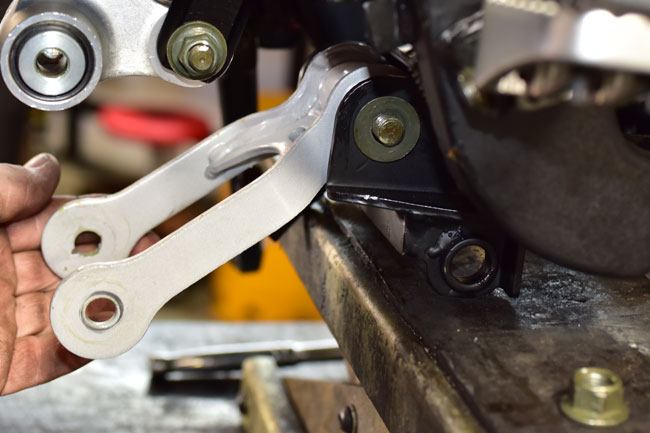
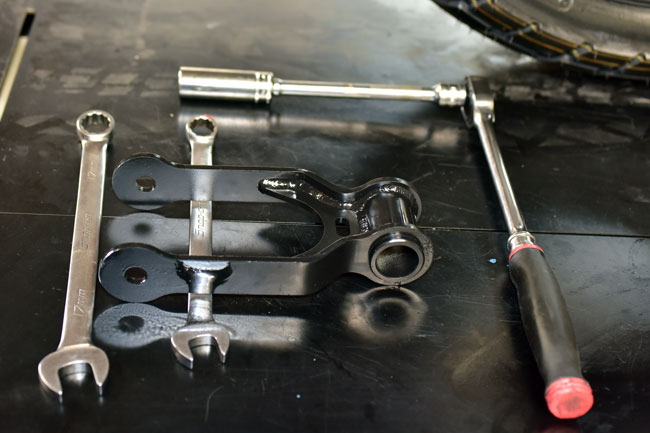
This is the longer suspension link, which will lower the bike once it has been installed.   It’s what you get when you buy the lowering link from us.
141114_9069-650

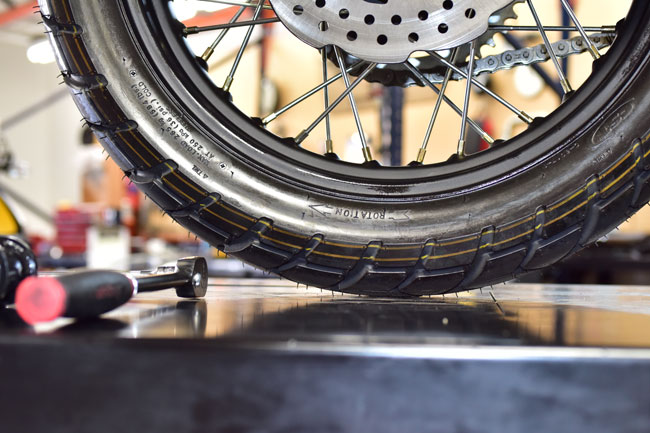
We use a jack to lift the rear wheel.  You don’t have to get it way up in the air; you just need a little clearance between the bottom of the rear wheel and the ground.
141114_9070-650

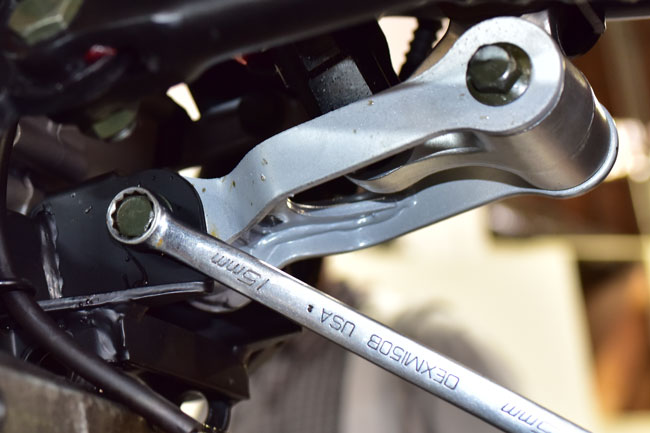
What we’re going to do is remove the stock suspension link (denoted by the center arrow).   We are going to remove the pivot bolts at either end (denoted by the red arrows on the left and the right).

141114_9071-650

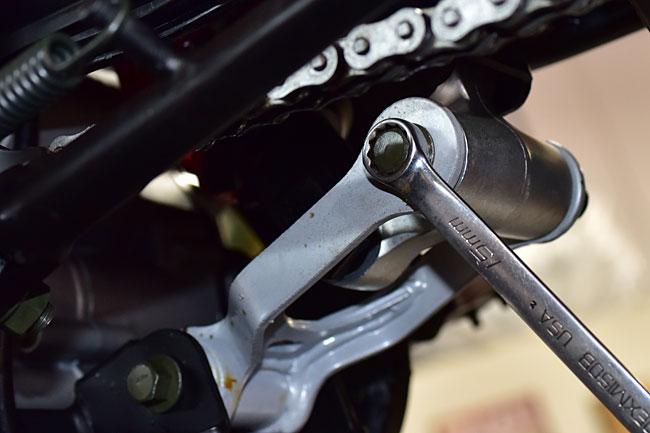
The self-locking nuts on the right side of the suspension link are 17mm; the bolt heads on the left side of the motorcycle are 15mm.

141114_9073-650

141114_9075-650

141114_9076-650

Remove the 17mm self-locking nuts and their washers from the right side of the suspension link on both the forward and aft pivot bolts, and remove the pivot bolts.

141114_9077-650

141114_9079-650

141114_9080-650

At this point, you can remove the stock suspension link.

141114_9081-650

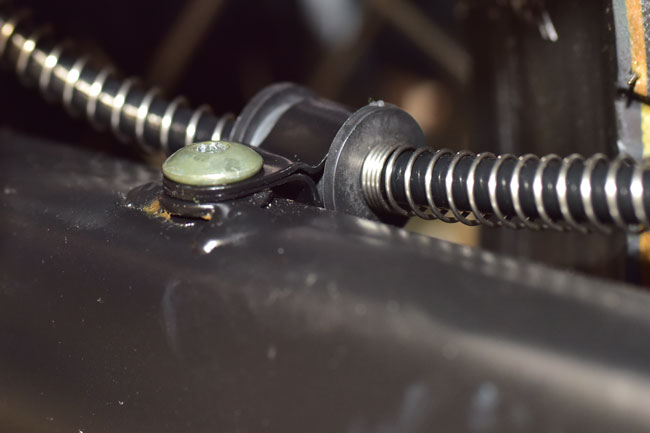
After you have removed the suspension link, we advise reversing the hose clip on the rear brake’s rear hose attach point on the swingarm (there are two hose clamps and two attach points; we are describing the rear one).   Remove the Allen bolt securing the clamp, rotate the clip 180 degrees (you don’t have to take it off the hose), and then reattach it so that the rear brake’s hydraulic line runs along the inside of the swingarm as you see in the photo below.   We do this to assure clearance between the hose and the rear brake caliper when the rear suspension is fully compressed.   We’ve checked this interface with the hose clamp in the original position and it clears the caliper; routing the hose as we show here adds additional clearance just to make sure these two items never come into contact with each other.
141114_9083-650

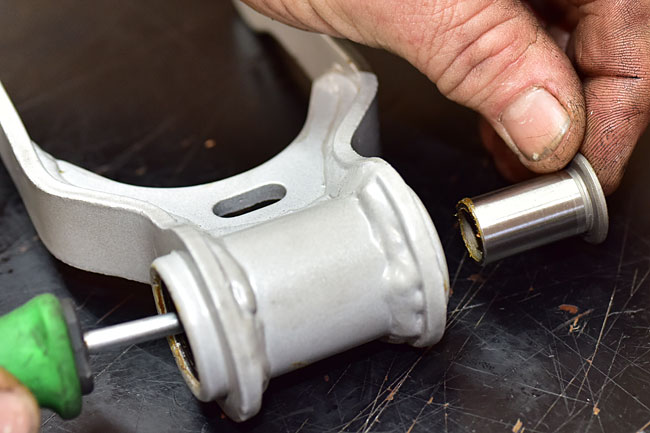
Let’s now remove the bearings and the seals from the original suspension link.   The first part of this is to slide the bearing inner races out of both sides of the link.
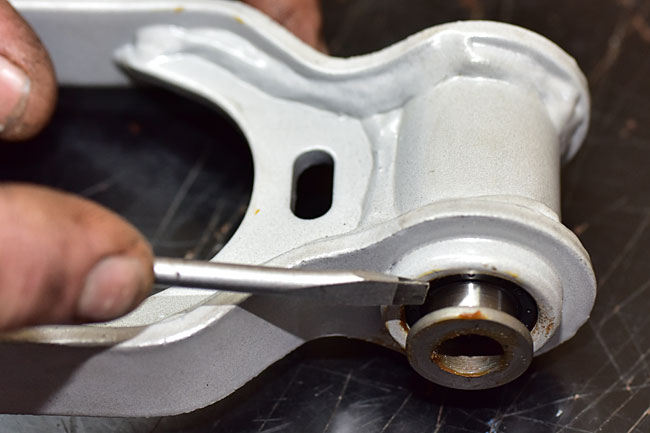
141114_9084-650

141114_9086-650

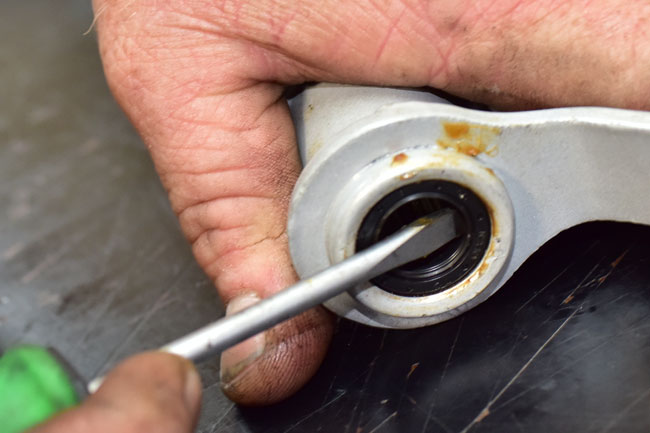
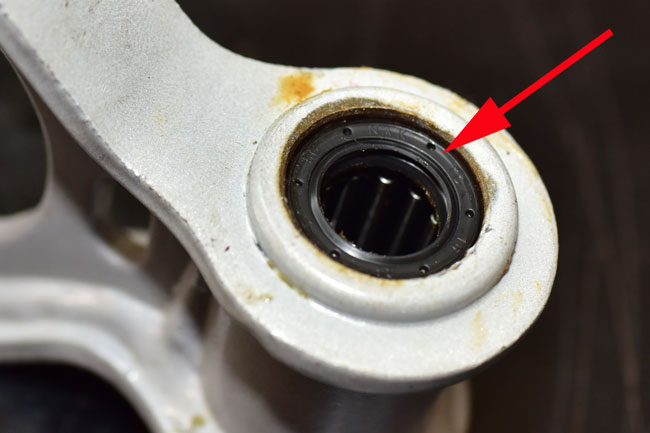
Next, we’re going to gently pry the grease seals out of the link on both sides.  The red arrow points to the grease seals.   Do this carefully; we’re going to reuse the grease seals.
141114_9088-650

141114_9090-650

The grease seals have an inside and an outside.   The side where you can see the spring faces into to the rear suspension link.

141114_9091-650

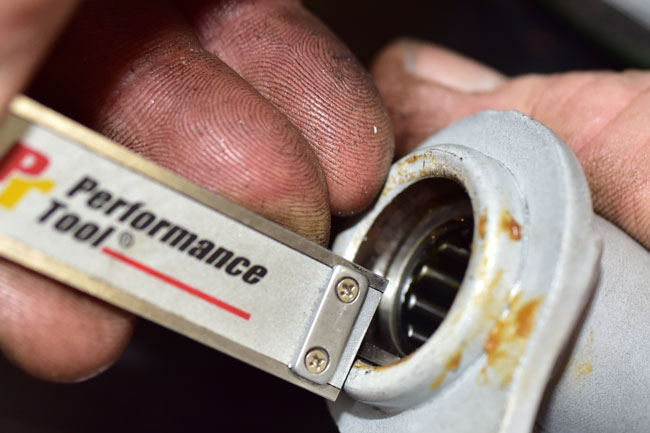
When you have removed the grease seals, you’ll be able to see the bearings inside the link.  Note that when in place, there is about 6mm to 7mm of the link’s inner diameter exposed.  That’s the area you see the red arrow pointing to below.

141114_9092-650

141114_9093-650

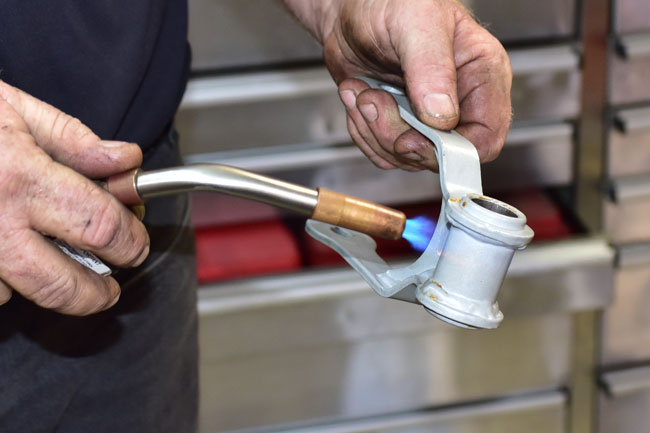
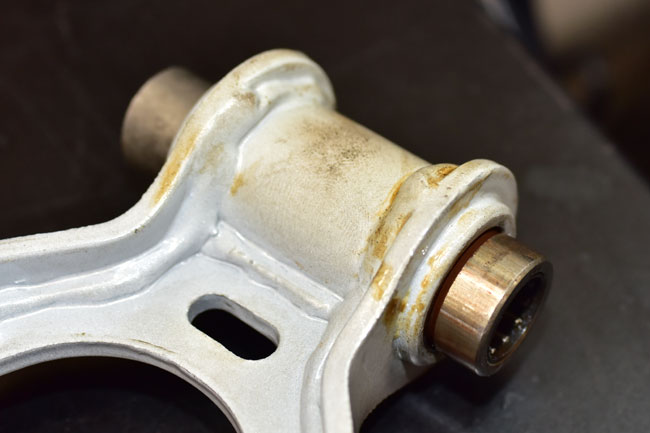
Now we have to remove the bearings from the link.  The bearings are a press fit in the link, and the way to get them out is to heat the link.   You don’t need to heat up it much; heating the rear link to about 250 degrees in this region is adequate.  That won’t burn the paint and it will expand the link enough to allow us to drive out the bearings.   Gerry uses a propane torch for this; you can also use a heat gun.
141114_9096-650

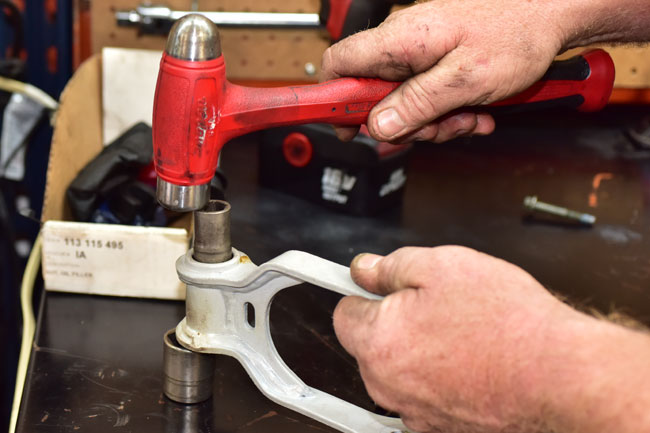
Once the link is warmed, use a couple of sockets and a hammer to drive out the bearings, as shown below.
141114_9101-650

141114_9102-650

141114_9103-650

You can also use a press to drive the bearings out, but most folks won’t have a press in their garage.  We show you how to do it with a hammer and a couple of sockets for that reason.

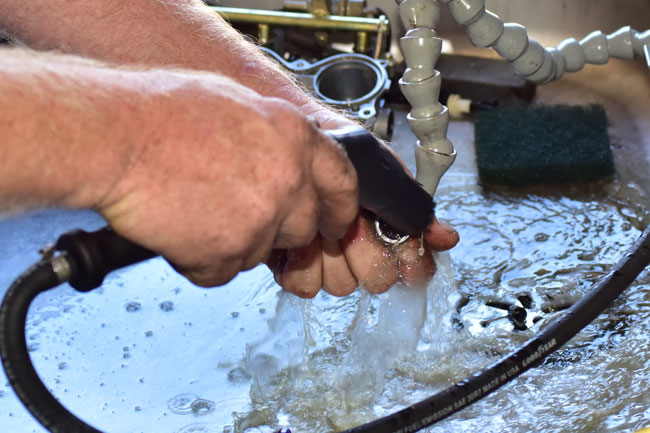
Once the bearings are out, we recommend cleaning them thoroughly and then repacking them with bearing grease.   We clean these parts in our solvent sink.
141114_9105-650

141114_9107-650

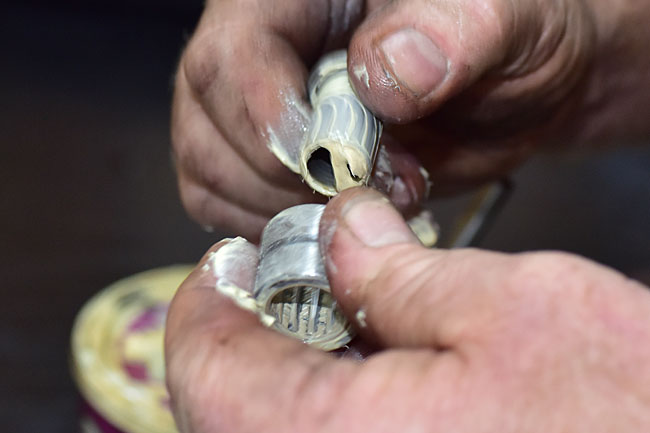
After the bearings and their inner races are clean, allow them to dry.  Then apply bearing grease liberally, packing the bearings well and thoroughly coating the races.   Gerry pushes the races into the bearings and rotates them several times to assure the bearing grease is appropriately distributed to all of the bearings’ inner surfaces.

141114_9108-650

141114_9110-650

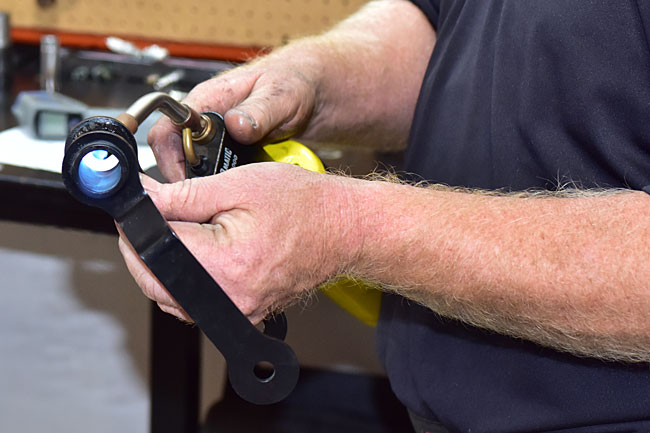
Remove the inner races from the bearings, as we are now going to install the freshly packed bearings into the new rear suspension link.   The process is the reverse of what we did before.   Heat the rear link to allow it to expand.  This will allow us to drive in the bearings.
141114_9111-650

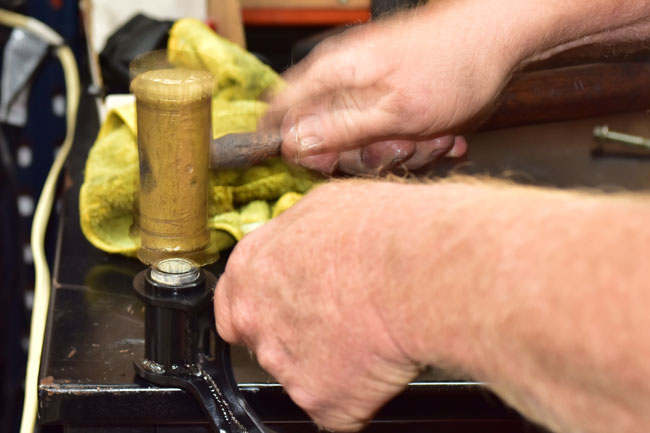
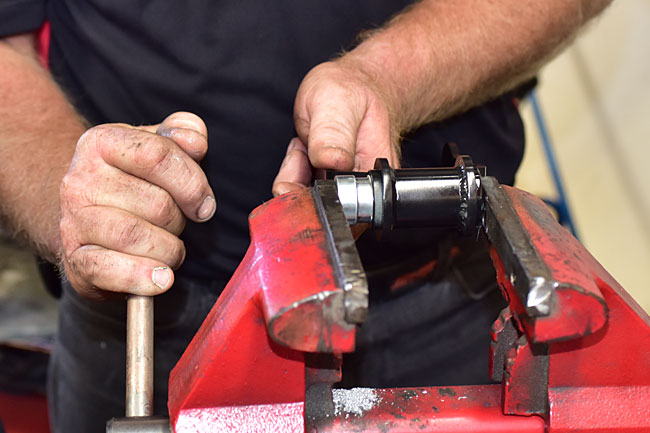
We start the bearing with a brass hammer, and then drive them into the link the rest of the way with a vise and a bearing sleeve.
141114_9115-650

141114_9119-650

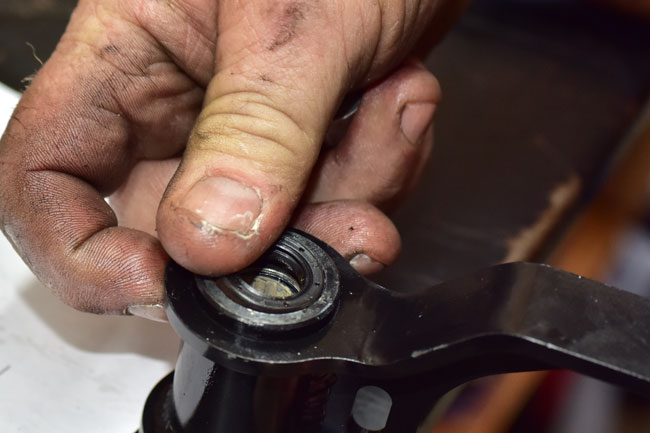
You want to drive the bearings into the link so that they go inside the link with about 6mm to 7mm of exposed inner diameter.   After you’ve done that, reinstall the grease seals.
141114_9121-650

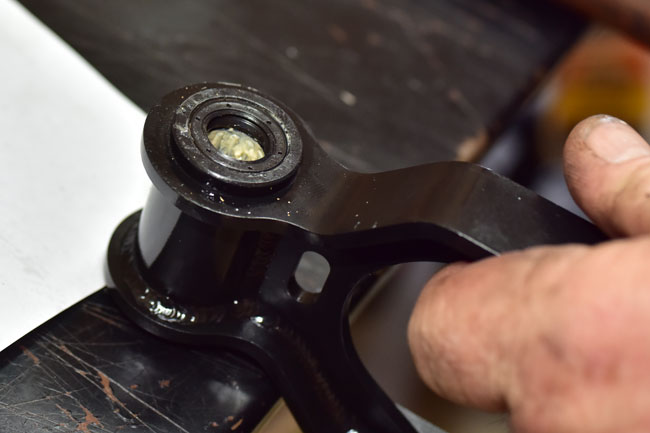
The grease seal surface should not protrude beyond the end of the link.   The installation should look like the one below.
141114_9120-650

After the seals are in place, apply bearing grease liberally to the inside of the bearing.

141114_9122-650

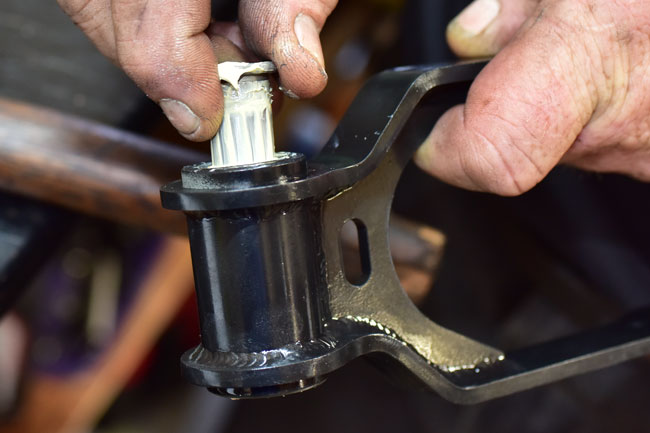
Install the bearing inner races on both sides of the link, as you see below.
141114_9123-650

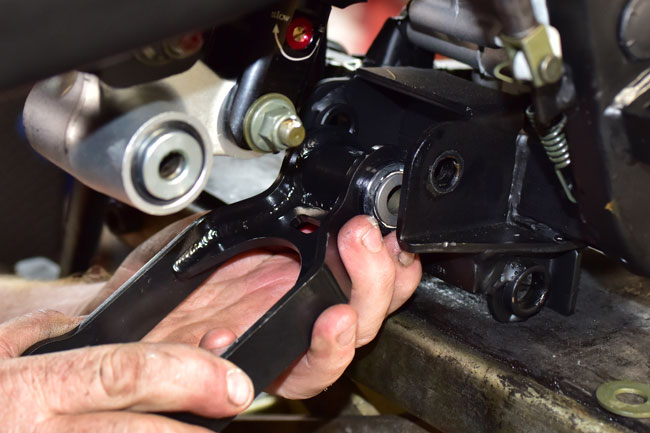
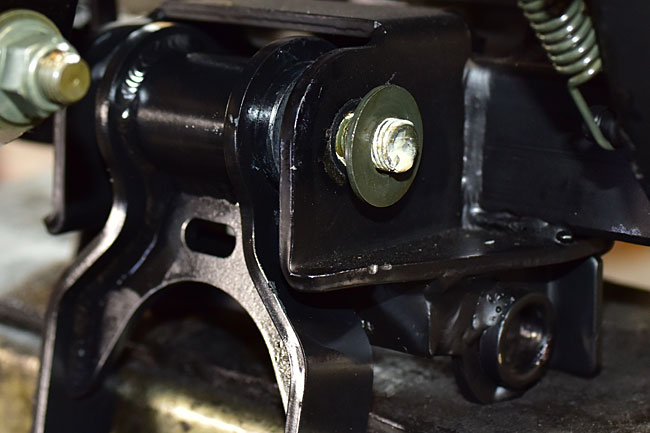
We can now install the new suspension link.   Start with the front pivot point first.   Push the pivot bolt through with the bolt head on the left side of the motorcycle.   Push the bolt through the frame pivot points and the link, and then install the washer and the nut on the right side.
141114_9124-650

141114_9127-650

141114_9128-650

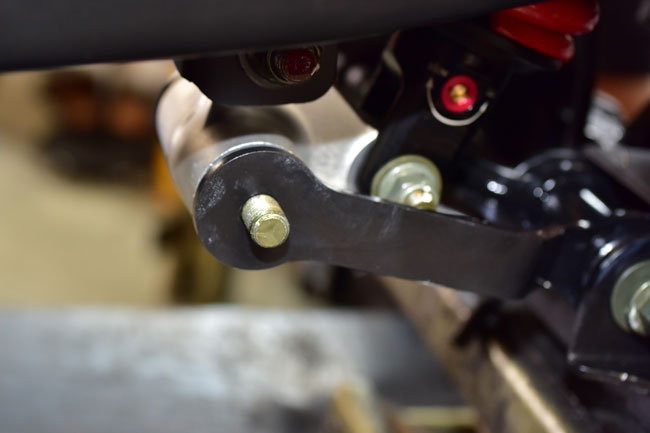
Lift the rear wheel to align the suspension link with its rear mounting holes, and repeat the bolt, washer, and nut installation process.

141114_9129-650

141114_9130-650

141114_9131-650

Tighten the rear suspension link bolts, and get out for a ride!

Most of the people who do this installation don’t do anything to the front suspension, but if you want to, you can lower the front of the bike, too.   To do this, you can loosen the front forks in their upper and lower and triple tees, and move the forks up a bit.    You can’t go too far in the front or you’ll hit the handlebars.  If you want to lower the front end, please see our tutorial on fork maintenance for how to move the forks in the upper and lower triple tees.

And folks, that’s about it.  If you don’t want to remove and reinstall the rear suspension link bearings, we can sell you a link that already has the bearings installed (just make sure you tell us that’s what you want when you order the lowering link).

Posted in CSC Motorcycles | Comments Off on RX3 Lowering Kit Installation

Auxiliary Lighting Installation

This maintenance tutorial focuses on auxiliary lighting installation.  We offer three different auxiliary lighting systems.  The installation is the same for any of the three.  We’ll show the installation using our largest auxiliary lighting system.

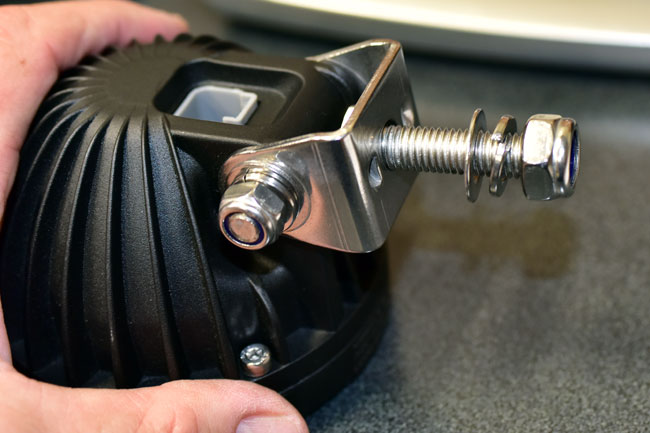
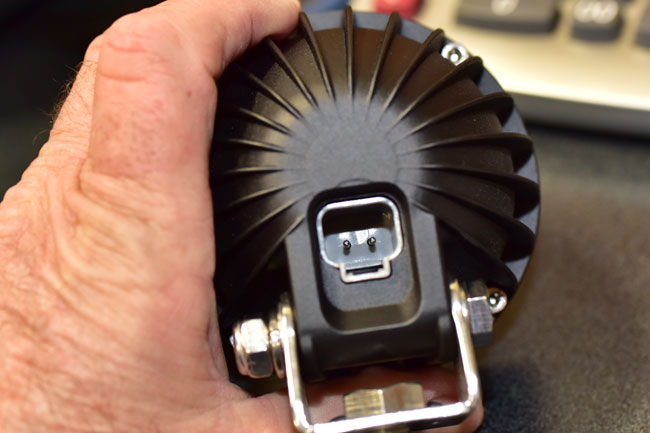
Your lighting kit will come with two lights, the mounting hardware, the bar mount brackets, and the wiring harness for each light.   Each light will look like this…note the self-locking nut, the lock washer, and the washer on the lights’ threaded mounting post.

141114_8928-650

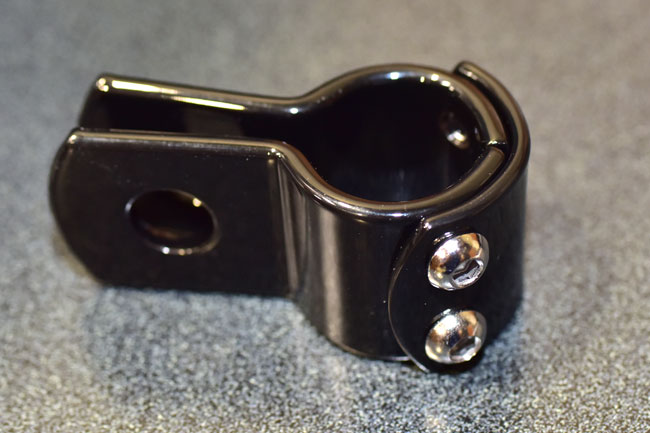
Here’s what the mounting bracket looks like.   You will have two of these.

141114_8929-650

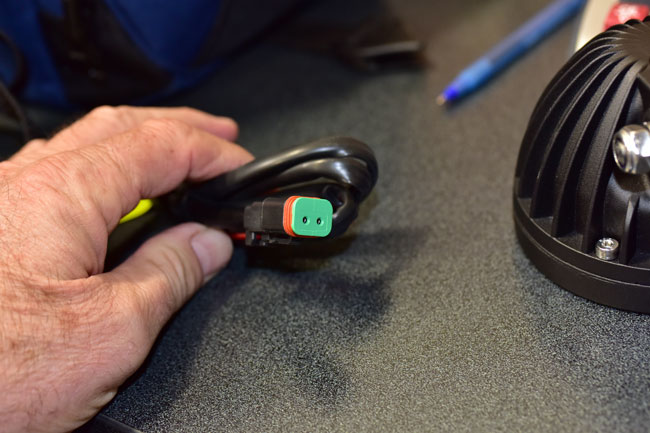
Each light has a wiring harness.

141114_8926-650

The wiring harness plugs into the back of the light.

141114_8927-650

Remove the rear seat, the front seat, the body panels around the fuel tank, and the fuel tank.  I usually wait to do all of this until the fuel tank is relatively empty, as it makes the tank easier to remove.   You’ll need to plug the fuel hose emerging from the tank so it will not leak fuel once the tank has been removed.

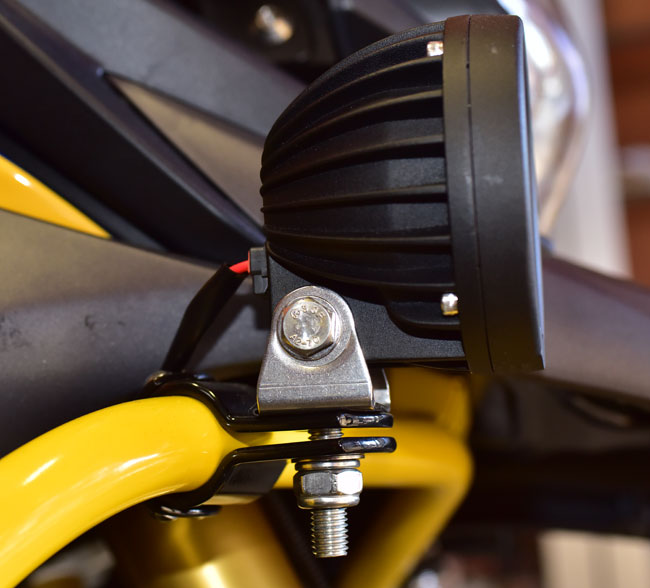
Mount the headlight on the engine guards, with the mounting bracket and the hardware arranged as shown.

141114_8909-650

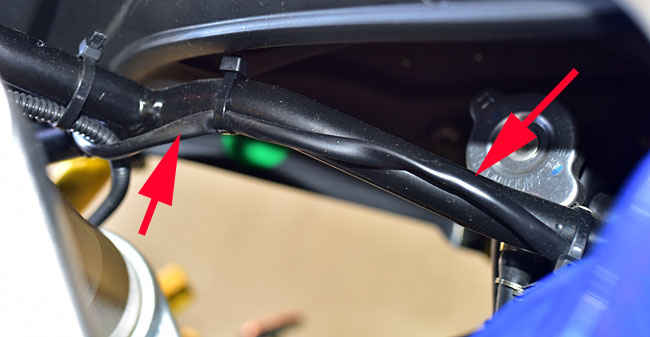
Run the harness for each light along the headlight mounting frame as shown in the photo below.   Secure it to the frame using electrical tape or zip ties (not provided with the lighting kit).
141114_8911-650

Run both lights’ harnesses along the motorcycle frame and secure them such that they will not interfere with the reinstalled fuel tank or seats.   You’ll want the harnesses to emerge along the frame on the left side of the motorcycle beneath the front seat in the area where the two accessory plugs are located.
Splice the positive leads from both lights together, and then do the same for the negative leads.

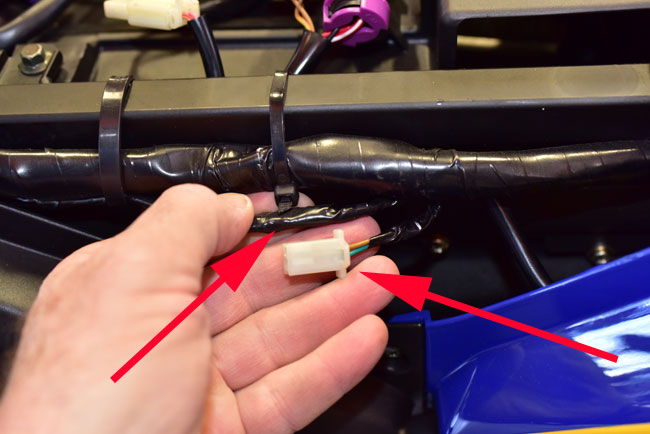
Select one of the accessory plugs controlled by the O/A1/A2 right-handlebar-mounted switch.   Cut the plug off and connect the powered lead to the positive spliced leads from the auxiliary lights (that’s the red wires from the lights).   Similarly connect the ground lead to the negative spliced leads from the auxiliary lights (that’s the black wires from the lights).   Insulate the connection area with electrical tape and secure the harness to the frame.

141114_8912-650Check the lights for proper operation with the O/A1/A2 switch.  Reinstall the body panels, the fuel tank, and the seats.

Provide power to the lights and adjust their aim by rotating the lights either left or right and either up or down on the mounting brackets.  Tighten the light mounting hardware once the lights’ aim is adjusted to your satisfaction.

And folks, that’s it!   You’re ready to light up the night and ride!

Posted in CSC Motorcycles | Comments Off on Auxiliary Lighting Installation