Heated Grips Installation

This maintenance tutorial addresses installing heated grips your RX3 motorcycle.   This is a pretty nifty accessory, and we pleased to be offering them for the RX3.

We believe the best place to electrically tap in to the RX3’s electrical system for your heated grips is the harness that runs to the headlight.   We’re going to show you how to do this so that when you turn the ignition off, power is cut to the heated grips.   If you tap in to the RX3 electrical system elsewhere, you run the risk of leaving your heated grips on after you have turned off the motorcycle, which will rapidly run down the battery.

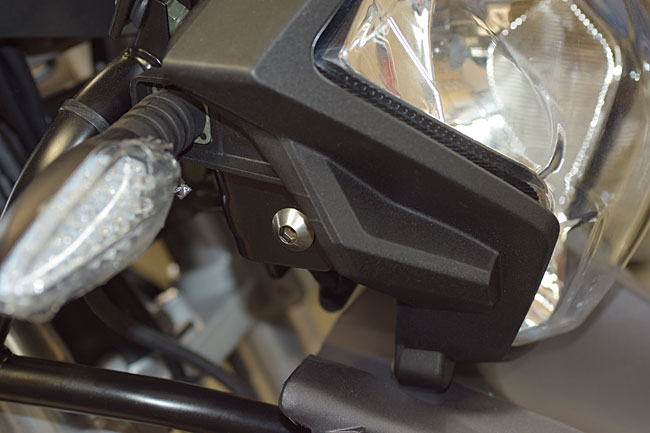
The first step is to remove the headlight be removing the two 6mm Allen bolts that secure it to the motorcycle.

141015_8241-650

141015_8242-650

Cut the zip tie that secures the headlight harness to the motorcycle.

141015_8243-650

This is the electrical plug that connects the headlight harness to the motorcycle.  Unmate it.

141015_8244-650

141015_8245-650

At this point, the headlight and its harness will be electrically and physically disconnected from the motorcycle.  Take the headlight assembly to your workbench and cut open the rubber sheath that surrounds the headlight harness wiring.

141015_8246-650

We’re interested in gaining access to the power wire (that’s the brown wire) and the ground wire (that’s the green wire).

141015_8248-650

With a wire stripper, expose the copper wiring inside the green wire.  This is the ground wire.

141015_8251-650

Do the same thing on the brown wire (this is the power wire).

141015_8330-650

Next, take the long harness provided with the heated grips and strip the lead coming from this harness’s fuse box.

141015_8253-650

Do the same thing with the black lead on the heated grip harness.  After you have done this, solder the heated grip harness’s red wire to the headlight harness’s brown wire.

141015_8331-650

Similarly solder the heated grip harness’s black wire to the headlight harness’s green wire.   After making the solder connections, wrap each connection in electrical tape, and then wrap the joined harnesses with electrical tape as you see below.

141015_8268-650

Find the heated grip switch, which is shown below.

141015_8270-650

The heated grips come with both an adhesive patch for mounting the switch on a flat surface, and a handlebar mount for securing the switch to your handlebars.   We’re going to use the handlebar mount, so find the switch side of the handlebar mount and attach it to the switch with the four provided screws, as shown below.

141015_8271-650

Find the opposite side of the handlebar mount and attach it to the switch, mounting the switch on the left handlebar as shown below.

141015_8273-650

141015_8276-650

The handlebar switch harness has three connector plugs.   The largest connector plug will attach to the heated grip harness we attached to the headlight harness (as explained above).  The other two connectors will attach to the harnesses for each of the heated grips (the left one and the right one).

141015_8278-650

Our approach will secure the connector plugs beneath the ignition switch shroud for a clean installation.   Remove the ignition switch shroud be removing the two Allen bolts that secure the shroud, as shown below.

141015_8279-650

Mate the connector from the heated grip harness (the one with the red and the black wires we installed earlier, which is now connected to the headlight harness) to the heated grip switch harness.

141015_8286-650

You will find that the heated grip harness is way longer than we need it to be.   You can either bundle up this wire and stow it, or remove the excess wire.  We recommend doing the latter.   To do so, cut off the excess wire and splice the harness.   Don’t remove too much wire.   You’ll want to remove enough so that the wiring reaches the headlight harness when the headlight is installed.

141015_8287-650

Remove the existing grip on the left handlebar.   We do this by slitting the grip with a box cutter, as shown below.

141015_8291-650

Remove the grip on the right handlebar in the same manner.

141015_8292-650

Note that the heated grips have different inside diameters.  The smaller diameter grip goes on the left handlebar.  The larger diameter grip will go on the right handlebar’s throttle.

141015_8293-650

We use ProtectAll to ease the grips’ installation onto the handlebar and the throttle.   We sell this; if you wish to order it with your new grips, please let us know.

141015_8310-650

Before you install the left heated grip on the handlebar, note that the harness exits the heated grip.   You’ll want to orient the heated grip so that after installation, the harness points down and a little forward.

Lube the inside of  the left heated grip and install it on the handlebar.

141015_8298-650

Install the end cap on the left heated grip.

141015_8299-650

The finished left heated grip installation should look like this.   Note the orientation of the heated grip’s harness.

141015_8300-650

Prior to installing the right heated grip, clean up any injection molding flash on the throttle.   We use a box cutter to do this.   Don’t get carried away.   You just want to remove the big stuff that might interfere with installation of the heated grip.

141015_8305-650

Again, note that the harness exits the right heated grip.   You want to install the right heated grip so that the harness points to the rear, as shown in the photo below.

141015_8309-650

Install the end cap on the right heated grip.

141015_8311-650

Leaving a little slack in the right heated grip harness (as shown below), zip tie the right heated grip harness to the throttle cable barrel.  It’s important that you leave enough slack so that throttle movement is not restricted.

141015_8314-650

141015_8315-650

At this point, connect the left and right heated grip harness connector plugs to the heated grip switch harness.

141015_8319-650

Once this is done, zip tie the connectors near the ignition switch, such that they will be covered when the ignition switch shroud is reinstalled.

141015_8323-650

Reinstall the headlight, and zip tie the heated grip harness to the motorcycle.  We do this to allow access to the heated grip fuse, as shown below.

141015_8328-650

141015_8329-650

After the motorcycle is put back together, you’re almost ready to ride.   Before you do so, check the left-to-right travel of the handlebars to make sure your harness installation and tiedown does not restrict the motorcycle’s steering.

The heated grip switch provides for five heating levels.   These are accessed by repeatedly pressing the heated grip switch.

141015_8340-650

And folks, that’s it!  Time to get out and ride!

Posted in CSC Motorcycles | Comments Off on Heated Grips Installation

A Tennessee ride…

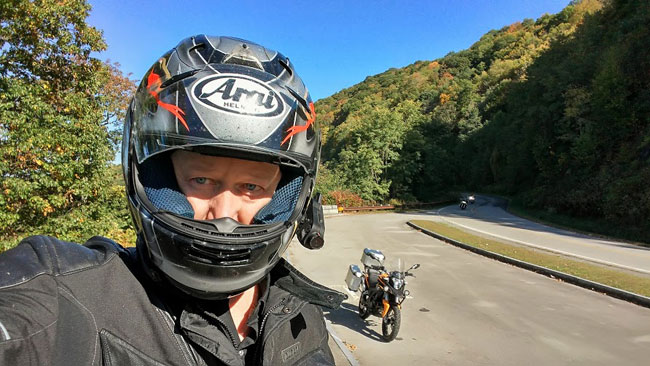
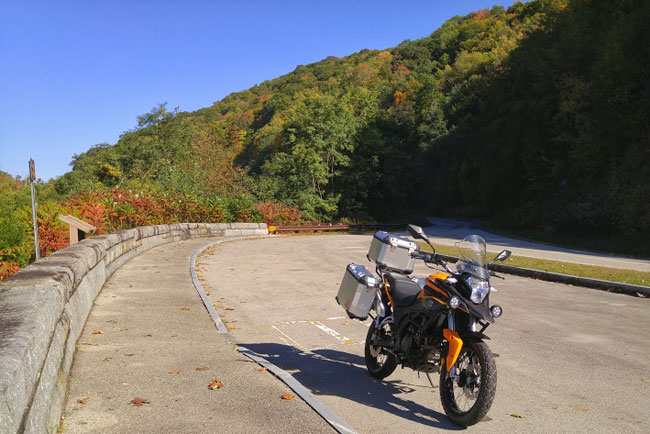
I received a nice note from our good buddy Ron in Tennessee yesterday…

Hey Joe,

I just wanted to thank you and your team for the awesome experience my wife and I are having on our new RX3s…

Ron

1013151552_HDR-01-650

1013151553-01-650

Awesome shots, Ron, and thanks for the nice note.   The leaves are turning colors back on the east coast…it’s one of the things I miss out here in So Cal.   We’re glad you are enjoying your new motorcycles, and please keep the photos and notes coming!

On another note, everyone, we’re putting together a maintenance tutorial on installing our new heated grips, so keep an eye on the blog for it.

Ride safe, my friends.

Posted in CSC Motorcycles | Comments Off on A Tennessee ride…

Don’t Miss The Boat II

140916_8034-650We’re approved in Canada.   That’s great news, and we want to celebrate this achievement by sharing our success with our Canadian friends.   We discussed what we might do for a special introductory offer and the Boss gave me my marching orders a short while ago:

Do it all.  

Folks, for a very short time only, if you live in Canada and you buy a new RX3, here’s the deal:

  • We’ll pay the $195 setup fee.   That’s a hell of a deal, and it’s only on RX3 motorcycles we’re selling in Canada.   Check out what the dealers are getting for setup fees on their bikes.   It’s frequently as much as four times what we charge, but it doesn’t matter. We’re paying your RX3 setup fee, but only while this introductory Canada offer lasts.
  • We’ll give you 20% off any accessories you add to your new, Canada-bound RX3.   Our accessories prices are already well under what the other kids charge, and we’re going to drop our low prices 20%. Note that this discount is off of our normal accessories price; it does not apply to any of the accessories package deals currently being offered on our website.   Lights, seats, sheepskin seat covers, aluminum bags, 19-inch wheels, knobbies, accessories outlets, heavy duty aluminum skid plates, center stands, and on and on it goes.   It’s all good stuff, too!
  • We’ll install any accessories you purchase with your new Canada-bound RX3 at no charge.   Yep, we’re paying for that, too!
  • And finally, while this limited time offer lasts, our Canadian friends can use the very successful Buddy Program we ran for a short time in the US.   If you and your good buddies up in Canada order more than one RX3 and they ship to the same location, we will substantially reduce the freight charges!  That’s a savings of potentially hundreds of dollars.

Roll all this up and the savings could easily exceed a thousand bucks.   It won’t ever be this good again.   And this offer won’t last long.   It’s a celebratory offering available only in Canada.   We want to get RX3 motorcycles rolling in Canada and we don’t want to throw money away on advertising.  We’d rather get the ball rolling by passing the savings along to our Canadian friends who know a good thing when they see it, and let our customers do our advertising for us.

Ah, the impending doom sales close….yep, here it is:  This offer won’t last and we’re not announcing how long it will run, but I can guarantee you it won’t be for long.  It will be measured in days, not weeks. And when it’s over, it’s over.  This is your call to action.  And it is your call.

We have all colors in stock.   I’m told orange is the fastest (that’s my bike below), but they are all beautiful.   These bikes are amazing, but I don’t want you to take my word for it.   Check out what RX3 riders are saying on the Internet forums.

150422_1811-72-650

If you’re in, please give us a call at 909 445 0900.   But do so quickly.   This won’t last long.

Posted in CSC Motorcycles | Comments Off on Don’t Miss The Boat II

China to England on an RX3…

Yep, you read that right…

RX3-JS74112094

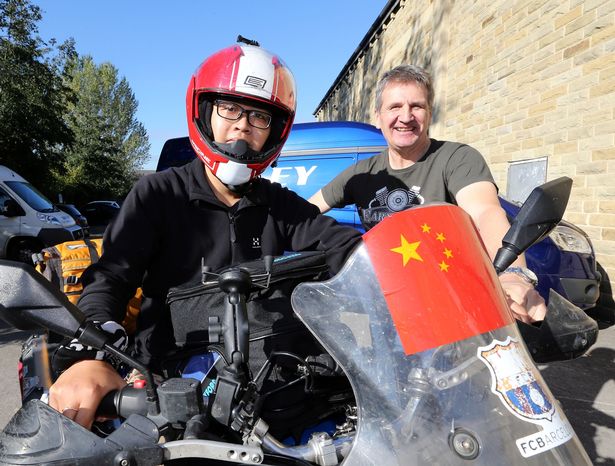
Meet Xi Zhenzhong (aka “Micro”) who rode his RX3 from the factory in Chongqing all the way to the UK.   You can read the UK story here:

http://www.examiner.co.uk/news/west-yorkshire-news/meet-micro-man-who-wanted-10230146

Good stuff, folks.   These RX3s can go the distance.

Posted in CSC Motorcycles | Comments Off on China to England on an RX3…

Windshield Installation

We’ve had one or two queries in the last few days about installing the windshield on a new RX3.  Gerry and I thought we’d take a minute to show you how to do that.

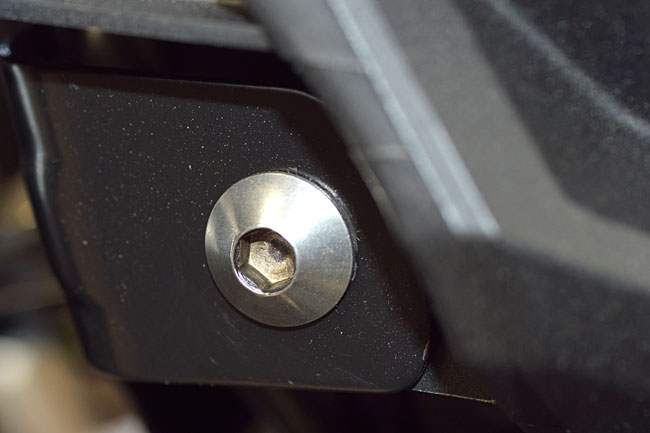
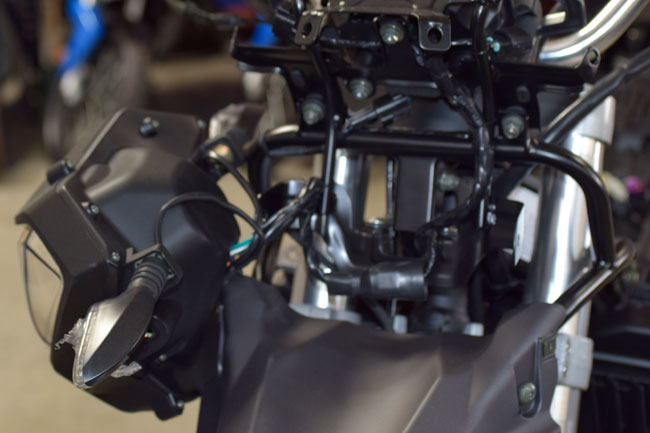
For starters, you’ll find it easier to install the windshield if you unbolt the headlight.  You don’t have to disconnect it electrically; you only need to unbolt it and let it hang out of the way on its harness.   The headlight is secured by two 6mm Allen bolts (one on either side of the headlight).   Just remove these and let the headlight hang down.

151013_8219-650

151013_8218-650

151013_8221-650

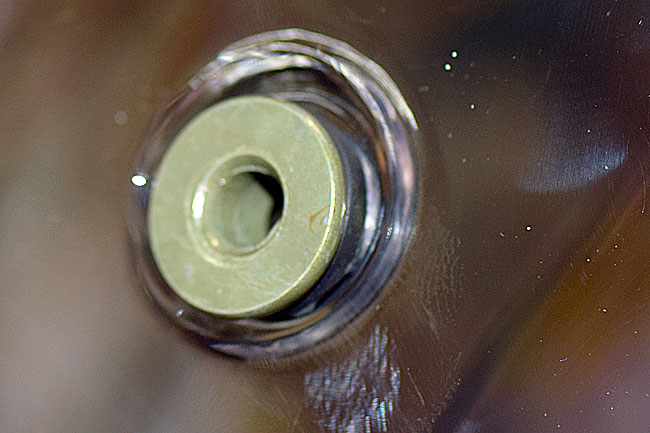
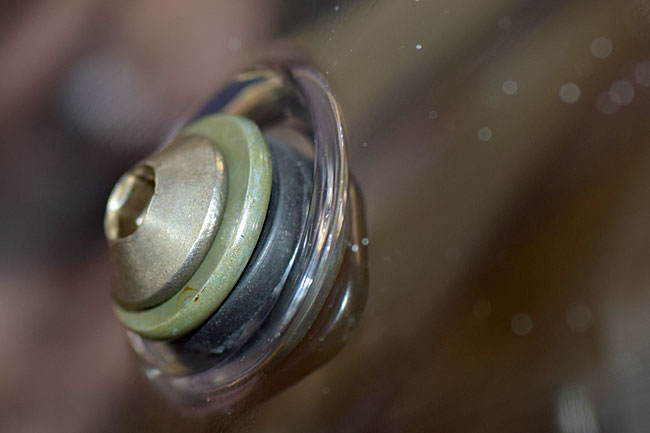
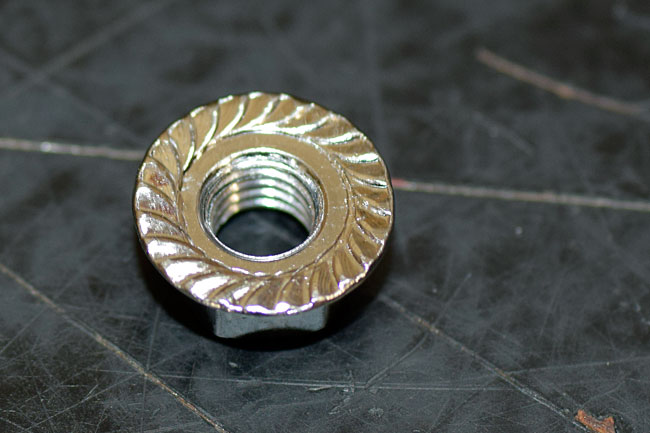
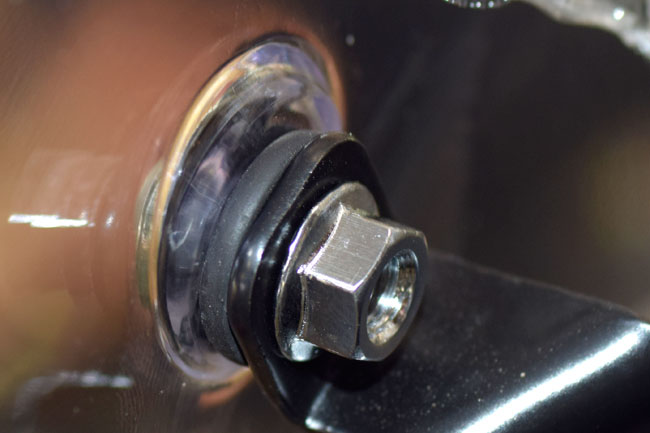
The windshield is mounted to the windshield bracket with six sets of fasteners.   Each fastener set consists of a rubber grommet, a steel spacer, an Allen bolt, and a shouldered washer.

Insert the grommets in the windshield and put the steel spacer through the grommet with the shoulder facing out (forward) as you see below.

151013_8223-650

After you’ve done that, position the windshield on the windshield bracket and put the Allen bolts through the steel washer.   The Allen bolt head should face forward (as you see below).

151013_8226-650

Next, install the shouldered nut on the opposite side of the windshield, as you see below.   You may wish to use a dab of locktite to keep the nut from backing off, although I’ve never seen this happen on any of our motorcycles.

151013_8230-650

151013_8227-650

And that’s about it, folks.   If you have any questions, give us a call and we’ll do our best to help you.

Posted in CSC Motorcycles | Comments Off on Windshield Installation

Bobbers, books, bandwidth, and Baja…

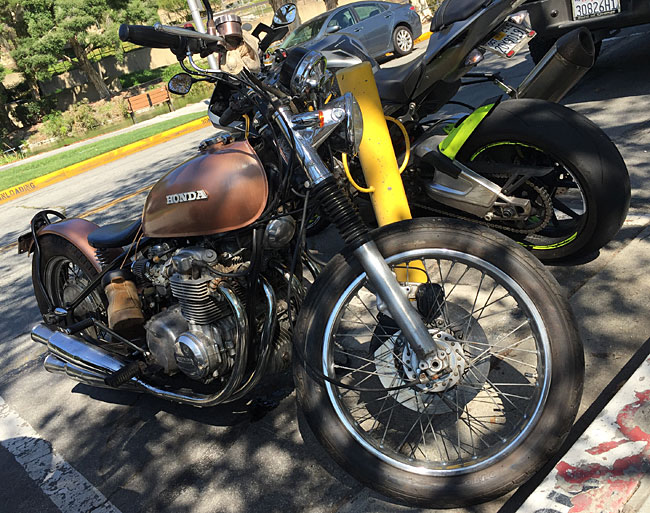
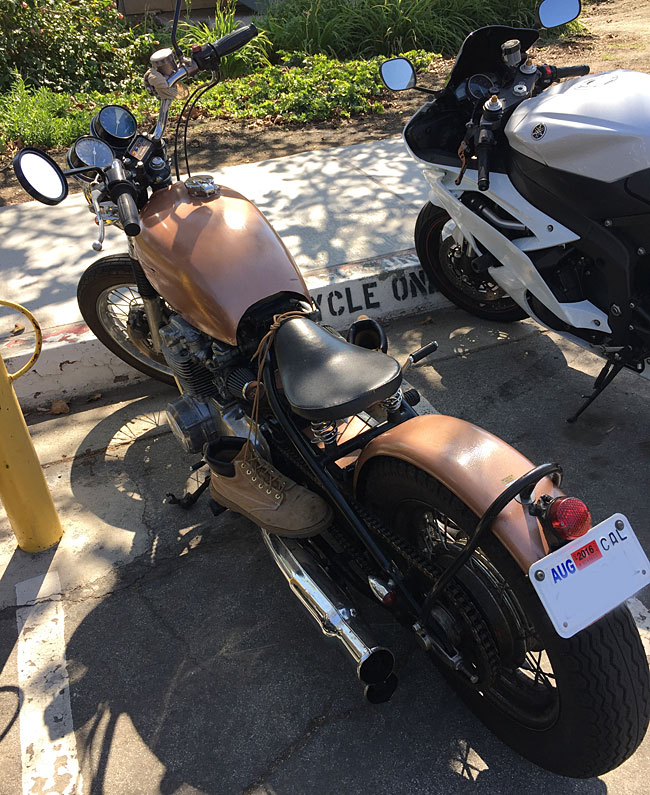
I saw an interesting bike on the Cal Poly Pomona campus yesterday…it was a CB550 Honda Four with a hardtail frame, and it had been given the Bobber treatment:

IMG_0220-650

IMG_0221-650

I like that bike.  I don’t know that it’s anything I’d want to own, but I like it anyway.   It’s cool and even though I haven’t met the owner, I’ll bet he’s an interesting guy.   The bike was parked outside the engineering building where I teach, so I’m guessing he’s an engineering student.    He’s going to be a good engineer when he graduates.  I can tell.

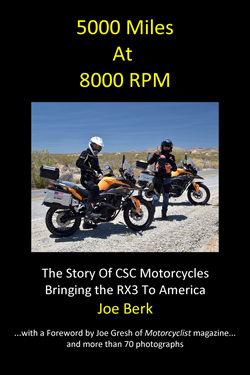
Front-Cover-For-B&W-650-2505000 Miles At 8000 RPM is doing well.    We’re going to be offering it from CSC in the near term, but in the meantime you can order it directly on Amazon right here.   At one point it was ranked as high as No. 23 in all of the motorcycle books Amazon sells, which was kind of an ego trip for me (not that I need any help in that department).   The online reviews have been good and the emails you folks have sent to me have been much appreciated.

I’m glad you like 5000 Miles At 8000 RPM, folks.  It was a hoot to write.  So much so that I’m thinking about the next book project, and what I think that might be.   I’m thinking about a photo book based on our next CSC RX3 Baja trip or two.

Yep, I’m thinking about two Baja trips…a three-day weekend run down to San Felipe before the end of the year, and our March 2016 trip to see the whales in Scammon’s Lagoon.   The March trip will be either 5 or 6 days, and it will be awesome.   We said we wanted to hold that to 10 riders, and we already have 7 people signed up.   There’s no tour guide fee or any of that nonsense (I work for peanuts, basically).   All you’ll have to pay will be your expenses (the hotels, your meals, and fuel, and the modest fee to go out in the boats to play with the whales).   You’ll need an RX3, of course, but you know you want one, anyway.

So, back to that next book project.  I’m thinking of a coffee table photo book, with photos from everybody who rides with us on the next two Baja runs.   We could arrange for 100% of the royalties to go to charity to keep things simple, and we’d use the best of all of our photos in it.  It would make the trips even more fun, I think.   Think about it.   A great motorcycle.  A great trip.   A grand adventure.   And a great book with your name on the cover!

And that bandwidth thing…folks, the CSC blog is so popular that it’s become hard for even me to sign on.   That’s a good thing.   Thanks for your continuing support and interest in CSC Motorcycles.

Posted in CSC Motorcycles | Comments Off on Bobbers, books, bandwidth, and Baja…

Tech day, home on the range, and more…

For starters, a compilation of a few helmet-cam videos I grabbed last week on our RX3 ride…

The route was a good one…we rode the freeways up to Lytle Creek, then it was over the mountains on a dirt road (Sheep Canyon), up into Wrightwood, and then on around the northern side of the San Gabriels.

Hey, anyone here interested in a Tech Day during one of our upcoming Donuts and Dual Sports Saturdays?   We’d like to have you visit and we’d do a tutorial on whatever aspect of your bike you feel is most relevant.   For starters, we could do a tutorial on replacing your chain, I think, and we might even offer a discount on a new chain if you order one during our Tech Day.  We might stream it as live video on Periscope, too.  It’s just a thought…let us know what you think!

Next topic…I’m up for a weekend ride.  I’m thinking either a two-day journey through Death Valley, or a three-day trip to San Felipe in Baja.   We’d start from the plant in Azusa, and if we do San Felipe, we’d leave early on Friday.   If it’s Death Valley, we’d leave early on a Saturday.   Dates are TBD right now; you folks let me know and I’ll set it up.  Shoot me an email (jberk@cscmotorcycles.com) if you have an interest in a Tech Day, a Death Valley ride, or a quick run to San Felipe.  Or all three!

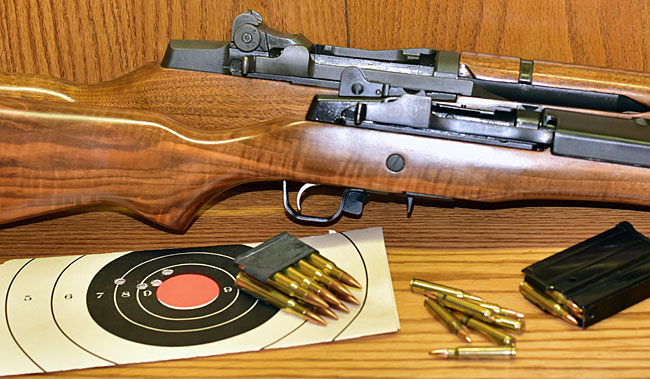
I mentioned yesterday that I was going to get to the range this morning, and we did.  It was a grand day.   It got hot again here in So Cal, but my buddy Greg and I were on the range early and we beat the heat.   I took my Mini 14 and the mighty M1.  The Mini 14 is a relatively modern rifle based on the old M1 Garand.  Both use a gas-actuated rotary bolt design, and both are, as the old saying goes, good enough for government work.  Actually, both are quite a bit better than just “good enough.”  These are awesome toys.

141011_8212-650

The Mini 14 uses the diminuitive .223 cartridge (that’s the smaller one you see above), and the old M1 uses the World War I/World War II era .30 06 (that’s the big round you see in the clip on the left).   The .30 06 is a monster, but don’t let the comparative size fool you.   That little .223 is very powerful, too.  I like shooting both of them.

Ah, just a quick post this evening, boys and girls.   I’m firing up the RX3 in a few minutes and heading over to the gym.  Time for another midnight ride.

Posted in CSC Motorcycles | Comments Off on Tech day, home on the range, and more…

A couple of Zongshen videos…

This first one shows a bit of the new RC3, the sports bike based on the RX3 250cc engine…

And the next one shows a factory rider on the RC3 doing his best Joe Gresh imitation…

Very cool stuff. As always, more to follow…

Posted in CSC Motorcycles | Comments Off on A couple of Zongshen videos…

A summer evening ride, and more…

Quite a day today. The temperature rose up to 103 degrees. In mid-October. It’s hard to believe.   It’s not even still Summer.   We’re into Fall already.  But it sure feels hot enough to be Summer.

Susie and I didn’t get too much done today.  I’ll blame it on the heat and the donuts.  I wanted to get out and ride to the plant in the morning, but you know how Saturdays go.  Susie wanted donuts, so that meant a quick run down to the donut shop, and when I got there 20 people were lined up with the same idea.  Hey, I wasn’t about to go back empty-handed.  Then I got home and put another pot of coffee on to read the papers and before I realized it, one of my riding buddies had sent me a text message telling me he had ridden into the CSC plant and, you know, where was I?   Well, I was too busy taking it easy, and by the time I got that message, it was nearly noon. It was too hot to ride for this old guy, so Susie and I hopped in the car and rolled on over to the shop (with the air conditioner running flat out the whole way).

When we got to the CSC plant, Ryan told me another good buddy had stopped by on an XR 650 (Tom, I’m guessing that was you), and I had missed him, too.  Wow.  I didn’t do too well today.

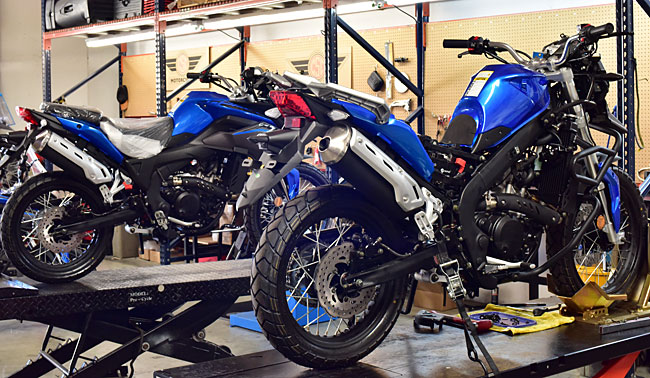
Gerry and the Service Department sure are staying busy. We’re getting a lot of service work because Gerry and his crew are tops, we’re not out to gouge people, and the word is getting out.   Gerry had a super sleek BMW K-Umpteen-Hundred-Something-or-Other he had just finished servicing, and there was an FZ1 Yamaha with 100,000 miles waiting right behind it for its turn in one of the service bays. Between doing the setups on the new RX3s and the service work on other brands, our motorcycle maestros sure are staying busy back there.
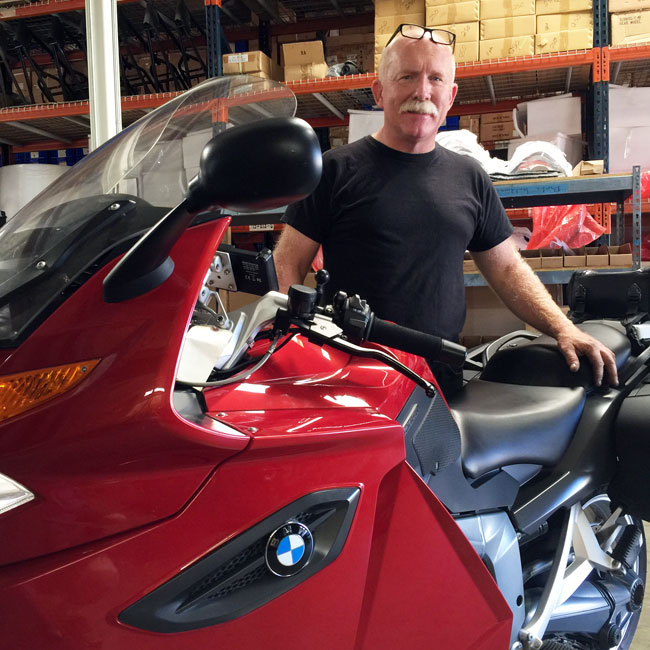
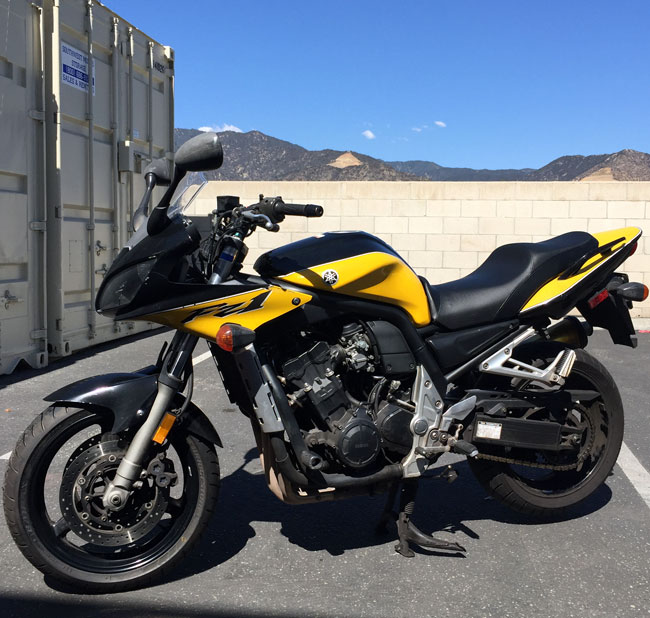
IMG_0208-650

IMG_0211-650

If it sounds like I’m bragging about our Service Department, I guess I am.  I went to the gym late this evening, and I decided I really owed it to the KLR 650 to take her out after Gerry and Lupe worked their magic on that bike. The KLR has never run better. And somehow, they managed to eradicate all of the chalking that normally occurs on the older first-generation KLR body panels. I don’t know what they used to bring the bodywork back, but my 2006 KLR actually looks newer than my 2015 RX3. That’s undoubtedly because I like keeping the RX3 dirty and I am really racking up the miles on it. I’ve had the KLR nearly 10 years and I’ve only been riding the RX3 since April of this year, but I’ve already got nearly as many miles on the RX3 as I do on the KLR.

The ride home from the gym a short while ago was fun. Surface streets all the way, a hot summer evening, and the KLR was chugging right along.  That motorcycle-manufactured summer breeze sure felt good after fighting with the machines in the gym.  There’s something about a motorcycle ride in the evening on a hot day that’s just, well, right.   It felt good.   I’ve had times in my life when I was younger that I’d find myself in those situations and I’d ride until the sun came up.   I love it.   Tonight was like that.

We’re sure eliciting strong reactions from our friends to the north. One of our Canadian fans signed on to buy a new RX3 a few minutes ago (via an email to me, no less) and he’s going to join us on the Baja trip next March. I’m pumped about that, but then I’m always pumped about any motorcycle ride to Baja. It’s going to be grand.  We’ve had several people sign on for our next Baja run already, and if you want to buy an RX3 and ride with us, well…there’s no time like the present.   Give us a call on Monday.   When your buddies are bragging about their latest chrome doodad or a run to the corner burger joint, you’ll be able to casually mention you rode your motorcycle to Baja.   Trust me on this one, folks.  There’s nothing like it.
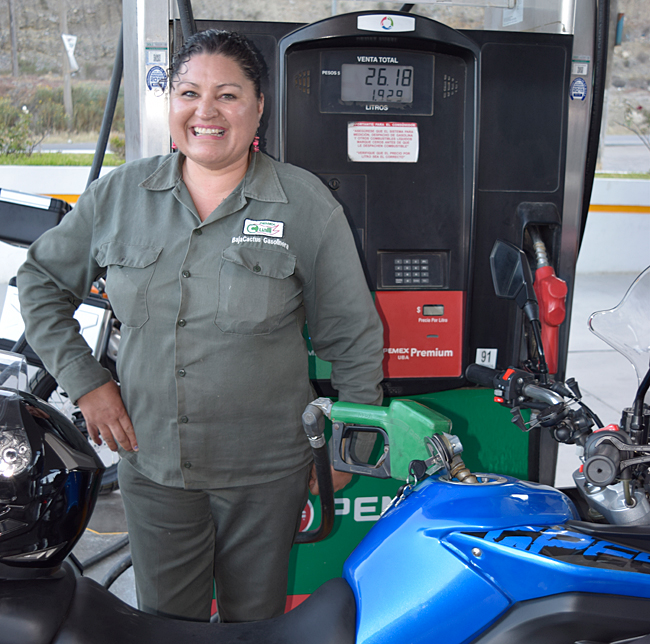
Roselda, the prettiest Pemex attendant in El Rosario

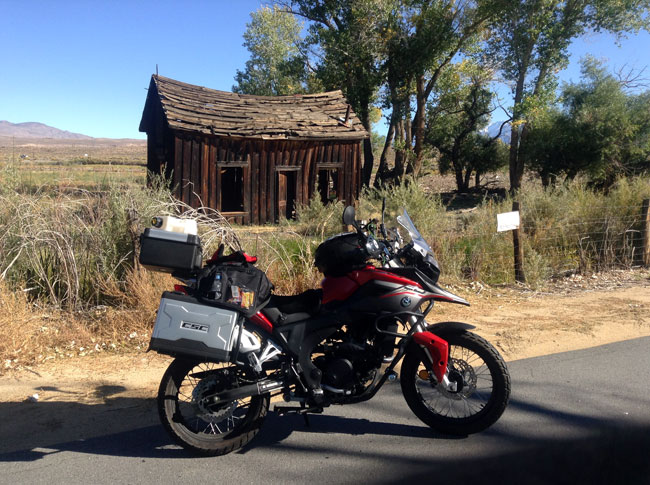
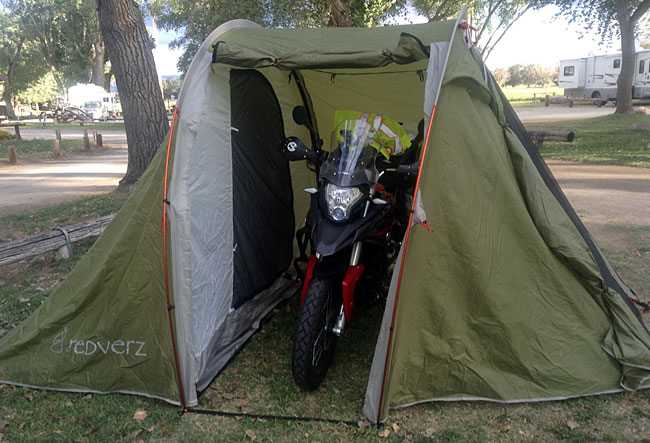
Another nice thing that happened today was an early morning email from my good buddy Twin Peaks Steve. Steve is doing it right…he and his RX3 headed north on 395 up into the High Sierras a few days ago.   Steve camped on that trip.  It looks like he had a ball.
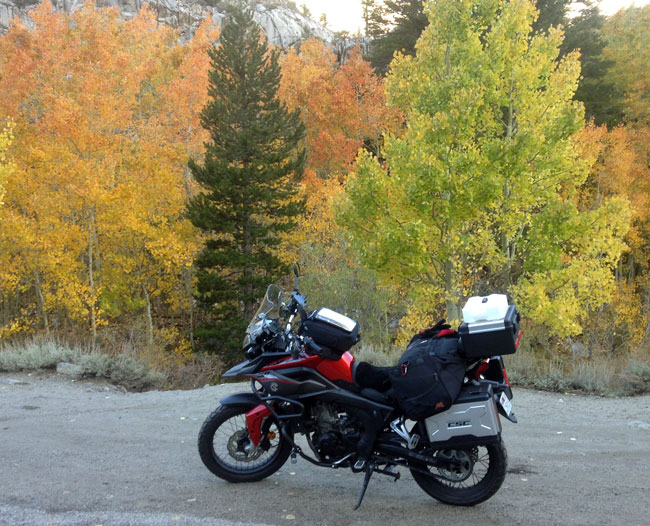
IMG_0020-650

IMG_0038-650

IMG_0014-650

Steve, your photos are awesome. I am envious (yeah, I know, it’s one of the seven deadlies), but it looks like you are living the life and doing what you are supposed to be doing with your RX3.   Good for you!

Sunday morning (tomorrow, as I write this) is going to be good, too. My good buddy Greg and I are heading out to the rifle range early with our Mosin-Nagants. We want to beat the heat and the crowds, and throw a little lead downrange.  Good times.  Watch for photos. We have a lot of fun with our 90-year-old infantry rifles.  Not as much fun as riding an RX3 in Mexico, but good times nonetheless.

Posted in CSC Motorcycles | Comments Off on A summer evening ride, and more…

In a better place…

141008_8206-800

Posted in CSC Motorcycles | Comments Off on In a better place…