In addition to the online Motorcyclist magazine article I mentioned last week, Motorcyclist also posted a link to the article on their Facebook page. That link is here:
You know, it’s interesting to read the comments on these things. A few haters and trolls turn out initially. But what we’ve noticed is that there are fewer and fewer haters posting. And the ones that do are basically displaying their prejudice and ignorance (I know, I’m being redundant; prejudice and ignorance usually go hand in hand). What always happens next is that people who know about the RX3 post in response, and their posts (your posts) are based on actual experience. When that happens, the haters and trolls usually crawl back down into the shadows under their bridges.
Okay, that’s enough on the trolls for now. I’ve given them more print volume than they deserve. I guess all I can say is that if ignorance is bliss, these folks must be the happiest people on the planet. But I know and you know that’s not the case. The happiest people on the planet are out riding their motorcycles (and for most of us, that will be on our RX3s)!
Posted inCSC Motorcycles|Comments Off on Motorcyclist magazine’s Facebook page…
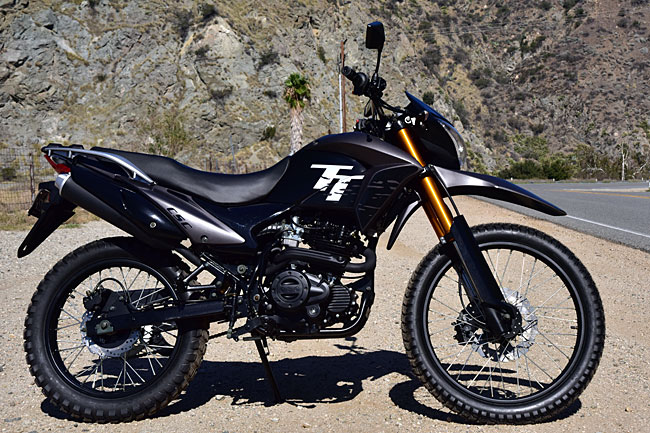
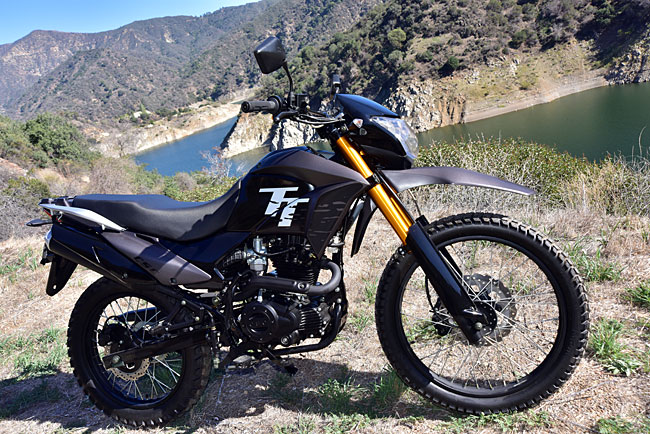
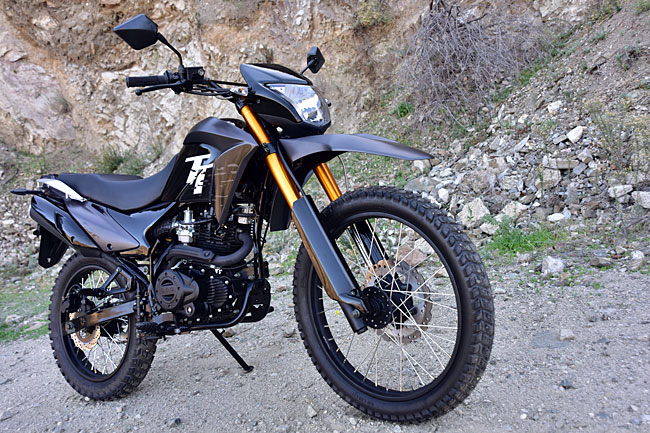
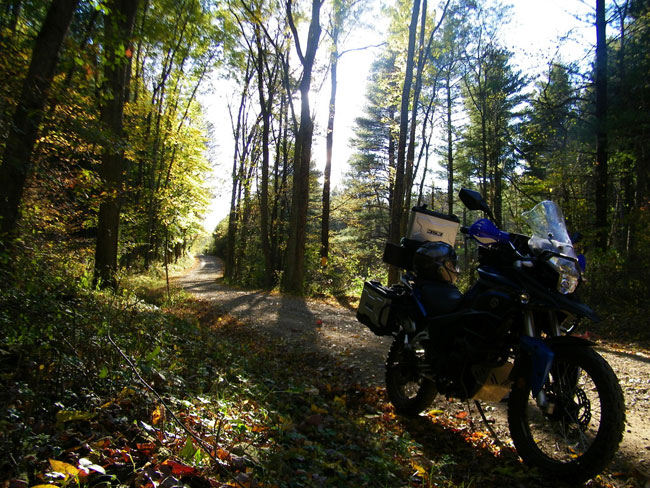
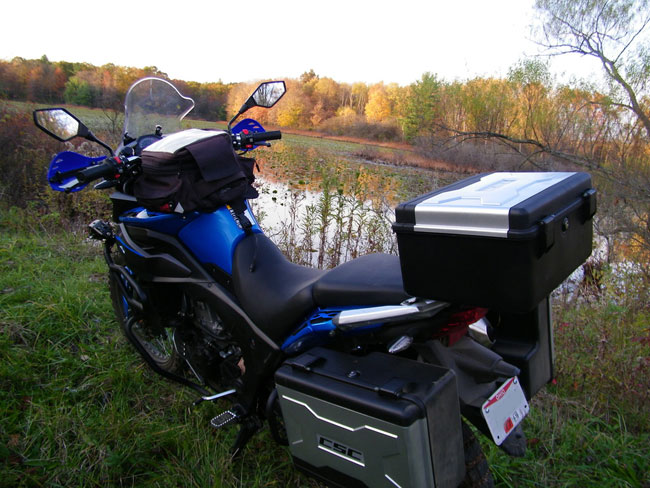
Good times this afternoon, folks…I got out for a ride on the 250cc TT Special up in the San Gabriel Mountains. I grabbed a few photos, carved a few corners, and had a great ride. This new bike can grab a line and shred! It’s designed for both street and the dirt, but I’m here to tell you it sure hooks up well on asphalt!
It was a very bright day today, which is not the best lighting for good photography, but things still turned out okay. At least I think they did…let me know what you think!
And folks, that’s about it for tonight. I’ve got a full weekend planned starting early tomorrow, and then we’re going to be getting set up for next weekend’s Tech Day. If you want to find out how to change the chain on your RX3 or any other motorcycle, it’s something you’ll want to take in. Keep an eye on the blog…we’ll be posting more info on our first Tech Day next week!
Posted inCSC Motorcycles|Comments Off on Riding the TT Special!
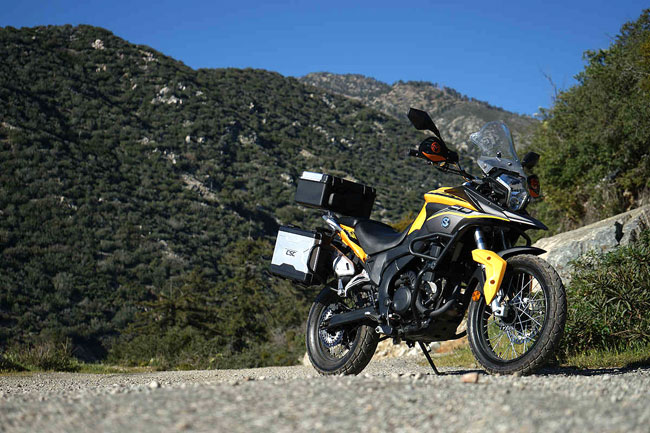
Ohio Dan recently purchased a beautiful blue RX3 tastefully accessorized with our (now his) 19-inch front wheel and Shinko off-road tires, and from the looks of things, he knows how to work a camera! Dan sent these amazing photos to Ryan, and two things impressed me immediately…the photography, and Ryan’s comment when he showed the photos to me. “I want to ride that road,” he said.
Me, too, Ryan.
Dan, it’s obvious you are using the RX3 they way it was intended to be! Ride safe, and thanks for sharing your awesome photos with us.
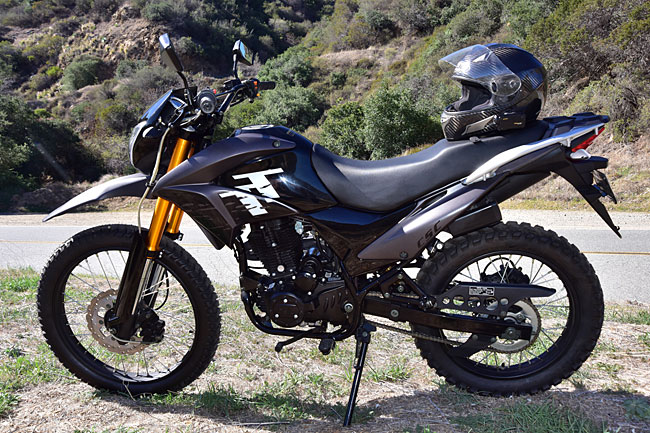
Folks, I’m headed into the mountains in a few minutes to grab some photos of the TT Special. They won’t be as good as Ohio Dan’s, but it’s going to be fun!
We sure have a lot going on here, folks, and I’m sure having fun. Sales are hot and RX3s are flying out of Azusa. 5000 Miles At 8000 RPM is selling well. By the way, CSC has the book in stock now and you can order it directly from us; just give us a call at 909 445 0900. The guys in the plant are finalizing details on the 2016 RX3, including pricing. The TT Special is progressing through EPA and CARB testing. I’ve made my flight reservations for the 2500-mile ride I’m doing in Colombia with Juan Carlos and the guys from AKT Moto (and I’m really looking forward to just being one of the guys on the ride instead of the guy leading it). As the saying goes, it’s all good.
First, an update on Baja. Our Baja Ride will be from the 15th to the 20th of March (that’s 6 days, and that will give us plenty of time to see the whales and take in the sights). We’re just about at capacity now (last I checked we had one opening left), so if you want to do Baja with us, buy your RX3 and give us a call now.
The ride in Colombia is going to be an epic one. I’ve been to Colombia before on another secret mission, but that was a quick two days and I didn’t get to see too much outside of Barranquilla and Cartegena. I’m am very excited about returning to Colombia and seeing the country from the seat of an RX3. I may even spring for a new Nikon lens; I’m still using the old 24-120 Nikon lens and the new one has the vibration reduction feature that makes for sharper photos. It’s expensive, but my good buddy Lester had that lens on the 5000-mile Western America Adventure Ride and I was very impressed with it. We’ll see what Susie tells me I can do. I’m going to do a book about the Colombia ride, too, with lots of photos.
November 7th (that’s a Saturday) is our Tech Day on chain maintenance, chain adjustment, and chain replacement. If you plan to make it to the plant to put a new chain on your RX3 for this first of several CSC RX3 Tech Days, please let us know this week so we’ll have the parts you’ll need. You can reach us at info@cscmotorcycles.com.
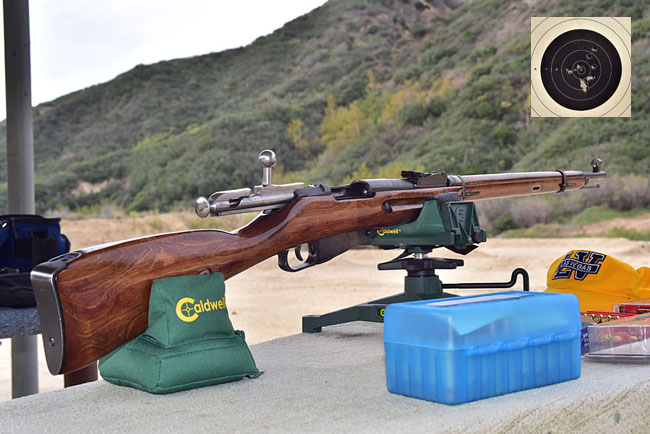
I was able to get out for a bit early yesterday and run a few rounds through the Mosin Nagant. That puppy is shooting magnificently. Fun times all around.
That’s all for now. Ride safe, my friends.
Posted inCSC Motorcycles|Comments Off on Baja, November 7th, Russian rifles, and more…
As you may know, Motorcyclist magazine (where our good buddy Joe Gresh’s columns appear) ran a feature on the RX3 motorcycle a few months ago. Until today, it was only available if you bought the magazine. The Motorcyclist RX3 story is now online, and you can see it here:
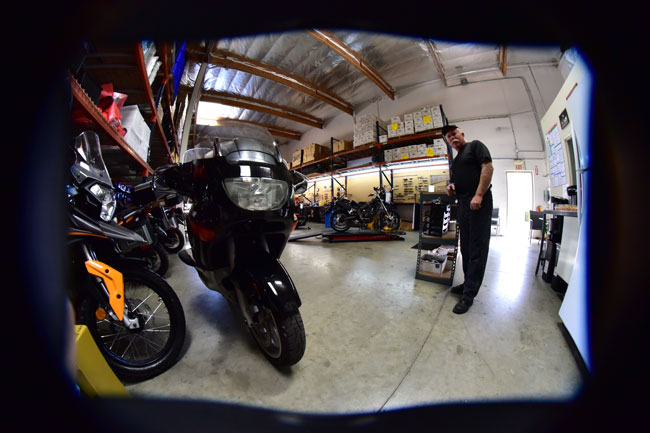
No, not really..but I was in the service area early today and I brought the Rokinon 8mm wide angle lens with me. Those ultra-wides throw in a lot of barrel distortion (that’s what you call the curvature around the edges of the photo), and I liked the way this shot of Gerry (along with a monster BMW in for service) turned out…
The Rokinon 8mm lens is designed for the smaller DX-sized sensors on most digital cameras. When it’s used on the larger full frame D810 Nikon, it vignettes the photo as you see above. The D810 has a setting where it will crop out the vignetting and make the camera believe it has the smaller DX sensor, but I like the way the vignetting frames these photos.
We get a lot of other-than-CSC motorcycles in for service (we work on nearly any bike). Gerry and his folks do superior work and we don’t gouge customers. If you have a motorcycle that needs servicing, please give us a call at 909 445 0900 and ask for Gerry. We’re running an oil change special this coming Dual Sports and Donuts Saturday for just $19.95 (plus fluids and parts), so let us know if you want to swing by.
Posted inCSC Motorcycles|Comments Off on The Earth’s curvature…
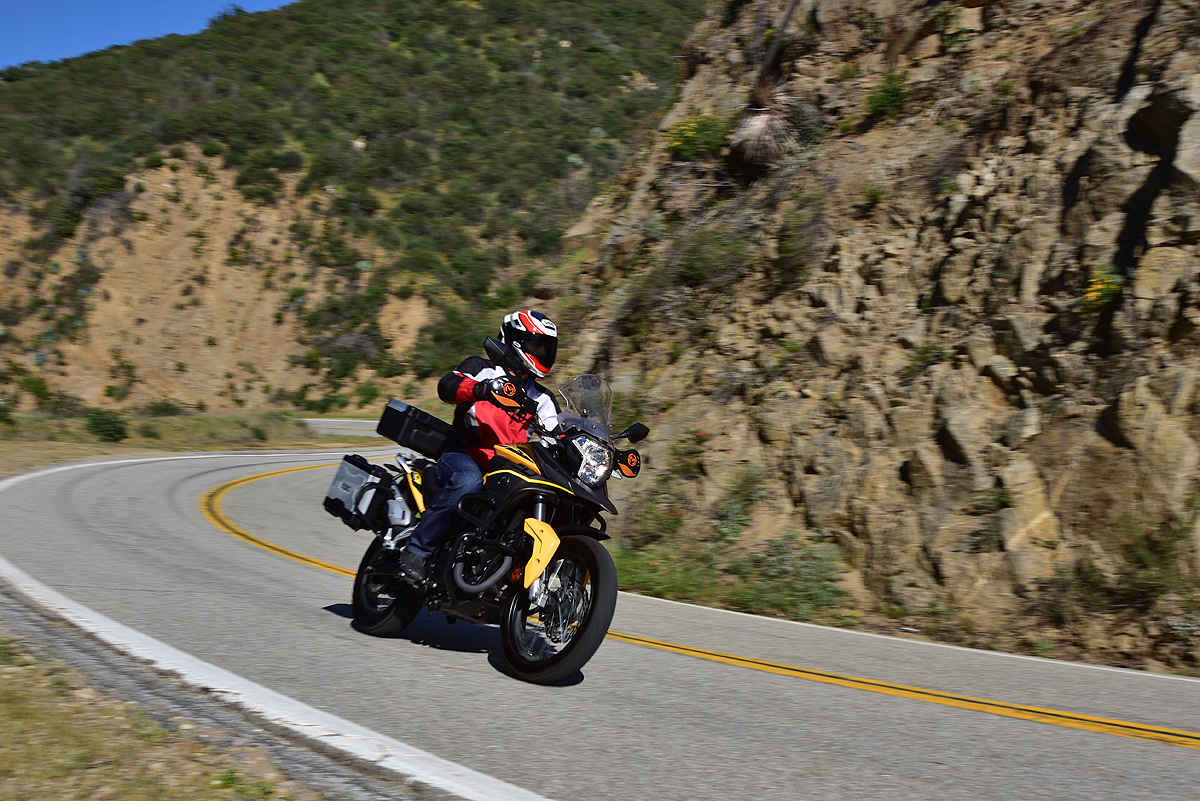
Cold mountain air, the awesome 130-mile ride on Angeles Crest Highway yesterday, and CSC RX3 sales…the title of today’s blog (Brisk!) applies equally to all three!
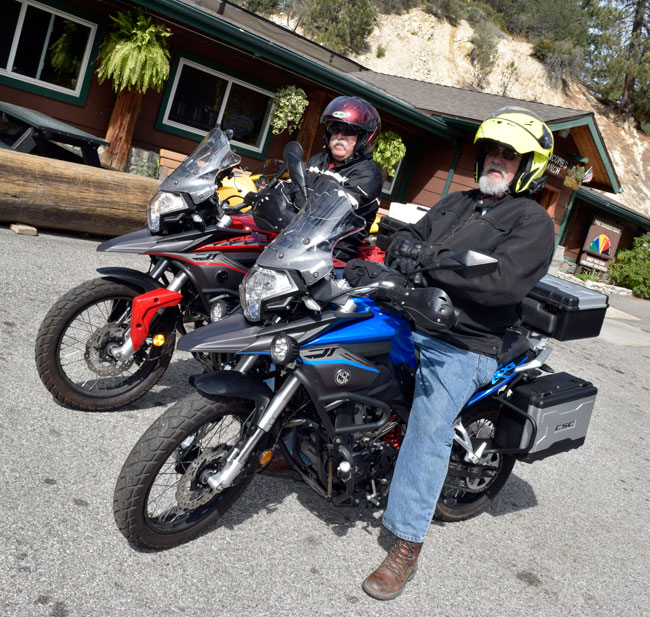
Angeles Crest Highway was about as lightly traveled as I have ever seen it on our mid-morning run yesterday. The road has been blocked on its northwestern end for a few weeks now by a landslide and it will be through the rest of this winter (it doesn’t go all the way through to Wrightwood). That’s evidently discouraging a lot of people from riding it. And (your tax dollars at work) ACH is being repaved, so the road surface was gravelly for much of its length yesterday. That’s another factor that tends to scare off many motorcyclists. But not us brave souls on our RX3s! We had a blast.
Hey, how about another video or two of our ride through the mountains!
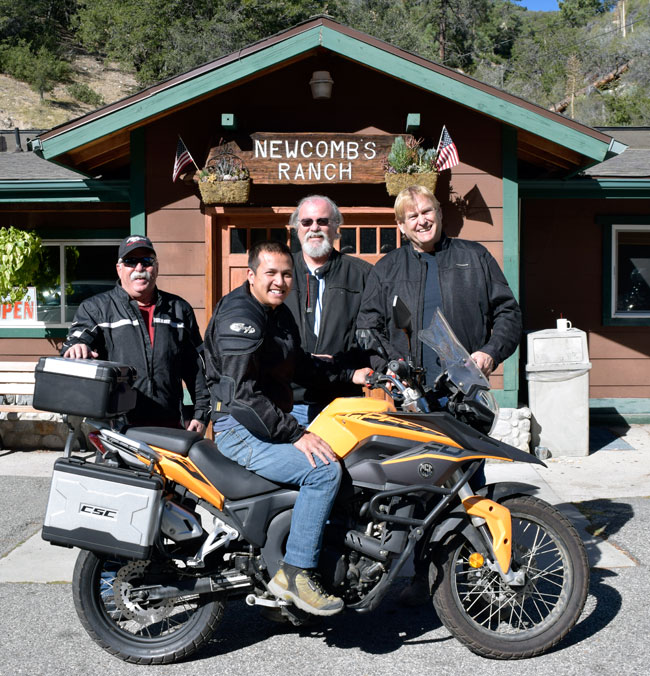
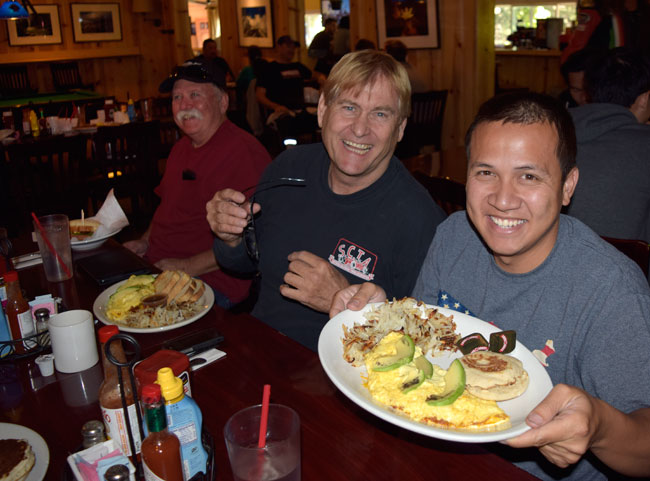
We rode up with five riders…Tuan, Twin Peaks Steve, Duane, Tom, and yours truly. We had a bunch of guys meet up with us at the plant, too, on big bore sports bikes, including our good buddy Joel. They couldn’t take the day to ride up to Newcomb’s, but they wanted to stop in and see the RX3s. That’s okay…the sports bike guys wanted to shred and we wanted to get some breakfast!
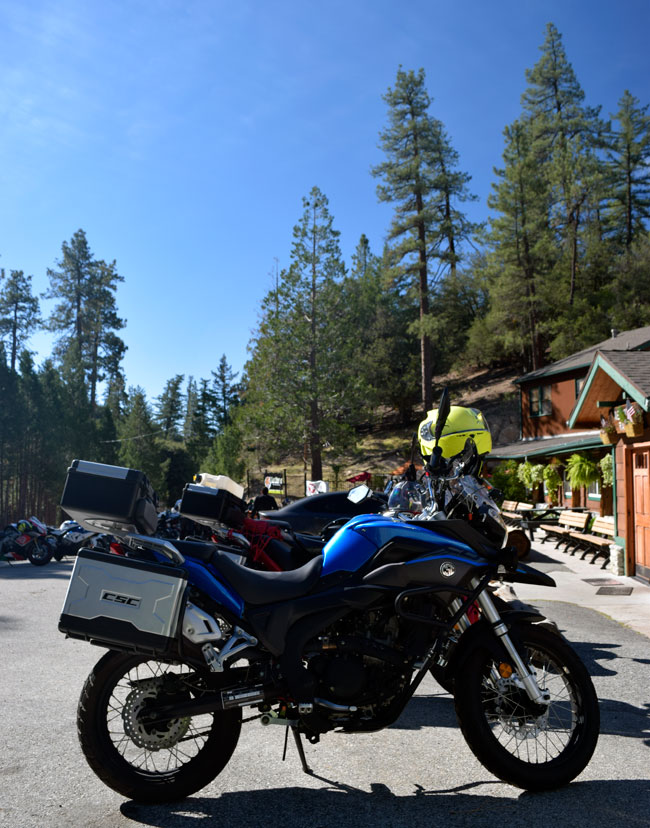
We left the plant on our ADV bikes and headed to Newcombs…
The ride out to Highway 2 (that’s the Angeles Crest Highway) was great, even though it was just a simple slog on the 210 Freeway. Once we were on the Crest, though, the riding changed from a simple freeway slog to what we in So Cal are known best for…our magnificent twisties (this time in the Angeles National Forest). The videos don’t do the road justice. You really need to experience it for yourself (and at just $3,495, that’s eminently doable, folks).
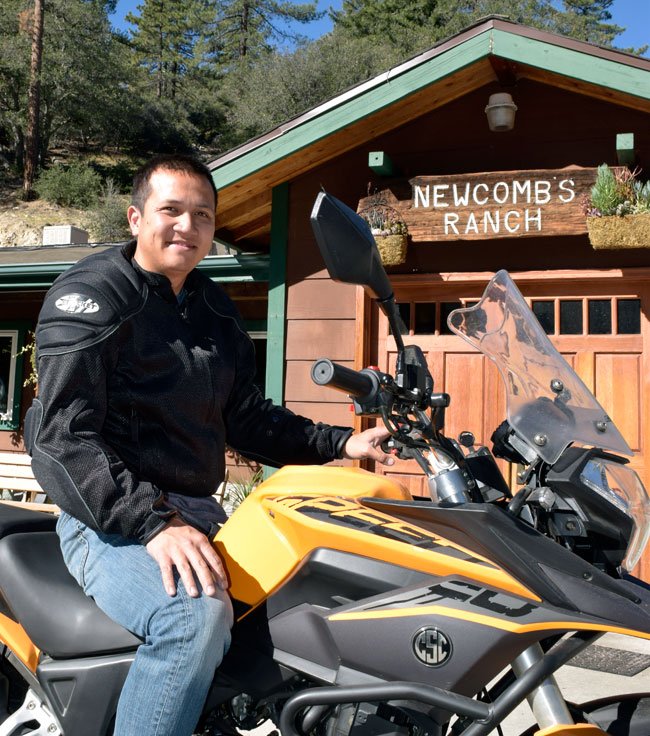
Our destination was Newcomb’s, a motorcycle hangout that’s about as good as it gets. Good food, good people, and a good opportunity to walk around in the parking lot taking in all of the moto exotica that’s attracted to a mountain moto Mecca like this.
I was surprised when we pulled into the Newcomb’s parking lot. It was only about 20% full, no doubt due to the lighter-than-average ACH traffic described above. That was all right by me, though. I already knew it had made the riding better, and I knew the service in the restaurant would be prompt, too. I always like to use some of my better lines in restaurants to let the wait staff know I want to get in and get out quickly, especially when I am on a motorcycle ride. Long leisurely dinners are okay when I’m out for a fine meal with Susie; when I’m on the RX3 it’s all about the riding.
When I entered, one of the folks in the restaurant asked if I wanted to sit near the fireplace or near the bar. “I want to sit near a waiter,” I said.
“Got it,” he said, and a very nice young lady was at our table quickly. I had a bit of fun with her. I’m old enough that I can joke around with young ladies. Her name was Natalie and I knew immediately she had a good sense of humor. “Tuan here is too bashful to ask, but he wants to know if you’re single,” I told her. Tuan blushed. So did she.
“I’m single,” she told us, smiling at Tuan.
I noticed that our pretty young lady had an interesting tattoo on her arm. Marilyn. I’m a sucker for anything that has anything to do with Marilyn, and I asked if I could grab a photo…
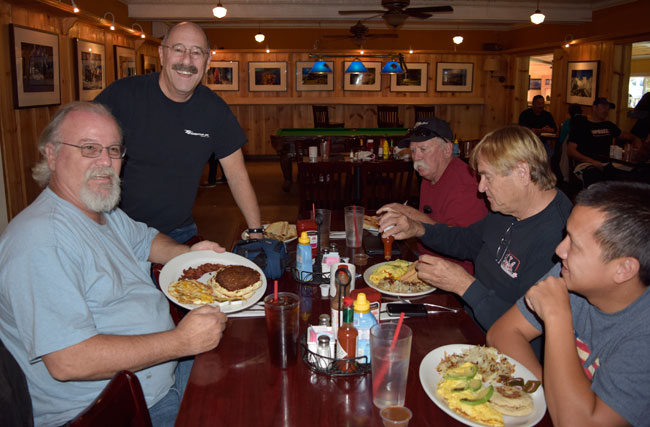
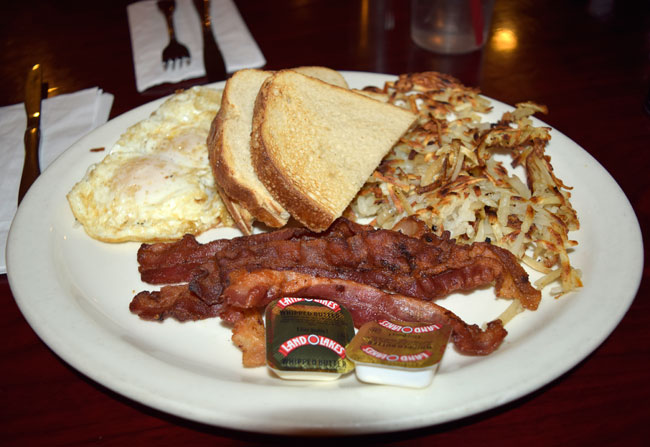
The food and the conversation were great. My staple for a biker breakfast is always the same: Two eggs over medium, extra crispy bacon, well-done hash browns, sour dough toast, and coffee. Newcomb’s got it perfect….
Tom and Tuan both ordered some sort of a California omelette thing with avocados. Hey, there’s no accounting for some people’s tastes, I guess…
I sat across from Twin Peaks Steve, and I really enjoyed hearing about his RX3 adventure ride in the High Sierras along Highway 395 in northern California. Steve did it right…he camped the entire way. I sort of swore off sleeping on the ground when I got out of the Army nearly 40 years ago, but Steve described his adventure ride in such glowing terms that he’s got me thinking about doing the same thing. That’s a good area to do it in, too. The regions north of Bishop along California’s Highway 395 are amazing. Anybody out there want to do that with us?
After breakfast, we checked out the bikes in Newcomb’s parking lot and headed back down to the LA basin. It was another amazing ride, and the RX3 was perfect for it. I’m constantly amazed at just how good these bikes are.
Boy, there sure is a lot going on. Secret missions are coming up all over. Colombia, for the ride with AKT Moto and Juan Carlos. As I’m typing this blog I’m trading messages on Skype with a guy in Saudi Arabia for a possible trip there. And the guys in Turkey want me to visit again. Turkey is one of my favorite places; it’s absolutely amazing. Woo hoo!
Overseas stuff is cool, but not as cool as a brisk morning ride on my RX3 with my good buddies on the Angeles Crest Highway! Good times, yet again. I can’t wait for the next one!
The title says it all…we had a great ride on one of the world’s premier moto roads, the Angeles Crest Highway! It was exhilarating! I’ll post more tomorrow, but for now, one quick shot of Tuan in front of Newcomb’s Ranch (where we had breakfast) and a quick video. The video shows just a bit of what it’s like riding the world’s best adventure touring motorcycle on the world’s greatest motorcycle road!
As I said, more to follow tomorrow, folks!
Posted inCSC Motorcycles|Comments Off on A glorious Angeles Crest Highway day…


 SG250 San Gabriel Cafe Racer
 TT250 Enduro